Paint and Render LTD
Based: in Crook, DL15 8BLLatest review
Karen R., NE37
Painter | Interior in Washington
This was the only company who bothered to get in touch .
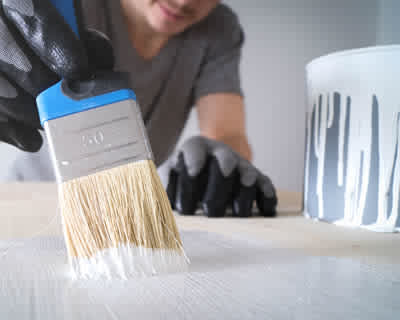
Interior painting can be a really inexpensive technique to refresh the interior of your property. Painting is often done as a DIY project, but experienced painters and decorators can make sure of a flawless finish and make sure that your decoration will last as long as possible.
The key to successful painting is preparation. Carefully decide on a paint colour or think about applying two to make an accent wall. Also think about the finish, as paints come in a range of finishes such as gloss, satin, egg shell or matte. Gloss and satin will perform better in high traffic areas. There is a significant assortment of manufacturers and paints that can be bought so it's always good to to search around to choose the paint that's the most suitable for your space.
Interior painters and decorators can supply you with plenty of recommendations about paint and help you choose the most suitable colour scheme for your internal rooms.
The average cost of a Painting and decorating is £800. Costs vary based upon the materials and the contractor chosen. The upper price range can be as high as £920. The material costs are mainly around £200
| Avg. price low | Avg. price low |
|---|---|
| Avg. price | Avg. price |
| Avg. price high | Avg. price high |
£800
£600
£400
£200
£0
| Labour cost | £560 | |
| Material cost | £200 | |
| Waste removal | £40 |
Requests for quotations in Pickering in June 2026
Requests for Painting and decorating quotations in Pickering in June 2026. 0% change from May 2026.
Requests for Painting and decorating quotations in North Yorkshire in June 2026. 29% change from May 2026.
We noted 245 requests for property quotations within Pickering. Of these quote requests the amount of painting and decorating quotations in Pickering was 1. Quotatis would have been in a position to match these consumers with up to 4 suitable fitters who were available for work in Pickering during those times. Request a free house survey from reputable companies in Pickering.
Source: Numbers calculated based on the search volumes in major search enginesRequests for quotations in York in June 2026
Requests for quotations in Scarborough in June 2026
Requests for quotations in Thirsk in June 2026
Requests for quotations in Bridlington in June 2026
Requests for quotations in Selby in June 2026
Pickering is an ancient market community as well as civil parish in the Ryedale area of North Yorkshire, England, on the border of the North York Moors National Park. Historically part of the North Riding of Yorkshire, it rests at the foot of the moors, ignoring the Vale of Pickering to the south. According to legend the community was founded by King Peredurus around 270 BC; nonetheless, the town as it exists today is of middle ages beginning. The legend has it that the king shed his ring and also implicated a young maiden of taking it, however later that day the ring was found in a pike captured in the River Costa for his supper. The king was so happy to discover his ring he married the young maiden; the name Pike-ring transformed over the years to Pickering. It is a wonderful tale told to fit the name, however it is not the beginning. Pickering is believed to be named after the fans of an Anglian man named Picer or some such personal name-- the Picer-ingas. The tourist venues of Pickering Parish Church, with its middle ages wall paintings, Pickering Castle, the North Yorkshire Moors Railway and also Beck Isle Museum have actually made Pickering preferred with site visitors. Nearby areas consist of Malton, Norton-on-Derwent and also Scarborough.
This was the only company who bothered to get in touch .
Answer a few quick questions, so we can match you with local decorators who can help.
Get free, no-obligation local painting and decorating quotes from 4 verified decorators working in Pickering.
Compare customer reviews, services and prices, and choose the right tradesperson for you.
Would highly recommend, they found me a firm which I was happy with a quote they give me and went ahead and had my job done within 2 days of enquiring.
Good easy way to find a selection of trades you need all in one place.
Love Local Quotes it's a big part of my Business I would recommend to anyone
How To Prep Walls For Painting
This is exactly the part of a wall painting job that can make or mar the whole project. To ensure that your paint project doesn’t end up being disastrous, the most important place to start is from room preparation which includes cleaning, sanding as well as priming the walls before painting. Not every wall will require to go through all the preparation steps as all walls are unique and some are in better conditions than others. However, it’s advisable to thoroughly inspect the surfaces before you proceed to painting and take the necessary actions where required.
This is a very simple DIY job that should be completed in little time, however it’s also perhaps the most important step of the entire painting project. Hence, if you lack the confidence to pull this off, then we’d recommend employing a painting expert who can guarantee the best results for help. In this guide, we’ll should you how you can prepare your wall for painting.
✓ Cleaning. There is no single best way to properly clean a wall, but most walls will be just fine with a sponge and warm water. For walls that have been stained with oil or grime such as kitchen walls, you can apply grease cutting detergent and water mixture to wash and follow up with warm water to clean the residues and a damp cloth wiping to finish it off. Then leave to dry off properly.
✓ Remove mildrew. Wipe out mildrew using a sponge and solution that’s three to four parts water to one part bleach. Apply this solution and scrub the affected surface with a soft brush.
✓ Sanding. This step is only meant for walls with rough spots on its surface. Dull the uneven spots with a sandpaper, wipe away the dust and leave to dry. Use a fine grit sandpaper to sand the surfaces and let it dry properly.
✓ Priming. Prime the wall to get the most out of your paint. They work to disguise imperfections and create a smooth surface on which you can work on.
How Much For A Painter To Paint A Room?
If you’re looking to have your room painted, it’s only normal to get an idea of how much it’s going to cost so you can set a budget and start planning. As you would have expected, the cost of having a room painted is dependent on a wide array of influencing factors such as the size of your room, the type of paint to be used, your location and many more. As a result, providing a single and accurate answer to this question is almost impossible.
Generally, a regular 4 metres by 3 metres room will take just a couple of days to be fully painted including both the coving and woodwork. Outside London, most painters and decorators would charge within the range of £150 to £200 per day meaning that you’ll have a total labour cost within the range of £300 to £400. What’s more? You’d also have to consider the price of the paint to be used which is usually around £50. If you add all the costs together you’ll get an average cost of about £400 to £500.
Unfortunately, paint does not last an eternity. Therefore, there’ll come a time where you’d have to consider painting your room all over again. It may seem unwise to employ the services of a professional painter and decorator especially if you’re on a budget. However, in truth, calling in a professional can go a long way to save you time, stress and money. In other words, even if you’re worried about the cost, a professional painter is still your best bet in the long run as they know exactly what to do to ensure you derive maximum benefits from your painting project.
How To Paint Skirting Boards
In the exact same way a room isn’t complete unless it has all the right finishing touches here and there, your skirting boards also just wouldn’t be right leaving it without a paint. As you can imagine, skirting board can quickly gather dust, dirt and scuffed over time can affect the appearance of the entire room. But you don’t have to wait for this to happen before painting your skirting boards. Good news is, painting of skirting boards is relatively easy and straightforward especially when you follow the guide given in this article. It should, however, be said that if you’re not so confident about holding a brush and doing the task yourself, then getting a professional painter to complete the project will be a great option to achieve the best result while you can focus on other important things.
Painting your skirting board will help provide your room with the much needed perfect frame. Now let’s take a closer look!
✓ Prepare your skirting boards. Treat your wood skirting board with a knotting solution and wood primer. But if they’re already painted or varnished, simply wipe clean use a wet and dry paper with a mild detergent to abrade the surface. Once done, you can then run a strip of masking tape along the floor.
✓ Start Painting. For the decorative coat, you can use any paint designed for wood and metal like satin, gloss etc. Once selected, you can then start to paint across the top with the help of a 2 inch brush. Then move to the flat side. Work in easy to manage sections and when starting the next section, start at the far side and brush into the section you’ve just painted so as to make for an even finish. Finally, remove the masking tape used before the paint dries off.
Your painter and decorator will carry out most of the preparation work for your project. You can help them by ensuring that the area is clean and tidy. Also, remove as many personal items and pieces of furniture from the area as possible and make sure all your internal doors are firmly closed just in case of dust from rubbing down.
We can help you get more painting and decorating work with our qualified job leads and boost your business.
Join today