Plasterboard Ceilings in Bridgwater
Are you searching for Plasterboard ceilings in Bridgwater? Our network of plasterers can aid with your task. All of our Plasterers in Bridgwater are checked so you can see local write-ups, when business was opened, rankings, approval and day rate, enabling you to make the best decision on who to hire. Allow us take the hassle out of locating approximately 4 pros for your Plasterboard ceilings project.
First and foremost, it must be specified that plasterboard or drywall is a panel of material which is usually pushed in between a backer and also a facer. The material consists of calcium sulphate dihydrate or plaster and also is used planned of both ceilings as well as indoor wall surfaces. Generally, a plasterboarding ceiling system is mainly made use of in domestic buildings as a result of a wide range of reasons. These reasons include its expense performance, being easy to mount along with its ability to enhance the curb appeal of a residential property. One of the most crucial benefits offered by plasterboarding a ceiling is the ability to conceal stuffs such as circuitry and also services over the ceiling while additionally allowing sufficient space to fit insulation materials in the ceiling attic rooms.
Plasterboard is integrated to help both designers as well as builders to meet building guidelines for a number of things. These includes acoustic insulation, fire protection in addition to thermal effectiveness. It's also able to regulate condensation along with possible damage in locations of high humidity.
When picking plasterboard for your ceiling, there's a demand to determine why you wish to execute this project, before making a purchase choice. There are numerous kinds of plasterboard available out there today which each having its very own special function. For example, there are plasterboard that provide fire performance, acoustic or sound performance, thermal performance, impact resistance, vapour, dampness and also water resistance and much more. Selecting the one the flawlessly fits your needs will certainly go a long to guarantee that you obtain full take advantage of your financial investment.
Is plasterboarding a ceiling a DIY task?
Have you made a decision to decorate your room or space? To get a clear vision of the outstanding new room, then you would certainly have to plan for correct plasterboarding. This seems fairly very easy, best? Well, wait up until you start! Plasterboarding is a lengthy and also complicated task which includes the application of 3 different layers. Therefore, contacting a expert is probably your best option to make certain that the most effective feasible outcome is attained the first time. In the event where you existing plaster is not in the best condition, there's a need to plan for its substitute. If you do, then you'll need to produce a brand-new space with the help of a specialist you find. In this blog post, we're going to think about several of the advantages that comes with employing the services of a professional plasterer.
- They have the ability to obtain the very best products. As a result of their large experience in the field, professionals can assist you with a variety of plastering materials offered in numerous brands. With their help, you can be certain to obtain immense value for every single penny spent.
- Budget. With a expert, you'll have the ability to obtain the actual spending plan. Once they visit the website, they're able to exercise all material expense, labour price and personal costs to give you a spending plan you can really collaborate with.
- Demands. With an professional, all your plasterboarding needs will be completely gotten rid of. You can anticipate a in-depth service and plan which covers all the elements to plasterboarding such as set job, skimming along with covering.
- Precision. With a expert, there's constantly a pledge of precision in the service shipment.
Do you need to skim a plasterboard ceiling?
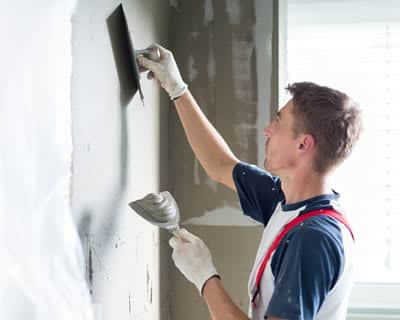
To get going, we'll need to take into consideration exactly what skimming is. This is simply a method of smudging which has to do with the application of a slim layer to walls to allow for the smooth surface area necessary for painting or decorating. It can either be usage as a plasterboard cover or used on an existing plaster surface depending on the situation. It must, nevertheless, be specified that a skimmed coating is not the easiest of jobs and also should only be done by a well-trained specialist that has vast years of experience as a plasterer. Because of the resemblances, skimming is typically misinterpreted for smudging however they're in fact miles apart. Standard plastering includes a intricate procedure which includes three different layers of plaster-- which all needs time to dry before the next coat can be used. With greater demand as well as tighter schedule, time has actually obtained a great deal a lot more priceless and also plastering has developed to fulfill the new expectations. With a skim plaster, there's only a single layer to apply which makes the job of a plasterer a lot easier as it can now be finished within a fraction of the time that was when required. So, is it essential to skim a plasterboard ceiling?
Well, it depends. If the existing plaster wall is in a good condition (still smooth and without any significant cracks or chips), then skimming is not really essential. In the event where you've currently attached plasterboard or drylining, the choice you have entails either painting or embellishing straight onto the board or making use of a layer of skim plaster for the completing. Nonetheless, skimming often tends to be a more preferred alternative due to its premium finish as well as enhancement of an extra noise proofing layer.
What Impacts the Price of putting in Plasterboard ceilings?
Installing a plasterboard on your ceiling features a lot of advantages. Not only does it update your property and also has a reduced environment effect, yet it's also very easy to fix, fire immune as well as aids to conceal lots of stuff-- making it a really a smart financial investment. If you're looking to have this done, then you 'd also possibly want to know simply how much it'll set you back to obtain your project over the line. Unfortunately, when it comes to setting up plasterboard on a ceiling, you will not be able to get accurate quote as the final expense is usually affected by a number of points. In this blog post, we're mosting likely to take into consideration several of the factors that can have a great influence on the final cost of installing plasterboard ceiling.
- Size. This is a fairly straightforward reasoning-- when the task is bigger, the general cost increases. However, the cost per square metre will minimize which implies that the expense of plastering a little ceiling room will cost even more per square metre than the expense of plastering a bigger ceiling space per square metre.
- Materials. There are several kinds of plasterboard available in the marketplace. Hence, the kind you choose will certainly additionally affect the last cost of the job. If you require a fire retardant, acoustic or other sorts of specialist plasterboard, you can anticipate to pay greater than conventional plasterboards.
- Location. Similar to several various other residence renovation projects, the price of plastering ceiling varies considerably throughout the UK. Places such as London and also the South East have the greatest rates because of the high standard of living as well as greater needs.
We will provide as much as 4 Plasterboard ceilings's locally, that will certainly offer quotes for the job you desire done. You'll receive a property visit from specialists in Bridgwater that'll assist you to select the appropriate options for your ceiling before performing the work. Enter your postcode to begin browsing currently.