


15 Sep
Garden | Sheds
Carlisle - CA2
Enquiry from: John S
Start Date: Immediate
Unpack and assemble 1x Outsunny Garden Storage Shed Tool Organizer w/ Table, 139x75x160cm,


Over 11 reviews & an average rating of 4.9/5 stars, you'll find the right pro
Use the shortlist button to select up to 4 tradespeople, enter your project details and press send
Get up to 4 quotes from local Carpenters near you



Carlisle - CA2
Enquiry from: John S
Start Date: Immediate
Unpack and assemble 1x Outsunny Garden Storage Shed Tool Organizer w/ Table, 139x75x160cm,
Carlisle - CA5
Enquiry from: Stephen A
Start Date: Less than one month
i need a new small garden fence either repaired or replacing. are you the property owner: owner of the property property type: semi detached what type of job are you looking to have done: other do yo...
Carlisle - CA1
Enquiry from: MEENAKSHI P
Start Date: Immediate
Made to measure custom fit wardrobes
Carlisle - CA2
Enquiry from: Nathan O
Start Date: Immediate
Hi, I'm looking to get a quote to fit 5 new internal door frames and doors. As well as a upvc back door to be installed. Kind regards Nathan
Carlisle - CA1
Enquiry from: Susan S
Start Date: Immediate
customer made an online enquiry for wooden decking and confirmed on telephone and email they would like a call with a carpenter to discuss prices.please call to arrange an appointment to quote. are yo...
Carlisle - CA3
Enquiry from: Elaine S
Start Date: Immediate
erect wooden apex shed 7’ x 5’. concrete base already in situ. no shed to take away. are you the property owner: owner of the property do you have a: medium size garden what level of service ar...
Carlisle - CA1
Enquiry from: Dave B
Start Date: Immediate
i am looking for a quote to supply and install decking to a back garden, dimensions are 6.5m x 4.5m and it will require a mid-section setup to accommodate the fall in the garden. are you the property ...
Carlisle - CA6
Enquiry from: Kenneth P
Start Date: Immediate
7' x 3" pent roof windowless shed. are you the property owner: owner of the property do you have a: large garden what level of service are you looking for: supply what level of service are you looking...
Carlisle - CA3
Enquiry from: Christine S
Start Date: Immediate
7ft x 7ft corner shed with 2 x windows And corner double door
Carlisle - CA2
Enquiry from: Ruth O
Start Date: 1 to 3 months
Are you the property owner: Owner of the property What level of service do you require: Install Only Do you have all of the required materials for your kitchen already: No Are you considering a design...
Carlisle - CA3
Enquiry from: Angela W
Start Date: Immediate
Wooden Double glazed sash window. One of the panes has about 1cm of water sitting between the panes due to a leak since the storm. Number of Windows: 1
Carlisle - CA3
Enquiry from: John H
Start Date: Immediate
Detached bungalow - the larder leading from the kitchen , has a skylight which has a rotten wooden frame, in the flat roof. This is no longer weather-proof; it lets in water and drips with condensati...
Carlisle - CA1
Enquiry from: Patricia S
Start Date: Less than one month
New bedroom door also need handles and hinges Time scale: Less than one month Please call to appoint Please call to appoint
Carlisle - CA2
Enquiry from: Mike H
Start Date: Less than one month
I have a tenant in this house. In 1 bedroom there is a sliding door wardrobe and a door has broken - it's wheel has come off. I need all the doors and guides replaced. Door size is 920mm * 2200mm, app...
Carlisle - CA6
Enquiry from: Natasha H
Start Date: Immediate
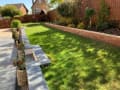
Customer visited the mygardeningprices.co.uk site and submitted an enquiry. Property type: Semi detached, Work description: Area of lawn to dig over, level and turf. Area by shed to dig out and lay ...
Carlisle - CA2
Enquiry from: Will S
Start Date: Immediate
Remove old kitchen and install new
Carlisle - CA2
Enquiry from: John P
Start Date: Immediate
I kitchen which needs fitted, electric and pluming points required moved. Are you the property owner: Owner of the property What level of service do you require: Install Only Do you have all of the...
Carlisle - CA3
Enquiry from: Barry F
Start Date: Immediate
to fit door casings stoothing wall skirting boards.
Carlisle - CA3
Enquiry from: Anna L
Start Date: Immediate
We had a wood decking installed 2 years ago, approximately 100 m2. It has started to warp over large areas and is now dangerous to walk on. We would like someone to have a look at it and give advice a...
Carlisle - CA4
Enquiry from: David T
Start Date: Immediate
Take up existing laminate flooring & skirting to hall & den (continuous thro. floor area) and fit new solid hardwood floor with new skirting. Dimensions:- Hall 4.2M x 1.5M Den 4.5M x 2.5M Total ar...
Do you have a need for a carpenter in or around your house? If yes, then one of the first things you’d probably want to know is the exact amount it would cost to get the project over the line. Now, carpenters are skilled craftsmen that are able to make things with wood and fabricate all sorts of wood constructions. The price charged by carpenters are determined by a wide range of factors which makes it nearly impossible to provide a short and accurate estimate without having a look at your unique requirements. In this post, we’re going to give you an in-depth insight into general carpentry charges while also considering some of the influencing factors. Let’s take a look!
Some of the most common factors that determines the price charged by a carpenter includes the project type, the size as well as scope of the project, the location of project, ease of access, experience and qualification of the carpenter and lots more. For instance, if the job is a minor one such as building a shed, it’ll cost a lot less than something more complex which requires a bit more experience like constructing a staircase. In general, building a shed will have a labour cost within the range of £150 to about £250, while a staircase construction will require a labour cost in between £1,000 to £1,500. For general carpentry, you can expect to pay within the range of £20 to £30 hourly rate depending on a number of factors which are stated above. It’s also important to state that while some carpenters charge per hour, others by the day and several of their projects will be charged at fixed prices.
The table reveals the kinds of work that Carpenters normally do and also the regular cost range of these jobs. Some tasks take longer to finish than others so costs do differ by task.
View our Carpenter cost guide View our Carpenter advice| Carpenter job | Carpenter cost in 2026 |
|---|---|
| Kitchen Fitting in Carlisle | £975-£2,495 |
| Carpenters and joiners in Carlisle | £375-£575 |
| Plasterboard dry lining in Carlisle | £638-£978 |
| Wood flooring in Carlisle | £750-£1,150 |
| Wooden decking in Carlisle | £1,125-£1,725 |
| Garden shed in Carlisle | £450-£690 |
| Wooden window repair in Carlisle | £320-£480 |
Wooden flooring is very popular flooring option amongst home and property owners in the UK and understandably so. It adds to your space’s curb appeal, it’s quite easy to maintain, it adds to the value resale value of your property if you later wish to sell and lots more. If you’re looking to have wooden flooring installed in your home, you have two options which includes doing it yourself or calling in a professional – the latter being more advisable. However, by following some simple but essential steps, you can also install your wooden flooring successfully by yourself. These includes determining the site is in the best condition before installation, removal of all floor coverings and underlay for a more stable and durable installation and incorporation of the right expansion gap of about 10mm to 12mm which would be maintained around the floor’s perimeter.
Wooden floor fitting can be done on two types of sub-floor - Concrete and Plywood. To install onto concrete, you can follow the guide below:
To install onto plywood, you can follow this guide:
The flight of steps in your multi-storey household doesn’t have to be purely efficient. With just a little thought given to banister design, the boring flight of stairs can turn into something you would like to show to people and be proud of. Replacement of your banister can even enhance the worth of your property, giving the entry an outstanding presence. But how much will new banisters and spindles cost you?
If you are considering starting with this project, having a help from a professional is always advised.
New banister cost
Banisters are also known as handrails. They are reinforced by balustrades or spindles – a row of pillars that improve the security of the stairway and donate in the direction of the overall look and feel. Banisters and spindles may appear dull due to use over time. A fresh coat of polish might help your staircase get a new facelift.
The cost of new banisters and spindles will fluctuate solely reliant on the material. The price for a new banister starts around £40 for softwood and can reach £120 for a metal one.
Spindle prices are also a contributing factor in determining the cost with prices in the range of £30 to £150 per meter based on the materials used.
How much does a new staircase banister cost?
Hiring a professional is very important when trying to properly install a new banister since they are familiar with the process and work as per safety compliance. Fitting your new banister can be easily taken care by a general builder as well as a carpenter.
Below is a table depicting the average costs of different types of bannisters and spindles:
White oak bannister is around £105 and spindles are around £13.50.
Pine bannister is around £35 and spindles are around £7.
Primed wood bannister costs around £31 and spindles costing around £18.
Metal bannister is around £110 with the spindles being around £6.
How Much Is Plasterboard?
Do you wish to install plasterboard in the nearest future? If yes, then you’d probably want to know the amount it’s going to cost. Here, we’ll give you a detailed plasterboarding prices breakdown to help you calculate an estimate for your project.
A plasterboarding project including the cost of both materials and labour with the use of a high quality panels is about £4 to £5 per panel. Therefore, if you wish to calculate on the basis of a standard room about 12x12ft would cost about £500 to £600. However, this price can fluctuate significantly depending on the professional as well as the quality of the materials you wish to incorporate in completing the project. We’d recommend that you hire the services of a professional with accreditation as he would provide you with a detailed quote with no hidden charges or costs. To give you a clearer idea, we’ve taken the time out to put together some estimated costs of employing the services of a seasoned professional plasterer to supply and plasterboard your home or office. Let’s take a look!
• A 6 x 12ft room with panels and plasterboard should have an average cost within the range of £250 to £400 and duration of one to two days.
• The individual cost of plasterboarding or drywalling a standard 12 x 12ft room should have an average cost within the range of £500 to £600 and duration of one to three days. These includes 60% for materials used (£330), 30% for tradespersons (£165) and the remaining 10% for waste removal (£55) to give a total cost of £550.
• A 12 x 24ft room with panels and plasterboard should have an average cost within the range of £1000 to £1200 and duration of three to six days.
Yes, although you should make sure that the terrace or decking is able to support the weight of a hot tub. Usually, you will need to have a structural survey carried out on the area. Seek the advise of a hot tub retailer or installer about the logistics of installing one at your property.
How To Plasterboard A Brick Wall
Do you want to cover your brick wall with plasterboard? The key to success here is the preparation. You must ensure that brick wall is prepared well enough to receive the plasterboard. To get started, there’s the need to attach wood furring strips to the wall which serves as studs in a wood frame structure. This way, the plasterboard will be prevented from getting in touch with the brick. You can always hang pictures or any other forms of decoration in between the gap between the walls. Let’s have a look!
lAttach Furring Strips
• Get a 2 inch by 4 inch wood stud and apply a bead of construction adhesive.
• Using a masonry bit, drill a pilot hole through the wood stud’s base as well as the brick wall.
• Hit a 3 inch fluted nail through the hole using a sledgehammer
• Using a construction adhesive, bind a horizontal 2 inch by 3 inch stud to the upper edge of the wall.
• Using an adhesive, bind the length of a 2 inch by 3 inch stud on its wide side.
• Use a masonry drill to drill a hole on the wood stud and 1 1/2 inches into the brick wall.
• Hit a 3 inch fluted nail through the pilot hole.
lApply Plasterboard
• Hold a plasterboard sheet against the furring strips.
• Use plasterboard screw to hold the drywall sheets in place.
• Use fibreglass to cover the joints where the two plasterboard sheets meet.
• Use a thin layer of the joint compound on the tape. Once done, screw it using a 6 inch taping knife, then allow to dry overnight.
• Use a sandpaper to smooth the joint compound.
• Use a fresh coat of the joint compound to block the holes and joints. Once done, allow the compound to dry.
• Use a light sandpaper to smooth the final coat.
Plasterboarding a brick wall is a simple task but the preparation part must be done right to protect your investment. Therefore, we’d recommend you hire the services of a skilful professional, who can guarantee the best results especially if you lack enough training and experience to carry out a DIY project.
Yes, your shed does need a base. This is to give it a solid, level foundation. Open soil will not help with the longevity of the shed itself or the contents within. The best materials to use to make your shed base are concrete, natural stone or wood.
The cost of just the engineered wood flooringis from £18 to £73 per m2.
Answer a few quick questions to help us match you with the right Carpenter
Receive no-obligation quotes from 4 Carpenters working in Carlisle.
Compare prices, customer reviews and services, and hire the right Carpenter.
View our open Carpenter jobs near you
Join today
