


06 Oct
Conservatory Repair
Middlesbrough - TS5
Enquiry from: Stuart T
Start Date: Immediate
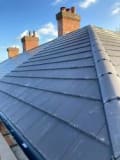
Glass conservatory roof replaced with polycarbonate roof


Over 493 reviews & an average rating of 4.5/5 stars, you'll find the right pro
Use the shortlist button to select up to 4 tradespeople, enter your project details and press send
Get up to 4 quotes from local Handymans near you



Middlesbrough - TS5
Enquiry from: Stuart T
Start Date: Immediate
Glass conservatory roof replaced with polycarbonate roof
Middlesbrough - TS4
Enquiry from: Sharon W
Start Date: 1 to 3 months
Submit your free quote for rated tradespeople
Middlesbrough - TS6
Enquiry from: Jonathan W
Start Date: 1 to 3 months
(address removed) gable end, gutters have build-up of debris
Sunderland - SR2
Enquiry from: Pat G
Start Date: Immediate
Submit your free quote for rated tradespeople
Sunderland - SR2
Enquiry from: George D
Start Date: 1 to 3 months
Weather damage to a polycarbonate panel req all 4 replaced
Durham - DH1
Enquiry from: Clare J
Start Date: 1 to 3 months
Just need gutters washed outside
Bishop Auckland - DL14
Enquiry from: Rob E
Start Date: Immediate
Fireplace removed full redecorate lounge landing hallway and stairs and laminate to be laid to lounge floor
Sunderland - SR3
Enquiry from: Graeme E
Start Date: Immediate
Paving slabs need levelling up where they have sank cleaning up silver sand filled then sealed
Newton Aycliffe - DL5
Enquiry from: Peter H
Start Date: Immediate
New kitchen has been fitted, and the walls treated, need a painter to paint it
Stockton-on-tees - TS17
Enquiry from: Areeba M
Start Date: Immediate
Submit your free quote for rated tradespeople
Newton Aycliffe - DL5
Enquiry from: Peter H
Start Date: Immediate
New Kitchen has been fitted, and the walls have been sorted, but it needs painting
Peterlee - SR8
Enquiry from: William P
Start Date: Immediate
Back yard has crack approx 2.5m long x5 to8mm wide how much would it cost to carry out a repair
Durham - DH6
Enquiry from: Allison M
Start Date: Immediate
2 x 3 bed semi joined needing gutters cleaned and washed
Houghton le Spring - DH4
Enquiry from: Anne W
Start Date: Immediate
Shattered one panel on roof
Peterlee - SR8
Enquiry from: Karen S
Start Date: Immediate
Replacement doors counter top back splash sinc tap
Sunderland - SR6
Enquiry from: Juris B
Start Date: 1 to 3 months
Front drive is brick block paved. there are about 3 areas that have sunken quite a bit and result in large puddles of water when it rains. these areas need to be lifted and reset
Peterlee - SR8
Enquiry from: Donald C
Start Date: Immediate
Gutters cleaned and hedgehogs fitted
Sunderland - SR6
Enquiry from: Juris B
Start Date: Immediate
(address removed) is brick block paved. There are about 3 areas that have sunken quite a bit and result in large puddles of water when it rains. These areas need to be lifted and reset
Sunderland - SR3
Enquiry from: Ayo A
Start Date: Immediate
Quote for cleaning gutters at house
Wingate - TS28
Enquiry from: Daniel W
Start Date: Immediate
Roof cleaning. Lots off moss on the roof. Three story terraced town house
How much do Handymans in Wingate cost?
Prices for Handymans around Wingate can differ relying on the sort of service that you need to have done in your home. It's the question we are asked a lot "how much do Handymans in Wingate cost?". It's often good to have an idea of how much a Handyman will likely charge for their work. Rates will probably rise and fall based upon the products and also the tradesperson chosen. The list shows the sorts of work that Handymans usually do as well as the regular price variety of these tasks. Some jobs take longer to complete than others so prices do differ by project.
Tasks that Handymans in Wingate can do:
| Handyman job | Handyman cost in 2026 |
|---|---|
| Painting and decorating in Wingate | £600-£920 |
| Replacement Kitchen doors in Wingate | £563-£3,000 |
| Bedroom fitting in Wingate | £1,500-£2,300 |
| Conservatory repairs in Wingate | £1,125-£1,725 |
| Driveway cleaning in Wingate | £225-£345 |
| Gutter cleaning in Wingate | £75-£115 |
| Conservatory cleaning in Wingate | £225-£345 |
| Demolition in Wingate | £2,440-£3,660 |
| Garden shed in Wingate | £450-£690 |
| Rubbish clearing & removal in Wingate | £188-£288 |
| Aluminium repair in Wingate | £240-£360 |
| Window repair in Wingate | £268-£402 |
| Wooden window repair in Wingate | £320-£480 |
| Graffiti removal in Wingate | £208-£312 |
| Roof cleaning in Wingate | £1,480-£2,220 |
| Driveway repair in Wingate | £1,520-£2,280 |
There are a bunch of things a handyman can do around the house, so if you’re looking for a reason to hire one, you’d definitely find plenty. First and foremost, a handyman is basically a well versed, skilled and experienced professional who possesses the ability to carry out a plethora of tasks as well as repairs. While not all local authorities require handymen to have a license or carry an insurance policy, some handymen do have insurance. Generally, their rates vary based on their experience as well as specialities.
Handymen are able to handle a multitude of potential jobs in and around the house. These ranges from small tasks, installations, assembly, indoor or outdoor building or repair jobs. They are available to help out with a wide array of odd jobs around the home at a very reasonable price. So, what are some of the jobs a handyman can do in a home? Let’s take a look!
How To Clean Roof Lights
If you have existing roof lights or perhaps you’re about to have them installed, it’s important to know just how to have them cleaned, even if you wouldn’t be doing it yourself. Generally, glass roof lights fitted in flat roof applications are more likely to be a major victim of staining and discolouration by several elements like rainwater, bird droppings, vehicle exhaust pollutants as well as tree sap. Therefore, just like any other parts of your home, periodic inspection of the units as well as regular cleaning is highly advised to help maintain their top performance for a lengthy period of time.
Firstly, when installing the roof lights, it’ll be helpful if its fitted at the right pitch so as to help keep the exterior clean as it enables the elements such as rainwater to run off the surface naturally. Cleaning roof lights involves working at height which can be very dangerous. Therefore, if you lack the skill and confidence to pull this off, it’s advisable to hire the services of a professional who can guarantee the best results for help. In this article, we aim to give you a good insight into how the roof light cleaning process works. Let’s have a look!
Rooflight Interior Cleaning
✓ Spread plastic under the roof light to catch dirt and spills
✓ Dust to wipe clear all loose dirt and cobwebs.
✓ Use a squeegee with a warm soapy water or any other glass cleaning product to clean the glass ( steer clear of any harsh chemicals or abrasive cleaners)
✓ Dry the roof light with a soft and lint-free cloth.
Rooflight Exterior Cleaning
✓ Access the roof safely with a specialist ladder
✓ Put mild detergent into a bucket and carry up to the roof before filling with warm water from a hosepipe
✓ Use the soapy water and a non-abrasive cloth or squeegee to clean the roof light, its surroundings as well as fixings.
How Much For A Painter To Paint A Room?
If you’re looking to have your room painted, it’s only normal to get an idea of how much it’s going to cost so you can set a budget and start planning. As you would have expected, the cost of having a room painted is dependent on a wide array of influencing factors such as the size of your room, the type of paint to be used, your location and many more. As a result, providing a single and accurate answer to this question is almost impossible.
Generally, a regular 4 metres by 3 metres room will take just a couple of days to be fully painted including both the coving and woodwork. Outside London, most painters and decorators would charge within the range of £150 to £200 per day meaning that you’ll have a total labour cost within the range of £300 to £400. What’s more? You’d also have to consider the price of the paint to be used which is usually around £50. If you add all the costs together you’ll get an average cost of about £400 to £500.
Unfortunately, paint does not last an eternity. Therefore, there’ll come a time where you’d have to consider painting your room all over again. It may seem unwise to employ the services of a professional painter and decorator especially if you’re on a budget. However, in truth, calling in a professional can go a long way to save you time, stress and money. In other words, even if you’re worried about the cost, a professional painter is still your best bet in the long run as they know exactly what to do to ensure you derive maximum benefits from your painting project.
What Insurance Does A Painter Need?
As a painter, you’re most likely going to require three forms of insurance which includes public liability, income protection as well as tool insurance. However, you should take note that outside these three, there are also several other forms of insurance whose relevance will only be determined by the nature of your business. Now let’s take a closer look into the three most important forms of insurance for painters.
✓ Public liability. What’s surprising here is the fact that many painters are actually aware that they should have a public liability insurance, but only a few really knows what it actually covers. Essentially, what a public liability insurance does is to protect you in the event whereby you messed up and some else suffers a loss as a result of your actions. Third parties can suffer a property damage or personal injury as a result of your negligence. It does not in any way cover the damages to your own property or injuries suffered by you or your staff.
✓ Income protection. As a subcontractor or self employed painter, you’ll be in the best position to know that if you don’t work, there’ll be no money for you. And with no sick leave and possibly no workers’ compensation, then financial problem looms. But not to worry, you can protect yourself from this risk by getting an income protection insurance.
✓ Tool insurance. It’s always a terrible feeling when you go to the site only to discover your tools such as ladders, spray guns, trestles and equipment are suddenly no where to be found. Upon discovery of this situation, you’ll start thinking about the cost of replacing all the tools. With a tool insurance, you can be protected against these sort of situations whereby your tools are stolen, damaged and lots more.
Clean of your conservatory gutter is probably not one of the most enjoyable chores you’d like to take on around the house. Not only is it messy and tedious, but it’s also time consuming and smelly. It’s a job every home and property owner would rather avoid, but unfortunately everyone has to do it. It’s a necessity due to the fact that neglect gutters holds and harbours mould, moss as well as plant debris. It would have been better if this is only disgusting, but the actual truth is that should be the least of your worries as this gradual build up of organic material in your conservatory gutters can minimize their drainage abilities, leading to leakages and spills that can damage your conservatory.
Cleaning of your conservatory gutter is a task that can be done regardless of your level of experience. However, it’s advisable to call in a professional for help especially if you lack the confidence required to pull it off.
Yes, painters and decorators can repair stained, damp or mouldy walls. Usually, this process will involve stripping away the damaged paint and treating the area with specialist paint. After this is done, the damaged sections can be repainted to match the room.
Your painter and decorator will carry out most of the preparation work for your project. You can help them by ensuring that the area is clean and tidy. Also, remove as many personal items and pieces of furniture from the area as possible and make sure all your internal doors are firmly closed just in case of dust from rubbing down.
One of the main reasons why fitted wardrobes are a popular choice amongst homeowners is due to the fact that they’re able to help maximise storage space and since they’re usually customized for the particular room, they’re always good looking. However, just like any other home item, over time your installed wardrobe may start to look a bit dated and old fashioned. In these type of events and in order to save money, several homeowners would prefer to update its look to a more modern one without having to completely replace the fitted wardrobe with a new one. In this guide, we’ll give some great tips on how to update your old fitted wardrobe. Let’s take a look!
✓ Add mirrors to the wardrobe doors. Your old fitted wardrobe may be made of old fashioned laminate or chipboard which happens to draw scratches and dents here and there. If this is the case, you can simply add mirrors to help conceal the damage or unsightly marks.
✓ Include decorative trimming or panelling. You can choose from the various styles of trimmings you’ll find at hardware stores. By adding some strips of moulding, the whole look of your fitted wardrobe can change significantly.
✓ Painting. If the surface of the wardrobe permits, painting can go a long way to alter the look of the wardrobe.
✓ Change the handles. Handles may seem as a little item that doesn’t add to the aesthetics of the wardrobe. However, in reality, change your old handle with a more modern and fashionable one can make a great difference to the wardrobe’s overall appearance.
✓ Upgrade the interior. You can upgrade the interior of your wardrobe to give you more options and a better appearance. For instance, you may wish to have part of the wardrobe to offer integrated shelving or perhaps pull out drawers rather than having all the interior space for hanging clothes and garments.
Answer a few quick questions to help us match you with the right Handyman
Receive no-obligation quotes from 4 Handymans working in Wingate.
Compare prices, customer reviews and services, and hire the right Handyman.
View our open Handyman jobs near you
Join today

