07 Sep
Gutter Cleaning
Folkestone - CT20
Enquiry from: Marton K
Start Date: Immediate
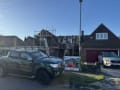
I would like to get a quote for gutter cleaning. This is a 5 stories high 1890 Victorian red brick villa. Direct access to the roof from the top floor flat


Over 1092 reviews & an average rating of 4.4/5 stars, you'll find the right pro
Use the shortlist button to select up to 4 tradespeople, enter your project details and press send
Get up to 4 quotes from local Handymans near you








Folkestone - CT20
Enquiry from: Marton K
Start Date: Immediate
I would like to get a quote for gutter cleaning. This is a 5 stories high 1890 Victorian red brick villa. Direct access to the roof from the top floor flat
Hythe - CT21
Enquiry from: Carole B
Start Date: Immediate
Demolition and removal of log cabin style summerhouse, 15ft x 12 ft approximately. No asbestos
Ashford - TN25
Enquiry from: Derek S
Start Date: Immediate
Remove internal load bearing wall between kitchen and dining room
Folkestone - CT18
Enquiry from: Mark L
Start Date: Immediate
(address removed) 2 floors. gutters need cleaning out and there are a couple of corner joints that are leaking and need replacing
Folkestone - CT20
Enquiry from: Helena P
Start Date: Immediate
We need our gutters cleaned
Folkestone - CT19
Enquiry from: Hiran R
Start Date: Immediate
Needs to clean blocked gutter Water dripping from middle of the gutter
Folkestone - CT19
Enquiry from: Zak G
Start Date: Immediate
Submit your free quote for rated tradespeople
Folkestone - CT18
Enquiry from: Nita P
Start Date: Immediate
Concrete patio very cracked in need of repair
New Romney - TN28
Enquiry from: Jeanette S
Start Date: Immediate
Landing, stairs and hall decorated
Ashford - TN23
Enquiry from: Mike N
Start Date: 1 to 3 months


I’m looking for waste removal/decluttering services. the items include a bed frame, two mattresses, two bikes, and some miscellaneous items. could you please provide me with a quote so i can compare
Ashford - TN23
Enquiry from: Barrie W
Start Date: Immediate
Cleaning to Block Paving at front of Bungalow
Ashford - TN24
Enquiry from: Priya S
Start Date: Immediate
My gutter is leaking, it needs changing
Ashford - TN23
Enquiry from: Prakash R
Start Date: Immediate
Can I get a quote for gutter and board cleaning
Rye - TN31
Enquiry from: Ashbee (
Start Date: Immediate
One panel slipped needs either replacing or pushing into position
Folkestone - CT19
Enquiry from: Emma B
Start Date: Immediate
Thank you, i am looking for a gutter clean and repair (where necessary) front and rear of the property. emma
Rye - TN31
Enquiry from: Deborah O
Start Date: Immediate
Roof clean to remove streaks
Ashford - TN25
Enquiry from: Elaine M
Start Date: Immediate
Some hair line cracks on the internal walls
How much do Handymans in New Romney cost?
Prices for Handymans around New Romney can differ depending upon the type of work that you want to have actually done in your residence. It's the inquiry we get asked a lot "how much do Handymans in New Romney charge?". It's generally great to have an idea of how much a Handyman are going to likely cost for their services. Rates will certainly change based upon the products and the tradesman selected. The table shows the types of work that Handymans commonly do and also the average cost range of these jobs. Some projects take longer to finish than others so costs do be very different by project.
Tasks that Handymans in New Romney can do:
| Handyman job | Handyman cost in 2026 |
|---|---|
| Painting and decorating in New Romney | £425-£6,980 |
| Replacement Kitchen doors in New Romney | £563-£3,000 |
| Bedroom fitting in New Romney | £1,500-£2,300 |
| Conservatory repairs in New Romney | £1,125-£1,725 |
| Driveway cleaning in New Romney | £288-£923 |
| Gutter cleaning in New Romney | £145-£613 |
| Conservatory cleaning in New Romney | £225-£345 |
| Demolition in New Romney | £2,440-£3,660 |
| Garden shed in New Romney | £450-£690 |
| Rubbish clearing & removal in New Romney | £113-£394 |
| Aluminium repair in New Romney | £240-£360 |
| Window repair in New Romney | £268-£402 |
| Wooden window repair in New Romney | £320-£480 |
| Graffiti removal in New Romney | £208-£312 |
| Roof cleaning in New Romney | £454-£1,522 |
| Driveway repair in New Romney | £1,520-£2,280 |
There are a bunch of things a handyman can do around the house, so if you’re looking for a reason to hire one, you’d definitely find plenty. First and foremost, a handyman is basically a well versed, skilled and experienced professional who possesses the ability to carry out a plethora of tasks as well as repairs. While not all local authorities require handymen to have a license or carry an insurance policy, some handymen do have insurance. Generally, their rates vary based on their experience as well as specialities.
Handymen are able to handle a multitude of potential jobs in and around the house. These ranges from small tasks, installations, assembly, indoor or outdoor building or repair jobs. They are available to help out with a wide array of odd jobs around the home at a very reasonable price. So, what are some of the jobs a handyman can do in a home? Let’s take a look!
Is your driveway damaged or starting to show some signs of cracks and gaps? If yes, then you’d probably be thinking of repairing it before it gets even worse. Repairing a driveway is largely an unknown process but also a very tedious task as well. So if you’re looking to hire a professional for help, just how much is the repair going to cost? In this article, we’re going to look at the various factors that can determine the cost of a driveway repair.
In the UK, the average price of repairing a driveway is usually within the range of £1,400 to £1,800, where as the normal price of a driveway repair will range between £700 to £2,400. although some small repairs tasks can be as low as £250, while huge driveway repairs can skyrocket to about £4,200.
However, in general, the overall cost of repair a driveway can not be determined as each driveway is unique with their special repair needs. The factors that can influence the price of a driveway repair includes the material used, the perimeter of the driveway as well as the condition of the foundation. The only factor that’s not unique to any one driveway is the materials used, so let’s take a look at the differences in price using the based on the various types of materials available.
✓ Concrete. The average cost of repairing a concrete driveway is usually between £250 to £3,200. Have it in mind at most times the price of fixing an overly damaged driveway can be more than the cost of buying a new one.
✓ Asphalt. The average cost of repairing an asphalt driveway is usually between £750 to £2,800.
✓ Brick. The average cost of repairing a brick driveway is usually between £700 to £1,700.
✓ Cobblestone. The average cost of repairing a cobblestone driveway is usually between £500 to £1,600.
How To Clean Roof Tiles?
If you’re a DIY person with a dirty roof tiles or just a homeowner who’s also a lover of knowledge, you may probably like to know how you can have your roof tiles cleaned. This is a very common question which often depends on the dirt or debris you’re dealing with as well as the type of roof you possess. Most often than not, if you own a traditional concrete or slate roof tiles, then you’re more likely to battle moss and or algae growth.
If you’re not a competent DIY person or do not have enough confidence to pull this off, then it’s advisable to hire the services of a professional who can guarantee the best results for help. In this article, you’ll learn how to go about cleaning your roof tiles. Let’s have a look!
✓ Consider Safety. When it comes to roof cleaning, you have to be very careful. They’re normally high up and any task that deals with height will usually require putting safety measures in place. Firstly, it’s important to be confident with heights and ladders, if not you’d have to find someone who is. And if you’re confident, there’s also the need to find someone who can help you hold the base of the ladder.
✓ Trim the trees. Nearby trees are usually a threat to any roof and also makes cleaning much harder. So it’s always wise to cut any overhanging branches before you proceed.
✓ Bleach or not to bleach. Although you have to be very careful using beach and water but it also happens to be one of the easiest DIY ways to clean your roof. You either stand about 4 feet away and rely on water pressure or clean down the tiles by hand.
✓ Try not to make use of a blaster.
While many professionals will recommend a pressure washer to clean block paving, it’s possible to clean your paving without one – just scrub the affected areas with a firm bristled brush and use plenty of soap. Then, rinse off the area with clean water.
First and foremost, there exists a common argument which revolves around graffiti. While some particular set of people believe that graffiti is vandalism and a punishable offence, other believe it’s actually a form of art which should be encouraged for more to be done. There exists some graffiti with great value, however it must be stated that not all (if not most) graffitis are pleasing to the eye. If you happen to live in an environment that’s rife or perhaps your very own property is vandalized, the detracting aspects of graffiti can be highly frustrating. Therefore, if graffiti is carried out on a property without the consent or permission of the property owner, then this is considered to an illegal act. If you have one done on your property, you’d probably want to know who will be responsible for the graffiti removal. So, who is responsible to removing graffiti which suddenly shows up? Although there are varying rules in various councils, the general rule of thumb is the person responsible for graffiti removal is owner of such property. In other words, if it happens to be on your personal or business property then it’s your responsibility to have it cleaned. However, if it appears on a public or council property, then it’ll be the responsibility of the council to have it removed.
You can report any form of graffiti on your property, but different councils have their unique ways for making such reports. For instance, the City of London offers an app dedicated to help home or property owners report both vandalism and fly tipping. Other states may provide phone numbers and email addresses where you report graffiti to the authorities.
How To Clean Concrete Roof Tiles
Dirt, moss and algae usually sees concrete roof tiles as the perfect place to reside. They can damage the structural bonds of your roof, they can lead to overheating of the attic and roof space as well as blocked gutters. In order to protect the structural integrity of your roof and ensure your home and properties are well protected against the elements, it’s therefore crucial to clean your roof regularly. There are plethora of ways to go about this but which method will best suit your concrete roof tile?
When it comes to working at heights, skill and confidence is paramount even if the actually cleaning and maintenance happens to be an easy task. As a result, if you lack the two attributes mentioned, we’d strongly recommend that you call in a professional roof cleaning contractor who can guarantee the best results for help. In this article, we aim to give you a good insight into the concrete roof tiles cleaning process. Let’s have a look!
✓ Use a trowel or stiff brush
This is a manual method which involves scraping off the algae, moss and dirt by hand using an effective tool like a trowel. However, before you do this make sure its a very dry day. Also, you can make use of a stiff brush to scrape off the dirt. Both cleaning tools are very easy and effective means to clean concrete roof tiles.
✓ Use chemicals
You can apply fungicide, moss killers and anti moss treatments with the help of a spray to kill any plant life on your concrete roof tiles. However, you should only do this after you’ve successfully scraped the surface with a trowel or a stiff brush.
Answer a few quick questions to help us match you with the right Handyman
Receive no-obligation quotes from 4 Handymans working in New Romney.
Compare prices, customer reviews and services, and hire the right Handyman.
View our open Handyman jobs near you
Join today

