
15 Jun
Conservatory Cleaning
York - YO62
Enquiry from: Pamela H
Start Date: Immediate
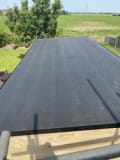
Conservatory roof cleaning


Over 617 reviews & an average rating of 4.5/5 stars, you'll find the right pro
Use the shortlist button to select up to 4 tradespeople, enter your project details and press send
Get up to 4 quotes from local Handymans near you






York - YO62
Enquiry from: Pamela H
Start Date: Immediate
Conservatory roof cleaning
Northallerton - DL6
Enquiry from: Brian F
Start Date: Immediate
Gutter blockage at rear of house
Northallerton - DL6
Enquiry from: Sylvia G
Start Date: Immediate
Gutters cleared. 2 gutters front and back of house A quote please
Ripon - HG4
Enquiry from: Samantha D
Start Date: Immediate
Front gutters clearing
Northallerton - DL6
Enquiry from: Malcolm S
Start Date: Immediate
Miss clearing off roof without chemical treatment
Ripon - HG4
Enquiry from: Moira S
Start Date: Immediate
I have a shed in my garden. I want to alter the shed into an added part of my garage and create a raised growing bed in the space this could create
York - YO62
Enquiry from: Clarissa P
Start Date: Immediate
Gutter cleaning required in our house
Northallerton - DL7
Enquiry from: Zoe S
Start Date: Immediate
Clean out the guttering
Thirsk - YO7
Enquiry from: Derek E
Start Date: Immediate
Gutter at rear around 1 meter is blocking the downpipe,house is 3 floors (ground,1st,a***).ballpark price for clearing.tx
Northallerton - DL7
Enquiry from: Bill T
Start Date: Immediate
Quick filling and painting
Ripon - HG4
Enquiry from: Anthony P
Start Date: Immediate
I have a leak in my conservatory that needs fixing before I can re plaster the walls inside. Looks like the sealing has failed as the glass panels all look ok
How much do Handymans in Thirsk charge?
Prices for Handymans around Thirsk can fluctuate depending upon the kind of task that you want to have carried out in your home. It's the question we get asked a great deal "how much do Handymans in Thirsk charge?". It's definitely really good to have an idea of how much a Handyman are going to likely charge for their work. Prices will probably vary based on the products as well as the tradesperson selected. The list shows the kinds of job that Handymans usually do and also the typical price series of these tasks. Some jobs take longer to complete than others so prices do fluctuate by task.
Tasks that Handymans in Thirsk can do:
| Handyman job | Handyman cost in 2026 |
|---|---|
| Painting and decorating in Thirsk | £600-£920 |
| Replacement Kitchen doors in Thirsk | £563-£3,000 |
| Bedroom fitting in Thirsk | £1,500-£2,300 |
| Conservatory repairs in Thirsk | £1,125-£1,725 |
| Driveway cleaning in Thirsk | £263-£648 |
| Gutter cleaning in Thirsk | £48-£118 |
| Conservatory cleaning in Thirsk | £225-£345 |
| Demolition in Thirsk | £1,720-£4,330 |
| Garden shed in Thirsk | £450-£690 |
| Rubbish clearing & removal in Thirsk | £188-£288 |
| Aluminium repair in Thirsk | £240-£360 |
| Window repair in Thirsk | £268-£402 |
| Wooden window repair in Thirsk | £320-£480 |
| Graffiti removal in Thirsk | £208-£312 |
| Roof cleaning in Thirsk | £560-£2,340 |
| Driveway repair in Thirsk | £1,520-£2,280 |
There are a bunch of things a handyman can do around the house, so if you’re looking for a reason to hire one, you’d definitely find plenty. First and foremost, a handyman is basically a well versed, skilled and experienced professional who possesses the ability to carry out a plethora of tasks as well as repairs. While not all local authorities require handymen to have a license or carry an insurance policy, some handymen do have insurance. Generally, their rates vary based on their experience as well as specialities.
Handymen are able to handle a multitude of potential jobs in and around the house. These ranges from small tasks, installations, assembly, indoor or outdoor building or repair jobs. They are available to help out with a wide array of odd jobs around the home at a very reasonable price. So, what are some of the jobs a handyman can do in a home? Let’s take a look!
To keep water away from your house, the importance of gutters cannot be overemphasized. However, in order to enable them do their job the proper way, the clogging dirt and debris must be thoroughly wiped out and fortunately there are a number of ways to get the job done by yourself. However, it must be stated that cleaning of gutters can be a very dangerous task as it deals with working at heights. As a result, if you are not confident enough to this pull this off, then we’d strongly recommend you get in touch with a reliable professional who can guarantee the job effectively and also in a safe manner. In this guide, we’re going to look at some of the ways in which you get rid of dirt and debris on your gutter by yourself.
How To Paint Skirting Boards
In the exact same way a room isn’t complete unless it has all the right finishing touches here and there, your skirting boards also just wouldn’t be right leaving it without a paint. As you can imagine, skirting board can quickly gather dust, dirt and scuffed over time can affect the appearance of the entire room. But you don’t have to wait for this to happen before painting your skirting boards. Good news is, painting of skirting boards is relatively easy and straightforward especially when you follow the guide given in this article. It should, however, be said that if you’re not so confident about holding a brush and doing the task yourself, then getting a professional painter to complete the project will be a great option to achieve the best result while you can focus on other important things.
Painting your skirting board will help provide your room with the much needed perfect frame. Now let’s take a closer look!
✓ Prepare your skirting boards. Treat your wood skirting board with a knotting solution and wood primer. But if they’re already painted or varnished, simply wipe clean use a wet and dry paper with a mild detergent to abrade the surface. Once done, you can then run a strip of masking tape along the floor.
✓ Start Painting. For the decorative coat, you can use any paint designed for wood and metal like satin, gloss etc. Once selected, you can then start to paint across the top with the help of a 2 inch brush. Then move to the flat side. Work in easy to manage sections and when starting the next section, start at the far side and brush into the section you’ve just painted so as to make for an even finish. Finally, remove the masking tape used before the paint dries off.
Getting the opportunity to fit your very own bespoke wardrobe in your home is a really exciting prospect. However, when planning to install customizable fitted wardrobe, one factor that turns off most home and property owners is the belief that the bespoke solution is actually a very expensive one. But the fact, in reality, is that so far you’re prepared for any associated costs bespoke fitted wardrobes should not make you break the bank to get one done in your home. So if you’re planning to install this type of fitted wardrobe and wondering about the cost, you’ve come to the right place! In this article, we’ve put together the price range estimate as well as the potential extra costs to help you plan ahead and get your dream wardrobe without having to worry too much about unpleasant surprises along the way. Let’s take a look!
With some companies you’ll be provided with a fixed price which can’t be negotiated. While prices from other suppliers will usually start within the range of £1400 to about £1700 for the standard wood finish wardrobe, but this can also reach about £5000 or more for high end or premium finishes, without taking the cost of the added extras into consideration. Ultimately, this often implies having to pay out more money for interiors and additional features than you’re likely going to need. Below is a rough guide to the cost of fitted wardrobes from Spaceslide:
✓ The price for a 2, 3 or 4 door sliding wardrobe starts at £452.37.
✓ The price for a 3 door fitted wardrobe starts at £659.07
✓ The price for a 4 door fitted fitted wardrobe starts at £865.77.
Additional costs you’ll have to consider before getting started includes the cost of hiring installers as well as delivery and removal cost.
How To Paint A Room
Painting is a joyful task and it’s quite obvious why it’s one of the most popular DIY projects. Whether you’re painting as an experienced DIYer or as a newbie, this step by step guide will put you in the right direction. However, if you lack the confidence to carry out this task, then we’d recommend you get in touch with a seasoned professional who can guarantee the best results for help. This way, you get to save some time and additional money that would have resulted from possible costly errors.
So just before you head right into the task, there’s the need to determine the type of pain finish you would love to use which is to choose a colour. Now let’s get started!
• Prepare the room
✓ Remove all objects as much as you can from the room and cover the remaining furniture or objects with a sheet.
✓ Fill all holes on the surface to make for an even finish.
✓ Wash the wall with the help of a damp sponge. A sugar soap or diluted washing up liquid will work just fine.
✓ Tape the edges of objects you do not wish to paint like light switches, plug sockets and the likes.
• This step can be skipped if painting on an existing paint, but it’ll advisable to dilute small quantity of your selected paint to patch prime the holes that you’ve filled. If you have a large number of holes that was filled, then priming them would be smart.
• Mix or stir the paint thoroughly in a paint kettle to ensure an even and perfect mix.
• Now you’re ready to start painting! Start from the edges to form like a frame to work within with your roller. Once done, leave for about 4 to 6 hours to dry.
• For the second coat, simply repeat the above step to complete your painting project.
How To Paint A Ceiling
If you’re a bit hesitant to take on the seemingly awkward task of painting your ceiling, you’re definitely not alone. However, there are ways in which you can make ceiling painting tasks one of the less strenuous tasks you’ll find around the house as they’ll help you get rid of most drips and also assist you to easily determine whether or not you’re covering the whole ceiling. In several cases, painting a ceiling simply means painting it white again and most same colour painting jobs are way easier than painting with a new colour entirely. When you have the right size of nap controller as well as the appropriate length of an extension pole, painting over your head will be a lot easier. Here’s how to paint a ceiling.
✓ Prepare the room. This include removing as many furniture and objects from the room as possible while also laying down plastic sheets on the remaining ones. And also cover the floor with paper or canvas drop cloths.
✓ Remove obstructions. Detach or remove everything that can make your work harder like light fixtures or smoke detectors.
✓ Protect surfaces. This includes protecting vertical surfaces like the windows and doors from ceiling paint.
✓ Prepare the ceiling. This involves vacuuming the ceiling to get rid of any dust or dirt, sanding any rough spots on the ceiling with a sandpaper and filling any small holes or cracks in the ceiling (optional).
✓ Prime the ceiling. Use an angled brush or paint edging tool or primer to cut in edges of the ceiling.
✓ Paint the edges of the ceiling. When the primer has dried, simply paint the edges of the ceiling to create a frame in which you can easily work in.
✓ Paint the ceiling in grids.
Yes, your shed does need a base. This is to give it a solid, level foundation. Open soil will not help with the longevity of the shed itself or the contents within. The best materials to use to make your shed base are concrete, natural stone or wood.
Answer a few quick questions to help us match you with the right Handyman
Receive no-obligation quotes from 4 Handymans working in Thirsk.
Compare prices, customer reviews and services, and hire the right Handyman.
View our open Handyman jobs near you
Join today

