

13 Oct
Gutter Cleaning
Ipswich - IP8
Enquiry from: Richard H
Start Date: Immediate
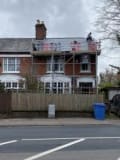
The Mill needs the gutters cleaned the building is 3 storeys high needs pressure cleaning or similar


Over 382 reviews & an average rating of 4.5/5 stars, you'll find the right pro
Use the shortlist button to select up to 4 tradespeople, enter your project details and press send
Get up to 4 quotes from local Handymans near you




Ipswich - IP8
Enquiry from: Richard H
Start Date: Immediate
The Mill needs the gutters cleaned the building is 3 storeys high needs pressure cleaning or similar
Ipswich - IP3
Enquiry from: Marzena S
Start Date: Immediate
Submit your free quote for rated tradespeople
Ipswich - IP1
Enquiry from: Rahul G
Start Date: 1 to 3 months
Submit your free quote for rated tradespeople
Ipswich - IP3
Enquiry from: Margaux A
Start Date: Immediate
Put one coat of paint through the house
Ipswich - IP2
Enquiry from: Jane I
Start Date: Immediate
I need a drain away dug out from concrete drive to wall so rain doesn't accumulate at base of house wall. Also repair done to drive where concrete has eroded
Ipswich - IP5
Enquiry from: Lynn B
Start Date: 1 to 3 months
Quote for moss removal from roof please and thank you
Ipswich - IP3
Enquiry from: Samuel D
Start Date: 1 to 3 months
Moss growing on pitched tile roof
Ipswich - IP1
Enquiry from: Janet A
Start Date: Immediate
Gutters cleaning on a semi detached house
Ipswich - IP1
Enquiry from: Janet A
Start Date: Immediate
Painting gall landing & stairs
Ipswich - IP1
Enquiry from: Christopher F
Start Date: Immediate
Driveway cleaned resealed
Ipswich - IP5
Enquiry from: Jean H
Start Date: Immediate
Gutter cleaning 3 bedroom detached bungalow
Ipswich - IP4
Enquiry from: Tony G
Start Date: Immediate
Remove debris from house gutter, front and back. Please respond by email only
How much do Handymans in Ipswich charge?
Costs for Handymans around Ipswich can vary depending on the type of job that you need to have actually performed in your house. It's the question we are asked a great deal "how much do Handymans in Ipswich cost?". It's always good to have an idea of how much a Handyman will likely charge for their services. Rates will most likely vary based upon the materials and the tradesman selected. The table reveals the kinds of task that Handymans typically do and the standard price range of these jobs. Some jobs take longer to complete than others so prices do differ by project.
Tasks that Handymans in Ipswich can do:
| Handyman job | Handyman cost in 2026 |
|---|---|
| Painting and decorating in Ipswich | £600-£920 |
| Replacement Kitchen doors in Ipswich | £563-£3,000 |
| Bedroom fitting in Ipswich | £1,500-£2,300 |
| Conservatory repairs in Ipswich | £1,125-£1,725 |
| Driveway cleaning in Ipswich | £225-£345 |
| Gutter cleaning in Ipswich | £75-£115 |
| Conservatory cleaning in Ipswich | £225-£345 |
| Demolition in Ipswich | £1,720-£2,830 |
| Garden shed in Ipswich | £450-£690 |
| Rubbish clearing & removal in Ipswich | £119-£288 |
| Aluminium repair in Ipswich | £240-£360 |
| Window repair in Ipswich | £159-£451 |
| Wooden window repair in Ipswich | £210-£740 |
| Graffiti removal in Ipswich | £208-£312 |
| Roof cleaning in Ipswich | £1,480-£2,220 |
| Driveway repair in Ipswich | £1,520-£2,280 |
There are a bunch of things a handyman can do around the house, so if you’re looking for a reason to hire one, you’d definitely find plenty. First and foremost, a handyman is basically a well versed, skilled and experienced professional who possesses the ability to carry out a plethora of tasks as well as repairs. While not all local authorities require handymen to have a license or carry an insurance policy, some handymen do have insurance. Generally, their rates vary based on their experience as well as specialities.
Handymen are able to handle a multitude of potential jobs in and around the house. These ranges from small tasks, installations, assembly, indoor or outdoor building or repair jobs. They are available to help out with a wide array of odd jobs around the home at a very reasonable price. So, what are some of the jobs a handyman can do in a home? Let’s take a look!
Gutters are a crucial component of any roofing system. They’re designed in such a way to protect your home or property from serious water damage, but keeping them clean and in good condition is something that’s almost always forgotten or ignored. Do not be deceived even when rain water is still running from them or they don’t appear to be clogged. Failure to clean maintain your gutters can lead to a wide range of outcomes and they aren’t so pretty. According to experts, gutter cleaning should be done twice a year - once in the spring and once in the fall. In order to help you realize the importance of cleaning your gutters, we’ll look at some of the possible outcomes of a neglected gutter.
How To Repair Sunken Concrete Driveway
If you have concrete driveway that’s cracked, uneven and mostly especially sunken, you’d know how distasteful it can be just viewing it on your property. A sunken concrete driveway is most likely caused by rainwater erosion removing the soil under it or a big root under it which as rotted over time. Another possible cause of the sunken concrete is an improperly prepared base which implies that the soil beneath wasn’t fully compact when the concrete was poured on it. Later on the soil beneath will eventually settle and shift below the concrete driveway which weakens the integrity of the entire driveway, making it more vulnerable to cracks, unevenness and sunken.
Two ways in which you can fix this problem includes either demolishing the whole driveway, re-compact the soil underneath and fill with new concrete or repair the entire driveway using an easy process called slabjacking. In this article, we’re going to look at the slabjacking repair process as it’s significantly less expensive than the demolishing approach and will also cause minimal disruption to your lifestyle.
Also referred to as mudjacking or concrete lifting, slabjacking is simply a process used to float your existing concrete back to its original position. If you are not a competent DIYer or lack confidence to pull this off, we’d recommend reach out to a professional for help. If otherwise, then you can practice the slabjacking process given below.
✓ Drill holes through the slab.
✓ Pump grout mixture through the holes. This mixture will spread out beneath he driveway and raise it up.
✓ Lastly, fill the holes and level the concrete driveway surface.in such a way to hide the signs of the repair made.
This is a process that works to efficiently get your driveway back in a top condition relatively quickly.
The short and simple answer is yes, fitted wardrobes add value to any home or property. Owning a home is mostly the single most expensive asset that a person can possess. And as a result, your home is a very special asset that you’d want to make conducive and maintain to the best of your ability. To retain the value of your home or even add to it, you have to learn how to maximize its potentials using different means. In the UK, a big issue for most households is usually the lack of storage space and most especially, the quickly shaped bedrooms which is really affected with storage problems. It almost always seems like there isn’t enough space to keep our clothes as well as the never-ending portfolio of accessories, devices and gadgets. Therefore, an extra or excess usable room inside a home is always a premium.
In other words maximizing the space you have, especially the unused ones, is a great way to add value to your property. Custom made fitted wardrobes are a great means to making the most out of the space within your home and are also designed to last for several years. Unlike the freestanding wardrobes, modern and fitted wardrobes are not only visually appealing, but they’re also customizable to fully maximize every inch of space within the room. As a result, they’re the ideal solution especially for loft rooms where the bedroom may be slope or oddly shaped to make the best out of the space available.
Potential investors are always eager to invest in homes with enough space that are well maximized. Therefore, a fitted wardrobe will not only help you create a better demand for your home at the point of selling, but it’ll also go a long to increase its value in so many ways.
How To Clean And Maintain Metal Roofs
If you already have a metal roof or just planning to get one, you’d probably be interested in knowing the cleaning and maintenance procedures. Although, metal roof are widely known to be very easy to clean and maintain and also very durable and long lasting, it’s still strongly recommended that homeowners should do all in their power clean and to take care of their metal roof in order to ensure it they live up to their potentials. Cleaning your metal roofs regularly helps to minimize damaging element such as airborne dirt, pollen, organic material debris, pollution, mildew and lots more. If left unattended to, these unwanted elements can result in several negative issues over time as such as chalking. Due to fact that metal roofs normally features special coatings as well as paint, cleaning the roof is both easy and environmentally friendly, which removes the need to use toxic chemicals. With just plain water, you can effectively wash down dirt, dust and other debris from your metal roof.
While the cleaning process is quite simple, working at height can be incredibly dangerous. It requires skills and confidence, so if you lack either of these qualities, it’s advisable to call in a professional roof cleaning contractor for help. Below is a simple cleaning solution usful for most metal roofs.
✓ In the event whereby water alone isn’t enough, make a cleaning solution using a quarter cup detergent ( which should include car washing soap, mild laundry detergent, mild dish soap) for each gallon of water.
✓ Apply the mixture to the surface of the roof with a wash cloth and ensure to the application gently.
✓ After application, allow it sit for up to 15mins.
✓ Rinse the roof surface with plain water.
Unwanted graffiti by a random artist on your property, be it residential or commercial, can be extremely frustration to say the least. Not only does it encourage further acts of vandalism and reduces the value of your property, but it can also deter your visitors or customers. The list goes on and on, however, one thing you should know is removing graffiti can be a tedious and time-consuming task. And that’s exactly where graffiti prevention comes in! By taking preventative measures, you can avoid having to incur the expenses or pass through the stress that comes with graffiti removal. So, what are the preventative actions you can utilize to deter such vandals? Well, there are a number of measures that can be incorporated, these includes maintenance, fencing, paint colour, protective coatings, vegetation, security, lighting as well as report.
Answer a few quick questions to help us match you with the right Handyman
Receive no-obligation quotes from 4 Handymans working in Ipswich.
Compare prices, customer reviews and services, and hire the right Handyman.
View our open Handyman jobs near you
Join today

