
16 Oct
Roof cleaning
Leeds - LS15
Enquiry from: Karen M
Start Date: Immediate
Clean all moss lichen etc from the roof. Treat it will a chemical to stop regrowth


Over 580 reviews & an average rating of 4.5/5 stars, you'll find the right pro
Use the shortlist button to select up to 4 tradespeople, enter your project details and press send
Get up to 4 quotes from local Handymans near you
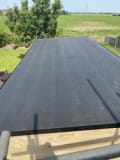





Leeds - LS15
Enquiry from: Karen M
Start Date: Immediate
Clean all moss lichen etc from the roof. Treat it will a chemical to stop regrowth
Barnsley - S75
Enquiry from: Richard F
Start Date: Immediate
One corner of guttering has sagged and rain waster overflows which is not helped bu the down spout adjacent being partly blocked with vegetation
Leeds - LS7
Enquiry from: Celia F
Start Date: Less than one month
Following jet spray cleaning to the drive there are a couple of places where the resin surface has broken down and need repair. whilst this is not a big job it needs repairing and it's not something i
Leeds - LS17
Enquiry from: Mohammed N
Start Date: Immediate
Submit your free quote for rated tradespeople
Leeds - LS14
Enquiry from: Innocent G
Start Date: Immediate
(address removed) internal re-painting, including ceiling
Selby - YO8
Enquiry from: Carole A
Start Date: Immediate


Breeze block shed 16ft l x 12ft w not a flat roof. concrete base already in situ. need to see it first
Cleckheaton - BD19
Enquiry from: Shona W
Start Date: Immediate
Two bedroom window handles and locking mechanism replacement
Wakefield - WF3
Enquiry from: Lisa A
Start Date: Immediate
Submit your free quote for rated tradespeople
Normanton - WF6
Enquiry from: David L
Start Date: Immediate


Kitchen unit doors & work tops replacement
Leeds - LS17
Enquiry from: Kevin C
Start Date: 1 to 3 months
Need a replacement polycarbonate roof 3.5m x 3.5m
Cleckheaton - BD19
Enquiry from: Callum F
Start Date: Immediate
Doors are not closing properly and gap is seen also roof has gap where it meets house wall
Barnsley - S71
Enquiry from: Richard P
Start Date: Immediate
Roof clean,with bio treatment
Wetherby - LS22
Enquiry from: Clive W
Start Date: Immediate
I need a roof panel replacing due to damage.The panel is polycarbonate
Batley - WF17
Enquiry from: Raluca S
Start Date: Immediate
The removal of about 1 metre of weeds in a gutter
Leeds - LS27
Enquiry from: Denise C
Start Date: Immediate
My block paved drive jet washed
Cleckheaton - BD19
Enquiry from: Callum F
Start Date: Immediate
Leaking roof where attached to hose and door needs repairing as large gap is visible when closed
Wetherby - LS23
Enquiry from: Barry M
Start Date: Immediate
Repair to partly rotten wood framed window
Castleford - WF10
Enquiry from: Litho G
Start Date: Immediate
Hi all, i would like a quote for gutter cleaning for an end of terrace house. this is mainly the roof gutter block with dirt and a bit of roof grass
Castleford - WF10
Enquiry from: Colin A
Start Date: Immediate
Gutters cleaning out and wiping down
How much do Handymans in Castleford charge?
Costs for Handymans around Castleford can fluctuate relying on the sort of work that you need to have actually done in your residence. It's the inquiry we get asked a lot "how much do Handymans in Castleford cost?". It's definitely better to have an idea of how much a Handyman will likely cost for their work. Prices will likely vary based on the materials as well as the tradesman picked. The table reveals the sorts of service that Handymans normally do as well as the typical cost series of these tasks. Some jobs take longer to finish than others so prices do be very different by task.
Tasks that Handymans in Castleford can do:
| Handyman job | Handyman cost in 2026 |
|---|---|
| Painting and decorating in Castleford | £600-£920 |
| Replacement Kitchen doors in Castleford | £563-£3,000 |
| Bedroom fitting in Castleford | £1,500-£2,300 |
| Conservatory repairs in Castleford | £1,125-£1,725 |
| Driveway cleaning in Castleford | £263-£648 |
| Gutter cleaning in Castleford | £48-£118 |
| Conservatory cleaning in Castleford | £225-£345 |
| Demolition in Castleford | £2,440-£3,660 |
| Garden shed in Castleford | £450-£690 |
| Rubbish clearing & removal in Castleford | £188-£288 |
| Aluminium repair in Castleford | £240-£360 |
| Window repair in Castleford | £268-£402 |
| Wooden window repair in Castleford | £320-£480 |
| Graffiti removal in Castleford | £208-£312 |
| Roof cleaning in Castleford | £540-£2,005 |
| Driveway repair in Castleford | £1,520-£2,280 |
There are a bunch of things a handyman can do around the house, so if you’re looking for a reason to hire one, you’d definitely find plenty. First and foremost, a handyman is basically a well versed, skilled and experienced professional who possesses the ability to carry out a plethora of tasks as well as repairs. While not all local authorities require handymen to have a license or carry an insurance policy, some handymen do have insurance. Generally, their rates vary based on their experience as well as specialities.
Handymen are able to handle a multitude of potential jobs in and around the house. These ranges from small tasks, installations, assembly, indoor or outdoor building or repair jobs. They are available to help out with a wide array of odd jobs around the home at a very reasonable price. So, what are some of the jobs a handyman can do in a home? Let’s take a look!
Can You Paint Over A Wallpaper?
According to some painting and decoration experts, painting over a wallpaper can never produce a result that’ll be as good as painting on a blank or naked wall. However in the event whereby there’s a pressing need to quickly beautify a room, it’ll be totally understandable if you don’t want to go through the hassle of the time consuming old wallpaper removal process.
Therefore, the short and simple answer to this question is yes, it’s absolutely possible to paint over a wallpaper and get a good outcome so far you don’t rush the process. To ensure your success if you want to paint over a wallpaper, there’s also the need to use the right tools and techniques. And just like any other DIY project, proper preparation before commencement is key.
If you’re going to paint over a wallpaper, many of the tools you’ll need to acquire are the standard painting and decorating products. This means that they can be easily procured at many DIY stores. To paint over a wallpaper, you’ll need a paint roller, top quality paint brushes, joint compound ( you’ll only need this in situations whereby your wallpaper is damaged or peeling), oil based primer, tape, sandpaper, paint ( can be water, solvent or oil based paints) as well as drop clothes ( for the protection of your furnitures).
As a rule of thumb, if you can easily remove the existing wallpaper, then you probably should before you start to paint the walls. However, if removing the wallpaper seems to be a pain or can significantly damage your wall, then it’ll be smart to simply paint over it. But before you proceed, you must also note that painting over the wallpaper will make it even harder to remove later in the future.
What Insurance Does A Painter Need?
As a painter, you’re most likely going to require three forms of insurance which includes public liability, income protection as well as tool insurance. However, you should take note that outside these three, there are also several other forms of insurance whose relevance will only be determined by the nature of your business. Now let’s take a closer look into the three most important forms of insurance for painters.
✓ Public liability. What’s surprising here is the fact that many painters are actually aware that they should have a public liability insurance, but only a few really knows what it actually covers. Essentially, what a public liability insurance does is to protect you in the event whereby you messed up and some else suffers a loss as a result of your actions. Third parties can suffer a property damage or personal injury as a result of your negligence. It does not in any way cover the damages to your own property or injuries suffered by you or your staff.
✓ Income protection. As a subcontractor or self employed painter, you’ll be in the best position to know that if you don’t work, there’ll be no money for you. And with no sick leave and possibly no workers’ compensation, then financial problem looms. But not to worry, you can protect yourself from this risk by getting an income protection insurance.
✓ Tool insurance. It’s always a terrible feeling when you go to the site only to discover your tools such as ladders, spray guns, trestles and equipment are suddenly no where to be found. Upon discovery of this situation, you’ll start thinking about the cost of replacing all the tools. With a tool insurance, you can be protected against these sort of situations whereby your tools are stolen, damaged and lots more.
There are several effective ways to clean paving slabs. It’s important to pick a method that suits you and your paving material.
Whatever method you use, start by removing all weeds and loose debris from your paving. Then, if you have a pressure washer, you can simply use this to clean away any dirt.
If you don’t have a pressure washer, you can try using soapy water or watered-down bleach. If you use soapy water, mix a mild detergent like washing up liquid with warm water. Then pour it onto your paving, work it in with a brush and rinse it off with clean water.
If you use bleach, first make sure that the water won’t drain off onto any plant life, as this can kill it. You should also avoid using bleach on concrete slabs, as it will cause them to fade. Mix one-part bleach with five-parts water, pour it onto your paving and work it in with a brush. Then leave it for 15 minutes and rinse it off with clean water.
A patio is an outdoor space which can be used for a variety of stuffs which includes fun time with family and friends, reading time or just relaxing as the fresh breeze blows. With all these benefits and more, it’s becomes more obvious that there’s a need to keep your patio in a tip top condition at all times. If otherwise, you may not be able to enjoy your patio to your satisfaction and probably, for as long as you would want. You simply have to provide it with a regular maintenance which involves inspecting and identifying the damages that needs to be repaired before it gets out of hand. Fortunately, the minor repairs can be done by yourself if you’re confident enough. However, for bigger damages it’s advisable to call in a professional for help. In this article, we’ll take you through the patio reparation process.
✓ Prepare the area. This involves removing the problem piece gently and carefully. If there’s a piece you think can still be useful, store it in the re-use pile or you can start a new one. Once you’re done removing the pieces, the next thing to do would be to start removing anything that’s unwanted from the damaged area like debris, unwanted soil etc, and start sand fitting with some fresh sand. This should be levelled out to ensure there’s no bumps.
✓ With the sand down, you can start by putting the pieces back in together. This should be done gently to avoid any further damage. Do this until your patio
✓
If you’re conservatory leaks every time it rains, has degraded roof or is apparently worn, then it’s high time some repair and maintenance work is carried out. However, several home and property owners tend to overlook this type of repair work because they believe it’s going to cost them a lot of money. In reality, this need not be the case when you work with any of the accredited tradespeople or companies in your local area as they’re always able to provide quotes that’ll suit your budget. If you’re wondering what the cost of repairing your conservatory is, then you’ve come to the right place! In this post, we’re going to give you an idea of a conservatory repair cost range. Let’s take a look!
First and foremost, it must be stated that there’s no single and straightforward answer to this question as there are multiple factors that influences the repair cost of a conservatory. These factors include the type of damage(s) involved, the materials used, the experience of company hired, your location and many more.
Generally, for conservatory fixtures and fittings repair jobs, we have a lot of parts to consider. For replacement roof panels, the cost you should expect to incur is within the range of £30 to £50 per panel. For sealed glazing unit replacement, you’re likely to incur within the range of £17 to £19 per unit. For door re-hung, you should expect to incur about £19 to £22 per door leaf. For leak tracing and repairs, you’re likely to spend within the range of £18 to £22 per hour, while call out charges will possibly range from £30 to £50 per visit.
Removing oil from block paving can be tricky, and a professional clean and re-point is often the best option. However, for small stains, especially recent ones, it’s worth attempting to clean it yourself. To do this, you can purchase oil remover or driveway cleaning solutions – although be careful, as some may stain or mark certain kinds of paving stones. In general, stay away from acid based cleaners.
Answer a few quick questions to help us match you with the right Handyman
Receive no-obligation quotes from 4 Handymans working in Castleford.
Compare prices, customer reviews and services, and hire the right Handyman.
View our open Handyman jobs near you
Join today

