



20 Oct
Garden Maintenance
Cardiff - CF5
Enquiry from: Stephen M
Start Date: Immediate


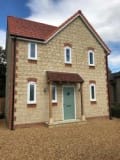
Ivy removal from front of house


Over 57 reviews & an average rating of 4.8/5 stars, you'll find the right pro
Use the shortlist button to select up to 4 tradespeople, enter your project details and press send
Get up to 4 quotes from local Landscapers near you


Cardiff - CF5
Enquiry from: Stephen M
Start Date: Immediate
Ivy removal from front of house
Bridgend - CF35
Enquiry from: Carol S
Start Date: Immediate
Need small rear lawns trimmed and mowed
Penarth, Dinas Powys - CF64
Enquiry from: Michael G
Start Date: Immediate
Small area of garden needs to sorted ***ot by 15 foot
Cardiff - CF23
Enquiry from: Sumon T
Start Date: Immediate
Repair cracks or potholes
Cardiff - CF14
Enquiry from: John D
Start Date: Immediate
Resetting of steps to the front door
Tonypandy - CF40
Enquiry from: Gareth J
Start Date: Less than one month

Mot type 1, chrono dust then lay 1 roll of artificial grass
Bridgend - CF35
Enquiry from: Peter M
Start Date: Immediate
Weeding, cutting back, general tidy up, and jet washing
Pontypridd - CF37
Enquiry from: Nigel P
Start Date: Immediate
Hedge removed. left with paving stones and small wall. 18 inches high. area 30 feet by 5 feet. to be landscaped. open to ideas
Cardiff - CF14
Enquiry from: Rema B
Start Date: Immediate
We are looking to get a new shed and garden designed too
Barry - CF63
Enquiry from: Linda E
Start Date: Immediate
Wanted a complete overhaul of garden atea which isonly paving at present
Bridgend - CF32
Enquiry from: Deborah R
Start Date: Immediate
Fencing panels and posts to be put up inside wall of garden
Bridgend - CF31
Enquiry from: Sonia S
Start Date: Immediate
Lawnmoning and tidy my back garden
Bridgend - CF31
Enquiry from: Caroline M
Start Date: Immediate
Submit your free quote for rated tradespeople
Caerphilly - CF83
Enquiry from: Amanda T
Start Date: Immediate
Decking removed and replaced with either decking board or slabs depending on cost
Maesteg - CF34
Enquiry from: Alan P
Start Date: Immediate
Place a 16ft by 16ft grass on top of patio
Penarth, Dinas Powys - CF64
Enquiry from: Janis H
Start Date: Immediate
Mrs lives in the penarth, dinas powys area and would like a call to discuss options
Pontyclun - CF72
Enquiry from: Aleksandra S
Start Date: Immediate
Overgrwon graden mowing, cutting bushesh and removal of waste
Cardiff - CF14
Enquiry from: Anne B
Start Date: Immediate

I am looking to arrange installation for a 10 × 8 ft metal shed in Cardiff. Can you confirm: – Whether you provide shed assembly services in Cardiff – If you are able to work with the specifi
Caerphilly - CF83
Enquiry from: Jeff A
Start Date: Immediate
To replace existing wooden fencing with composite fencing and posts. Approx. 30m plus an access gate
Ferndale - CF43
Enquiry from: Carol L
Start Date: Immediate
Submit your free quote for rated tradespeople
How much do Landscapers cost? Prices for Landscapers in 2026 can vary depending on the type of work that you want to have performed in your home.
If you’ve decided to hire a landscaping professional for your outdoor area, you’ll probably be wondering how much it’s going to cost so you can start planning. A landscape garden serves a wide range of purposes from beautification of your surrounding and building to serving as a perfect spot for family and friends’ get-togethers and to brighten up one’s life. However, we must also note that the landscaping does not come cheap. In order to make it look great and send a clear message, there’s need for an effective and careful planning as well as consideration which perfectly combines both beauty and utility (as not every landscaping idea works perfectly for every house). So, just how much do landscapers charge?
Just like most home improvement projects, the price of charged by landscapers is influenced by a wide array of factors. These factors include the scope of the project, the size of the landscape, the type of material and size of your patio, the cost of the plants and mulches, the professional daily or hourly rate as well as the unique treatment of the aesthetics of planting.
In general, landscapers can charge as little as a price ranging from £15 to £20 and £45 per hour greatly influenced by the location as well as the landscaping services required. As a daily rate, professional landscapers tend to charge about £140 to £200 per day. However, it should be noted that the major factors influencing the price that a landscaper will charge is based on the area you live in as well as the size of your garden. For instance, if you live in an area with higher demands like London, you can expect to be charged a lot more than anywhere else.
The table reveals the sorts of work that Landscapers commonly do and also the typical cost range of these projects. Some jobs take longer to finish than others so prices do differ by task.
View our Landscaper cost guide View our Landscaper advice| Landscaper job | Landscaper cost in 2026 |
|---|---|
| Wooden fencing in Cowbridge | £713-£1,313 |
| Landscaping in Cowbridge | £2,250-£3,450 |
| Garden maintenance and upkeep in Cowbridge | £188-£288 |
| Wooden decking in Cowbridge | £1,125-£1,725 |
| Artificial Grass in Cowbridge | £3,000-£4,600 |
| Garden shed in Cowbridge | £475-£1,595 |
| Garden lighting in Cowbridge | £320-£480 |
| Driveway repair in Cowbridge | £1,520-£2,280 |
| Lawn Care in Cowbridge | £130-£200 |
How To Draw A Garden Landscaping Plan
Are you thinking about constructing a new garden landscape? Do you have an existing one but forgot where you planted those tulip bulbs the previous autumn? Or perhaps you’re just trying to identify the exact spot where you cut back that clump of wilted foxglove, without mistakenly digging it up. For everything to be much easier when it comes to a garden landscape, it’s always a wise decision to draw a garden landscaping plan.
To get started, let’s take a look at the materials you’ll need to acquire. These includes a piece of white paper on which the existing elements on your garden will be plotted, a piece of tracing paper and tape to give options for planned additions, a pencil, an eraser as well as a measuring tape.
For more accuracy while drawing your plan, you’ll need to measure the garden’s distances, perimeter, the existing garden beds size as well as the trees’ and shrubs’ shape and size.
• Write down the measurements taken on the scrap paper.
• Assuming it’s a medium sized backyard garden that’s 18 feet wide, we allocated a scale of 3 feet to equal an inch.
• Using a piece of white paper (could be graph if you wish) and a pencil, carefully outline the perimeter of the space. Once done, you can then sketch in the existing plants as well as other special features on the space (features that are of a permanent nature like trees, fences and paths).
• Hold a piece of tracing paper and tape in on top. Then you can sketch out the plants you wish to add to fill in the spaces in the garden on the tracing paper.
What Is Landscape Gardening?
Landscape gardening is basically the art of setting out grounds or planting of ornamental plants so that a picturesque effect is created. In other words, it can be seen as the beautification or decoration of a portion of land to generate a naturalistic effect in a limited space. However, it should also be noted that landscape gardening meant to beautify places, but also important and very functional as our surroundings make a whole lot of contribution to the quality of our lives. Landscape is a word that’s not only used to qualify an beautiful scenery, but also stands for a great historical records of natural features created by human activities over time. So what are the general principles of landscaping?
• The right landscape garden should express some thought or feeling, just like a good landscape painting. The expression can be bold, quiet, retired and more.
• The landscape garden area should be divided into various sections with a plan for each individual area. The whole plan should be actualized in such a way that an observer or visitor can imagine the entire plan and purpose without having to analyse each parts.
• It’s of great importance to combine both beauty and utility effectively.
• The design’s simplicity should be emphasized while executing the plan.
• The garden and building should perfect blend with each other in such a way that they could be seen as one rather than the landscape garden stopping abruptly in front of the building. The view of the garden from the building’s door or window should offer an breath taking scenery. In short, every part of the landscape should be planned so that every visitor will have a surprising effect when seen.
• The ideal landscape should not be too tight and should possess an open space.
• Do not overcrowd the plants and objects.
Being a strong and durable product requiring little maintenance and expected to last over 2 decades, it’s little wonder resin is now a popular material amongst homeowners in the UK to build their driveways. However, there’s always the issue of the driveway fading, cracking or even becoming worn and tired. So is it possible to repair resin driveways? The answer is yes, a resin driveway can be repaired, however the best approach to use largely depends on the issue being faced. As a confident DIYer it’ll be very easy to do, but if you lack the confidence then calling in a professional for help would be a better option. So let’s take a look at how you can repair your resin driveways.
For cracks, the best reparation approach would be to chisel it out. Once done, then you can proceed to breaking the stones to form a rough edge. It’s important to make sure that the matrix of the stone remains unaffected. Make a new mixture of resin bound stone and pack it in tightly to the gap. While doing this, we’ll recommend making use of a plastic trowel to avoid burnishing. This fresh mixture will then create a smooth and perfect surface by interlocking with the edges. You can follow similar procedure for patches but these are larger holes or damages than cracks and as the name suggests are mostly likely to remain noticeable but will prevent further crumbling of your resin driveway.
For homeowners, who aren’t so keen about the patch repairs, you can opt for an overlay especially in the event whereby the majority of the surface has failed. Although many usually shy away from this approach because of the perceived high expenses, but the fact is that the approach is actually cost effective as you won’t have the need to spend more money in the long run.
As a home or property owner, you’re generally allowed to build next to your neighbour’s fence as long as it’s on your own side of the property. With that in mind, there are certain laws that regulate how close a fence can be built to buildings on the same lot or neighbouring lots. In addition, there are also local bylaws that provide limitations on the placements as well as height of fences so as to address safety hazards. In this post, we’re going to give you a good insight into how close you can build to your neighbour. Let’s take a look!
In general, if the fence is in your boundary then you’re allowed to build a 2-metre high brick or wooden fence or wall. However, this may differ depending on your location in the UK. As a result, you may want to reach out to your municipality’s building department in order to determine what these rules and limitations are in your area. In the events whereby there are no such restrictions but you’re still concerned, you can try informing your neighbour what your concerns are. However, if they’re not receptive there are some steps you can take to ensure your plans go as smoothly as possible. These steps include the following:
Answer a few quick questions to help us match you with the right Landscaper
Receive no-obligation quotes from 4 Landscapers working in Cowbridge.
Compare prices, customer reviews and services, and hire the right Landscaper.
View our open Landscaper jobs near you
Join today

