

25 Mar
Driveway Cleaning
Annan - DG12
Enquiry from: Kevin S
Start Date: Immediate
How many pounds &££ to jet wash a small back yard


Over 17 reviews & an average rating of 4.7/5 stars, you'll find the right pro
Use the shortlist button to select up to 4 tradespeople, enter your project details and press send
Get up to 4 quotes from local Driveway Installers near you



Annan - DG12
Enquiry from: Kevin S
Start Date: Immediate
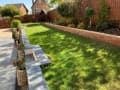
How many pounds &££ to jet wash a small back yard
Lockerbie - DG11
Enquiry from: VIOLET C
Start Date: Immediate
Gutters cleaned and fascias soffits and eaves all cleaned down
Dumfries - DG1
Enquiry from: Lisa M
Start Date: Immediate
My front garden and all of my drive way tarred, many some bricks around the front part of my house
Dumfries - DG2
Enquiry from: Derek B
Start Date: Immediate
I need an area of my back garden slabbing for improved recreational use. A large 'L' shape in slabs/paviers
Are you planning to install a driveway on your home or property? If yes, then you’ll most likely be interested to know exactly how much it’s going to cost. Well, to get started you’ll have to decide whether you’ll be doing this yourself or perhaps you’d be hiring a specialist. The project could be much more effective if you decide to tackle it on your own as you’re only going to be worried about the paying for the materials without any labour costs. However, installing a driveway is not the simplest of tasks even for the competent and more experienced DIYers. Therefore, if you choose to carry out the project on your own, you should also get ready for a longer completion time than it would have been if you hired a professional which is usually around 48 hours. If you have all the tools and materials in place before commencement, then it’s possible to complete the project over the weekend. However, there are many risks involved such as the possibility of misjudging the proper quantity of concrete mixture (for a concrete driveway) and more. So, how much does driveway installer charge?
Well, just like other home improvement projects, the amount charged by driveway installers depend on a number of factors like the type of driveway (concrete, asphalt, tarmac etc), size of the area, the experience of the professional, the property’s location and lots more. However, in general, the average cost of a driveway ranges between £35 to £85 per square metre. For labour costs, you can expect to pay between £200 to £450 per day based on the work’s complexity.
The table shows the sorts of task that Driveway Installers typically do as well as the regular cost series of these projects. Some jobs take longer to finish than others so costs do be very different by project.
View our Driveway Installer cost guide View our Driveway Installer advice| Driveway Installer job | Driveway Installer cost in 2026 |
|---|---|
| Tarmac paving and driveways in Dumfries | £1,125-£1,725 |
| Block paving in Dumfries | £3,000-£4,600 |
| Slab Paving and Driveway in Dumfries | £1,875-£2,875 |
| Driveway cleaning in Dumfries | £163-£5,173 |
| Gravel paving and driveways in Dumfries | £3,000-£4,600 |
| Pattern imprinted driveways in Dumfries | £3,750-£5,750 |
| Resin bound driveway in Dumfries | £2,625-£4,025 |
| Driveway repair in Dumfries | £1,520-£2,280 |
| Indian Stone Paving in Dumfries | £2,000-£3,800 |
| Pave Driveway in Dumfries | £1,800-£3,100 |
Generally, a paved driveway is always subjected to regular usage and yours isn’t likely to be an exception, otherwise you won’t be here. Regular usage automatically necessitates regular maintenance of the driveway in order to extend its lifespan, make your property safer and add more value to it. This maintenance will involve a frequent inspection of the paved driveway so as to identify and repair divots, cracks as well as rutting. Paved driveways usually have a lifespan ranging between 15 to 20 years, but this can only be guaranteed when backed by regular maintenance activities. Failure to provide your paved driveway with a regular maintenance will lead to a rapid deterioration within just a couple of years after installation.
The issues commonly faced by paved driveways is usually different based on several factors such as the weather, your location, your property’s sub base as well as some other elements. The ability to identify the problems and solve or repair them on time is key to success while it’s also save you some time and money. In this article we’re going to look at how to go about do-it-yourself tasks that involves minor cracks. More intense damages are advised to be handled only by professionals.
✓ Prepare the area. Clear the debris, weed the plants or vegetation (if any).
✓ Use a strong spray from a garden hose to wash clean the cracks
✓ In the event whereby the crack is deep, simply fill it until it reach about a quarter inch of the surface with sand.
✓ Tamp down the sand to make it more compact.
✓ Apply a patching compound to the surface of the cracked paved driveway.
✓ Leave it for some time to cure.
✓ Once cured, you can then apply your sealant.
Do you want to know the level of thickness a driveway concrete slab should be? Well, you are not alone! So many other home owners ask this question on a regular basis and reasonably so. In order to prevent cracks on your concrete over time, it’s crucial to ensure an even thickness across your driveway concrete. To determine the necessary thickness of your driveway concrete, there are some questions that must be answered. These includes:
• What’s the number of vehicles you expect to have on your driveway?
• Do you plan on parking heavy, industrial vehicles on it?
For a standard passenger vehicle driveway, you’d have a driveway spanning 8 to 9 feet in width as well as 15 to 18 feet for double width. The thickness for this type of driveway concrete is usually 4 inches of non-reinforced pavement. Ultimately, this enables you to park everyday family cars on it without having to worry about it cracking due to the car’s weight. Also in order to prevent cracks, it’s expected that the driveway should be sloped towards the street as this would make sure that there’s a run off of water especially for areas that experience lots of flooding. In addition, there’s also the need to install joints to prevent cracking. For the standard 4 inch thick driveway, these joints should be positioned about 10 feet apart.
Finally for parking heavy industrial vehicles, your concrete driveway is expected to be thicker in order to cope with the added weight. Typically, the concrete driveway will require a thickness of about 5 inches. The additional one inch may not sound much, but the fact is this can increase the load carrying capacity of the concrete driveway by up to 50 percent.
Do you know why paving slaps is a popular choice for both driveways and patios? Well, it’s the versatility! With its durability, diverse colour range, different styles as well as a timeless appeal, paving slabs happen to be a common choice amongst home owners. However, you should know that redeeming these benefits is not as simple as shovelling mortar and pressing down the paving slabs, and neither is it a case whereby you can just copy the laying process of a porcelain paving or block paving. Laying of paving slabs is on a whole other level! As a result, we’d recommend employing a trustworthy professional who can guarantee the best results the first time, especially if you lack proper training or experience to complete the task. In this step by step guide, you’ll discover more about the paving slabs laying process.
• Prepare your paving foundation. This includes checking that your foundation is level, marking out the area to be paved with wooden pegs, removing all vegetation and top soil to a depth of about 200mm to 250mm and raking the area level to ensure and even depth.
• Mix a layer of mortar for each paver and apply the mixed mortar onto the sub base by using the trowel.
• Lay the slabs on top of the laying course at the lowest point of the area to be paved.
• Take note that you may need to cut some slabs depending on the paving area size, your chosen slabs and the pattern selected.
• Once done, brush the area clean and start jointing. The best way to do this is by applying kiln dried sand to the paved area and carefully brush into the joints with a brush.
• Push the sands into the joints using a plate compactor
• Check the paved area for any gaps and fill where necessary.
Paved driveways are popular amongst residence and also homeowner in the UK and not surprisingly so. Be it concrete, gravel, brick, rock or asphalt, there are a great deal of benefits you stand to obtain. If you're aiming to have your driveway paved, then you go to the ideal location! In this article, we're going to think about some of the top benefits of having your driveway paved. Allow's take a look!
Right here are a few of the leading advantages of mounting a paved driveway.
Gravel is the cheapest driveway surfacing material. Asphalt costs a little more than gravel, and concrete is significantly more expensive. The cost of paving depends on the material you use. Obtain as many quotes as possible as materials and costs differ from company to company.
From gravel and crushed stones to asphalt and tarmac, the choice when it comes to surfacing options for driveways is truly staggering. However, what’s not too clear is the options that best suits a sloping driveway. If you also possess a sloping driveway and wondering the best material to install, you’re definitely not alone. This is a major source of concern for several home and property owners in the UK being fully aware that making the wrong choice here can prove really costly and disastrous. In order to help you make the best informed decision possible, we’ve put together this post which takes a look at the various driveway material options available to you.
Clearing snow from a gravel driveway can be tricky – you need to remove the snow without taking the gravel with it.
If the snow’s quite light and dry, try using a leaf blower. You might find that this is enough to get the snow out the way. If it isn’t, start by using a shovel. Use this to clear the top layer of snow off your driveway, leaving about an inch behind. Then, use a rake to remove most of the remaining snow. This won’t take away 100% of the snow or leave all of your gravel in place, but it’s still pretty effective. You can then lay salt to melt away the rest of the snow and stop it turning into ice.
Are you having weed problems on your carefully picked out block pavings? After spending huge bucks to install the block pavings, the last thing any homeowner would want to discover is weed taking over the prized asset. Fortunately, this is a problem that can be effectively handled in a few simple steps provided in this article.
Basically, sealing of block paving is all about prevention of weed growth in the area by total weed removal, putting of sand between the block paving joints and sealing with a good quality sealant. This is a task that’s best left for a reliable professional to guarantee the best results especially if you lack proper training and experience. This guide will give a good insight into the process.
Here are the equipment you’ll need to get started: pressure washer, weed killer, bin bag, broom, small brush, protective gear, sealing roller, spueegee, jointing sand and sealer and DIY sprayer.
lRemove The Weed
• Put on a protective clothing and gloves
• Get a weed disposal bag to clean while you go.
• Apply the selected weed killer on both areas where weeds are present and the absent ones to prevent any growing.
lPressure Washing
• Angle your pressure washer between the gaps. This is done to remove all weeds and debris that are still lying around as well as removing all possible chemical residues to create a thorough clean between the paving slab.
• Leave the washed area to dry.
l Sand The Joints
• Check the weather forecast to ensure there’s about 24 to 48 hours of dryness as its important for both sand and sealant to do a perfect job.
• Put sand between the gaps and push it down with your small brush until its levelled.
lSeal The Gaps
• The sealing process should be done immediately and sanding.
• Clean up the patio
• Perform a test using a small area
• Apply the sealant
• Apply the second of sealant
• Leave to dry for about 2 to 3 hours.
Answer a few quick questions to help us match you with the right Driveway Installer
Receive no-obligation quotes from 4 Driveway Installers working in Dumfries.
Compare prices, customer reviews and services, and hire the right Driveway Installer.
View our open Driveway Installer jobs near you
Join today

