
01 Oct
Driveway Cleaning
Heywood - OL10
Enquiry from: Rik H
Start Date: Immediate
Jetwash Driveway cleaning


Over 97 reviews & an average rating of 4.3/5 stars, you'll find the right pro
Use the shortlist button to select up to 4 tradespeople, enter your project details and press send
Get up to 4 quotes from local Driveway Installers near you




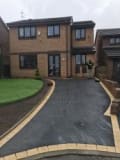

Heywood - OL10
Enquiry from: Rik H
Start Date: Immediate
Jetwash Driveway cleaning
Huddersfield - HD5
Enquiry from: Pat W
Start Date: Immediate
Submit your free quote for rated tradespeople
Bradford - BD9
Enquiry from: Nasreen A
Start Date: Immediate
Submit your free quote for rated tradespeople
Rochdale - OL16
Enquiry from: Sheraz G
Start Date: Immediate
Drive way done in tarmac
Oldham - OL2
Enquiry from: Stephen B
Start Date: Immediate
Front garden and lawn area
Bradford - BD10
Enquiry from: Orji P
Start Date: Immediate
I want something nice done for driveway
Leeds - LS27
Enquiry from: Andrew W
Start Date: Immediate
Submit your free quote for rated tradespeople
Huddersfield - HD5
Enquiry from: Audrey H
Start Date: Immediate
Driveway installed in tarmac
Huddersfield - HD3
Enquiry from: Patrick Anthony O
Start Date: Immediate
Bk garden instead of the paving bricks are there now early next year
Oldham - OL3
Enquiry from: Johnny C
Start Date: Immediate
Submit your free quote for rated tradespeople
Halifax - HX3
Enquiry from: Scott M
Start Date: Immediate
(address removed) needs tarmac installed
Bradford - BD4
Enquiry from: Wise E
Start Date: Immediate
Grass area front of house needs tarmarking for oarked card
Ossett - WF5
Enquiry from: Laura H
Start Date: Immediate
Submit your free quote for rated tradespeople
Bradford - BD2
Enquiry from: Muheeb R
Start Date: Immediate
Back garden done in slab paving
Oldham - OL9
Enquiry from: Rumon M
Start Date: Immediate
New tarmac driveway installation
Liversedge - WF15
Enquiry from: Ann H
Start Date: Immediate
Just like your ad a nice edgin and the tarmack ,so can you give me an idea how much it will cost please
Oldham - OL8
Enquiry from: Gibin V
Start Date: Immediate
Paving my backyard partially
Leeds - LS27
Enquiry from: Sarah I
Start Date: Immediate
(address removed) to be tarmacked the area is currently loose bricks and is approximately 30m2
Are you planning to install a driveway on your home or property? If yes, then you’ll most likely be interested to know exactly how much it’s going to cost. Well, to get started you’ll have to decide whether you’ll be doing this yourself or perhaps you’d be hiring a specialist. The project could be much more effective if you decide to tackle it on your own as you’re only going to be worried about the paying for the materials without any labour costs. However, installing a driveway is not the simplest of tasks even for the competent and more experienced DIYers. Therefore, if you choose to carry out the project on your own, you should also get ready for a longer completion time than it would have been if you hired a professional which is usually around 48 hours. If you have all the tools and materials in place before commencement, then it’s possible to complete the project over the weekend. However, there are many risks involved such as the possibility of misjudging the proper quantity of concrete mixture (for a concrete driveway) and more. So, how much does driveway installer charge?
Well, just like other home improvement projects, the amount charged by driveway installers depend on a number of factors like the type of driveway (concrete, asphalt, tarmac etc), size of the area, the experience of the professional, the property’s location and lots more. However, in general, the average cost of a driveway ranges between £35 to £85 per square metre. For labour costs, you can expect to pay between £200 to £450 per day based on the work’s complexity.
The table shows the sorts of task that Driveway Installers typically do as well as the regular cost series of these projects. Some jobs take longer to finish than others so costs do be very different by project.
View our Driveway Installer cost guide View our Driveway Installer advice| Driveway Installer job | Driveway Installer cost in 2026 |
|---|---|
| Tarmac paving and driveways in Sowerby Bridge | £1,125-£1,725 |
| Block paving in Sowerby Bridge | £3,000-£4,600 |
| Slab Paving and Driveway in Sowerby Bridge | £1,875-£2,875 |
| Driveway cleaning in Sowerby Bridge | £263-£648 |
| Gravel paving and driveways in Sowerby Bridge | £3,000-£4,600 |
| Pattern imprinted driveways in Sowerby Bridge | £3,750-£5,750 |
| Resin bound driveway in Sowerby Bridge | £2,625-£4,025 |
| Driveway repair in Sowerby Bridge | £1,520-£2,280 |
| Indian Stone Paving in Sowerby Bridge | £2,000-£3,800 |
| Pave Driveway in Sowerby Bridge | £1,800-£3,100 |
Tarmac is a material made up of broken stone and tar, used for surfacing roads, driveways and other outdoor areas. It’s actually a registered product trademark, but many people use ‘tarmac’ interchangeably with ‘asphalt’. Asphalt is similar to tarmac, but is now more commonly used, and is made from bitumen instead of tar.
When your driveway is suffering from depression, it becomes unsafe for driving (a danger zone) and ugly - no homeowner wants that! Unfortunately, most driveways won’t hold flat for long as they tend to develop cracks and potholes pretty quickly. Here, we are going to take you through how to fill asphalt driveways’ depression so as to ensure the sinkholes in your driveway poses no threat to you or your loved ones, while also beautifying your property. The approach to be used depends on the intensity of the depression. If its only a few cracks and holes, this can easily be repaired with some equipment. But if otherwise is the case, then calling a reliable professional will be your best bet. In this article, we’ll show you how to repair dips in your asphalt driveway relatively quickly.
✓ Pick a date with warm and sunny weather. This is because if you work in a cold weather, chances are the materials will freeze and hence, unusable. So find a day when the temperature will over 50 degrees Fahrenheit and below 80 degrees Celsius and when there would be no rain. We’ll advise a day between May to October.
✓ Prepare the area. Remove all loose stones, soil, dirt as well as vegetation from the holes. Once done, you can then proceed to washing the area with a pressure washer or sweep with a broom.
✓ Apply a thin mixture of asphalt to the area. Use a flat stirring stick to coat the low driveway area with a thin mixture of asphalt.
✓ Tamp the asphalt repair mix. Purchase the right kind of asphalt to repair the driveway. Fine aggregate asphalt mixture is more suited to filling small holes, whereas the coarse aggregate is more suited to filling larger holes. Apply layers ( about 2 inches each time) of the asphalt repair mix to the sunken area and use a shovel to give it a smooth finish. Once done, simply make the area smooth and protect it with a piece of plywood. Do not walk or drive on the area for a couple of days.
Is there a hole in your asphalt driveway you feel you can repair yourself? If it’s something you know you can confidently do then this step by step guide is just for you. If otherwise, then we’d recommend you hire the services of a reliable professional who can guarantee the best results while also saving you some time and extra money that could result from possible errors. In this article, we’d go over the reparation process of an asphalt driveway with a hole in it.
✓ Get the necessary tools. You’re going to need a broom ( to clean the area), caulking gun ( to fill the hole), a hand tamp a plate compactor or a hammer ( to level the filled in hole) and a weeding glove (just in case there are weeds growing in the hole).
✓ Prepare the area. Do this by weeding the plants or weeds that might have grown inside the hole and identify your asphalt filler.
✓ Wet your soil, if necessary. It’s important to note that this is only necessary if your soil is dry to help the filler stick properly.
✓ Fill in deep holes. If the hole goes down about 3 to 4 inches or more, simply fill it with any material like rocks, clay etc.
✓ Apply the asphalt filler. Fill the hole with the asphalt filler to about half an inch higher than the surface of the driveway.
✓ Level the filler. For a large hole, make use of a plate compactor or a hand stamp, but a hammer will be sufficient for smaller holes.
✓ Cover the hole, if necessary. If your home isn’t level, covering your hole with a piece of plywood is advisable.
✓ Clean off the seal. After the asphalt looks done and in place, simply brush away the debris from the seal to finish off the project.
No, pattern imprinted concrete shouldn’t be slippery. Most good driveway installers will add a special anti-slip agent to the sealant before they brush it onto your driveway, so it will stop it from being slippery.
It’s important to ask a driveway company how they will seal your driveway when you get a quote from them. If an untrustworthy company seals your driveway badly, it can cause a thick and extremely slippery surface, so it’s vital that you ask any contractor what their procedure is before you engage them.
It’s also important to remember that pattern imprinted concrete isn’t a ‘non-slip’ surface – it’s just not slippery. You could still slip over on a concrete driveway, just like you could on tarmac or a block paved driveway. Also, once you’ve walked and driven over your driveway for a few months, its skid and slip resistance will increase as it weathers and builds up tiny specs of dirt on it. Pattern imprinted concrete is often used in high footfall areas in places like shops, fast food restaurants and theme parks, so if there was a significant slip risk these businesses wouldn’t use it.
You might think that you could ask your contractor not to seal the driveway to make it less slippery, but it could actually do the opposite. By sealing pattern imprinted concrete, it means that moss and algae is much less likely to grow, which can be extremely slippery to walk on if it’s left to its own devices. If moss does form on your driveway, the sealed surface is much easier to clean as you can simply pressure wash it away; this is not as easy to do on a non-sealed surface.
Resin bound driveways are known to last a long time without the need for repairs, but sometimes accidents happen. You also need to make sure you regularly maintain your driveway by sweeping and power washing it to prevent damage. But if it does get damaged, how do you repair your resin bound driveway?
If you notice a crack in your resin bound driveway, it’s important to repair it as soon as possible. If you leave it to erode, you could end up with a difficult repair that will cost much more money.
To repair a crack, you’ll need to carefully chisel it open slightly so you can apply a primer then fill in the crack with a matching-coloured resin and aggregate mix. While there are variations in colour and size with all stone mixes, usually it’s easy to find a batch that matches almost perfectly. And once the crack has been repaired for a while, it will blend in seamlessly with the rest of your driveway.
To prevent cracking in your resin bound driveway, it’s best to tackle the issue at initial installation. Speak to your installer about whether it’s possible to add fibreglass mesh to the base. You should also ask your installer to add expansion trims as these will significantly reduce the risks of cracks.
So the best way to repair resin bound driveways is to prise open the crack and fill it in. It might seem simple, but getting the right colour match is something that should be left to the professionals, so get a few quotes to ensure you get the best finish.
Have you decided to install block paving and wondering what the best sand to be applied to the joints is in order to achieve a perfect job? Well, you’re at the right place! This is one of the most frequently asked questions when it comes to block paving and we seek to give you a reliable solution once and for all.
The best sand for block paving is a kiln-dried sand. It’s an extremely fine sand which has been dried in a kiln to get rid of all the water before it’s incorporated to achieve the best results. Therefore, the sand contains no moisture and is commonly used to fill the joints of block paving to keep the paving’s structure rigid and strong. It also goes a long way to prevent the ingress of water while stopping the paving from moving and becoming loose. The major reason why the paving sand must be dried is to allow it flow easily into the joints as well as the block paving’s gaps. As result of this smooth flowing to the bottom of the joints, there will be no sand sticking to the sides of the pavers.
Another major reason why kiln-dried sand is commonly applied to the block paving’s joints is to prevent water from penetrating the paved area. It also tightens the individual pavers together to prevent from moving and becoming loose. In the event whereby you happen to leave the joints of your block paving without kiln dried sand, it’s highly likely that they’ll sink as a result of water penetration and the blocks will become very loose. After washing block paving, it’s very important to also replace any sand washed off in the process once the paving is dried to prevent water ingress into the joints.
Weeds growing on your gravel can look unsightly, so it’s worth taking steps to stop them sprouting up.
When you lay your driveway, make sure you use a weed proof membrane. This will help to stop most growth, although it won’t totally prevent weeds occurring. For any other growth, dig the weed out or use a weed killer.
Pitting, also referred to as spalling is the event whereby “pits” or small holes start showing on the surface of your concrete driveway which makes it appear both worn and uneven. Concrete driveway pitting is a common but highly frustrating problem for most homeowners. You’ll see some concrete driveways that’ll only start to pit after a couple of years, but this is not true for all concrete driveways as others will start to show signs only after a couple of months. So how do you tackle this issue? Well, it’s relatively simple to tackle, however if you’re not confident or lack the necessary skills, we’d recommend you get in touch with a reliable professional who can guarantee the best results for help. In this guide, we’ll take you through the concrete driveway pitting repair process.
✓ Prepare the pits by cleaning the area, clearing out all debris and more. The small pits can be cleaned with a stiff brush while a sturdy broom will do a good job for larger pits.
✓ Make use of a hose to spray the concrete pits and flush out all remaining bits of waste.
✓ If you’re tackling series of small pits, simply use a caulking gun filled with pre-mixed epoxy and specially formulated for concrete to fill the pits. Clear off the excess eproxy ensuring that its level with the concrete surface. Once done, simply leave for at least 24 hours before the application of a concrete sealant to prevent the wear and tear of the new concrete.
✓ Chisel out a little concrete and clean with a pressure washer. Once done, apply a concrete resurfacing compound mixture into the holes and use a trowel to level off.
✓ Ensure that the repaired concrete driveway is protected from rain and foot traffic for at least 6 hours (or 24 hours for vehicles).
Answer a few quick questions to help us match you with the right Driveway Installer
Receive no-obligation quotes from 4 Driveway Installers working in Sowerby Bridge.
Compare prices, customer reviews and services, and hire the right Driveway Installer.
View our open Driveway Installer jobs near you
Join today

