

17 Aug
Plastering
Pembroke Dock - SA72
Enquiry from: Trevor G
Start Date: Immediate
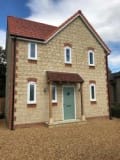
Hack off and re-render front of terraced house for damp proofing


Over 1 reviews & an average rating of 3.8/5 stars, you'll find the right pro
Use the shortlist button to select up to 4 tradespeople, enter your project details and press send
Get up to 4 quotes from local Plasterers near you




Pembroke Dock - SA72
Enquiry from: Trevor G
Start Date: Immediate
Hack off and re-render front of terraced house for damp proofing
How much do Plasterers cost? Costs for Plasterers in 2026 can be very different depending on the type of work that you require to have performed in your house.
A plaster is used to serve a number of purposes when applied on a solid surface. It seals rough brickwork or stonework, it provides a smooth surface for the application of paint, the smooth surface offers a clean and wipeable finish, it’s used to repair holes and cracks in existing plasterwork and lots more. With all these benefits, it’s little surprise more and more home and property owners are looking to have their properties plastered. If you’re also considering taking on this task, then you’d probably want to know exactly how much it’ll cost to get this project over the line. In this post, we’re going to give you a good insight into wall plastering costs to help you make the best informed decisions moving forward. Let’s take a look!
As you may have expected, the cost of charged by plasterers is dependent on a number of factors. These factors include the dimension of the room, accessibility of the surface, the condition of the existing plaster as well as the size or reputation of the company. Several plasterer professionals charge a daily rate or a average room size. They know the approximate area that they can cover in a day and charge accordingly. Typically, plastering walls from scratch for small rooms will cost within the range of £600 to £700 with a duration of 2 to 3 days, while mid-sized room should cost in between £650 to £1000 with a completion time from 2 to 4 days. Lastly, for a large room, you can expect to incur about of £1000 to £1500 and can be completed within 4 days.
The table shows the kinds of job that Plasterers usually do and the regular price series of these projects. Some jobs take longer to complete than others so prices do vary by task.
View our Plasterer advice| Plasterer job | Plasterer cost in 2026 |
|---|---|
| Plastering in Clarbeston Road | £563-£863 |
| Artexing in Clarbeston Road | £150-£230 |
| Plasterboard ceilings in Clarbeston Road | £225-£600 |
| Suspended ceilings in Clarbeston Road | £525-£805 |
| Artex Removal in Clarbeston Road | £190-£400 |
How Much Does Plastering Cost?
If your existing interior or exterior plaster is starting to show signs of needing to be refreshed or the painting never seems to last, then it’s probably time to have your plaster renewed to breathe in a new lease of life to your decorating efforts.
So if you’re giving wall plastering a thought, there’s a need to have a rough estimate of the cost a professional is likely to charge so you can set a budget and start planning. However a direct answer can not be provided for this question as there are so many factors that a professional will put into considering before coming up with a quote that’s unique to your specific requirements.
A lot of plasterers will come up with a quote for the job using the number of square metres of wall space that’s going to be covered. This is due to the number of plasterboards as well as the other materials that the plasterer will need to purchase, how long the work will take and also the labour that’ll be involved in completing the project.
Another popular influencing factor that several plasterers use is the size of the room to be plastered. This is the main reason why you’re more likely to find the prices in small, medium as well as large rooms. Therefore, in order to have a more accurate estimate of the cost of your plastering project, you’d have to call in a qualified professional to have a look at the job at hand. Generally, to re-plaster a small room will cost within the range of £350 to £550, a medium room will cost within the range of £400 to £600 and a large room, between £550 to £700.
Artex simply refers to a surface coating that’s commonly incorporated for interior decorating. Although it’s usually found on ceilings but it can also be used on the walls as well. The surface coating enables the professional plasterer or decorator add both texture as well as patterns to it. Originally, the name “Artex is the trademark of a UK based company known as Artex Ltd. Over time, the Artex name has been used to refer to all textured coatings, although there are other businesses that manufacture and sell identical products.
You can find Artex on ceilings as well as walls of mainly residential properties. In the 70’s and 80’s, it was pretty much a trend to have either your wall or ceiling ( can be both ) covered with Artex. The surface coating can be incorporated to create raised, textured swirls as well as patterns on ceiling and walls. There are a number of different patterns that can be made using Artex and some of these includes the following: Broken leather, swirl, stipple, fan or shell as well as knifed plaster. It can also provide just a bobbly raised uneven patter appearance from top to bottom.
Artex is main put to use by mainly decorators ( mostly plasterers). This is a skilled job as it’s tedious to create uninformed patterns especially if you don’t know how or where to start. Although the skill of Artex is very much a trade that’s dying rapidly now, but it was pretty much in high demand especially in the 70’s and 80’s. Nowadays, homeowners now prefer smooth plastered finishes over Artex, as they can be easily painted or wallpapered.
Plastering is suitable to cover most Artex. If it’s shallow Artex, it may be covered by skimming plaster on top. If the pattern of the Artex is too deep, you may need to use plasterboard to cover it or if you want to remove it entirely, you will need to use a wallpaper steamer.
Artex was originally made using white asbestos to make it stronger. However, this stopped in the mid-1980s, and the use of asbestos was banned in the UK in 1999, due to its extreme health risks. So, any artex you buy today won’t contain asbestos.
If you have an artex ceiling or wall that was created before 1999, it may have asbestos in it. This won’t be a health hazard if you leave it undisturbed, so it’s not necessary to remove it. However, if you want to get rid of or alter your artex ceiling or wall, you must get it tested to check if it has asbestos in or not first. If it does, you’ll need to hire a qualified professional to work on it.
It’s possible to paint your artex ceiling if you want to smarten it up or make it a different colour.
If it’s never been painted before, you’ll need to paint it with a PVA-based solution or water-thinned paint layer to start with. You may want to scrape or sand off any loose or peeling patches beforehand, but only do this if you’re sure that the artex doesn’t contain any asbestos.
Once you’ve done this, follow with two coats of your paint of choice – ideally an emulsion. If your artex ceiling has been painted before then you can paint directly without priming. However, if you’re painting over a particularly bold colour with a lighter one, you might want apply a layer of white paint first.
Can You Plaster Over WallPaper?
If you have wallpaper installed on your wall surface and you’re considering plastering the wall, when you put into consideration the stress involved in removing a wallpaper you may want to consider plastering directly over the wallpaper. This is quite understandable as removing a wallpaper can be quite time consuming and tedious, but plastering directly over wallpaper is a mistake that should never be made. Plastering over wallpaper is in no way a viable option due to the fact that it can only turn out disastrous after a couple of weeks or even days in some cases as the plaster will crack and crumble. As a result, you’ll have to firstly scrape off the wallpaper in order to assist the plaster get to be firmly secured to the wall behind.
When you plaster over a wallpaper, this will make the wallpaper wet and it’ll absorb the moisture. And once the plaster does not have moisture, the only result is for it to crack and start to crumble. Hence, plaster and wallpaper is never a good combination.
Asides from cracking and crumbling, anther issue is that the wallpaper will bubble. You can actually key the wallpaper with the help of a knife and it might look secured for some time, however it’ll eventually crumble and you’d have to scrape off the plaster complete to start all over again. The wallpaper will bubble as the plaster can’t be keyed into a wallpaper and the wallpaper will only work as a barrier between the plaster and the wall.
Overall, plaster always needs to slowly dry off as well as a good and proper surface to grip to. No matter the amount of PVA mix you spread on the wallpaper, it will always remain a barrier. So you’d have to remove the wallpaper completely to get a great result.
Artex is a water based decorative surface coating is typically incorporated on both walls and ceilings so as to apply a pattern. During the peak of its popularity in the 1970’s, it was considered the height of fashion when it comes to interior wall designs however its major drawback remains the fact that it usually contains asbestos especially if it was manufactured before the laws governing the use of asbestos was changed in the year 2000. And asbestos, as we know it, can be deadly when disturbed and its fibres are inhaled.
If you have artex installed in your purchased property and you do not know when the artex walls were done, or perhaps you just want to change the aesthetic design of your home into something more modern and to your personal taste, then you may want to remove the existing artex from your property for good. If this is your wish then you’ve come to the right place.
To remove artex from your walls you can choose to do so using the steaming method or through the use of an external product.
Using the steaming method, you should know that it’ll be more labour intensive and time consuming. You need a lot of patience moving your steamer slow and steady because if left on a spot for too long can damage the wall behind the coating. Once the artex has been dampened with the steamer, you can then scrape them off with a handheld scraper.
A faster solution would be to use an external product to remove your artex. For example, you can use X-Tex which is a water-based coating remover. All you need to do is paint the substance over your artex wall and leave to dry for about 30 to 60 minutes before peeling away the artex.
Installing a plasterboard to a ceiling is not the easiest of tasks, and even though it can be done by one person, it’s usually a lot easier when done by two people. If you’re an experienced DIYer, this task becomes a lot easier to undertake, with both confidence and patience needed to ensure a successful outcome. If you lack these essential attributes, we’d strongly recommend you call in a reliable professional who can guarantee the best results for help. In this guide, we’re going to take you through the processes involved to plasterboard your ceiling. Let’s take a look!
✓ Take a measurement of your ceiling. Knowing the length and width of your room is crucial here. You have nothing to worry about if it’s not a perfect square as that’ll only mean more cutting.
✓ Make the necessary plasterboard cuts. Cut the plasterboard sheet with a utility knife in accordance to ceiling space measured.
✓ Remove existing plaster. Once done, examine the trusses and beams to ensure they’re still in a great condition before you proceed. Also, make sure there’s no loose plaster that can compromise your new installation.
✓ Apply construction adhesive. For a better fit, you’d have to apply adhesive along the beams while also avoiding the edges as this could affect your screw placement.
✓ Start in a level corner. You have to start the installation from the most level corner.
✓ Work along the outside edges. Secure it using a screw along the outside edge. This will make your plasterboard held to your ceiling perfectly. It won’t bend or break as your proceed with the installation.
✓ Complete the installation. Install the plasterboard on your entire ceiling and complete the installation by taping the seams and plastering for a smooth surface.
Answer a few quick questions to help us match you with the right Plasterer
Receive no-obligation quotes from 4 Plasterers working in Clarbeston Road.
Compare prices, customer reviews and services, and hire the right Plasterer.
View our open Plasterer jobs near you
Join today
