

Interior work | Plastering
Callander - FK17
Enquiry from: Forbes W
Start Date: 1 to 3 months
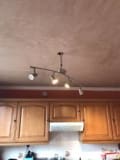
Remove ceiling paper and re-plaster 2.75 x 5 metre ceiling Home Owner Call to Appoint
Over 2 reviews & an average rating of 4/5 stars, you'll find the right pro
Use the shortlist button to select up to 4 tradespeople, enter your project details and press send
Get up to 4 quotes from local Plasterers near you
Callander - FK17
Enquiry from: Forbes W
Start Date: 1 to 3 months
Remove ceiling paper and re-plaster 2.75 x 5 metre ceiling Home Owner Call to Appoint
Stirling - FK9
Enquiry from: Jayne R
Start Date: Immediate
plaster where old wardrobe had been fitted to wall and now artex are you the property owner: owner of the property property type: detached how many rooms are you looking to have plastered: 3 rooms are...
Stirling - FK8
Enquiry from: Anna W
Start Date: Immediate
repair/fill 3 to 4 gaps in original coving in kitchen only. are you the property owner: owner of the property property type: semi detached how many rooms are you looking to have plastered: 1 room are...
Stirling - FK9
Enquiry from: Liz M
Start Date: Immediate
kitchen and sitting room both need repairs and plastering of lath and plaster walls and ceiling. kitchen in very poor state of repair with different levels and surfaces and several holes. kitchen is...
Stirling - FK8
Enquiry from: Graham M
Start Date: Immediate
Replastering of area of kitchen lathe and plaster roof previously damaged by water leakage- now dry. Area about 4 sq.yards Are you the property owner: Owner of the property Are you looking for Interio...
Dunblane - FK15
Enquiry from: Nicola G
Start Date: Immediate
I need a bedrooom plastered walls and ceiling
Stirling - FK9
Enquiry from: Dougie S
Start Date: Less than one month
6 msq plastering job. Plaster kitchen splashback area where old tiles were chiselled off of wall. Are you the property owner: Owner of the property Property Type: Other How many rooms are you looking...
Dunblane - FK15
Enquiry from: Dougie M
Start Date: Immediate
Repair living room ceiling back to original standard following a leak from the bathroom above. Also re-skimm small area in bedroom wall back to original standard following plumbing work Are you the p...
Crieff - PH6
Enquiry from: Scott C
Start Date: Immediate
Skim plaster ceilings Are you the property owner: Owner of the property Property Type: Detached How many rooms are you looking to have plastered: 5+ Are you looking for Interior Decorating: No Time sc...
Stirling - FK8
Enquiry from: James M
Start Date: Immediate
full ceiling in close, I pay 100% of cost. kitchen bay window, plaster touch up Are you the property owner: Owner of the property Property Type: Other How many rooms are you looking to have plaster...
Stirling - FK9
Enquiry from: Jean W
Start Date: Immediate
The conversion of bedroom and shower room into one room. Three walls and ceiling.
Stirling - FK9
Enquiry from: Rich K
Start Date: Immediate
Single room to be plastered. Original lath and plaster has been patched multiple times and one wall is fairly mobile. - Service Date: 04/01/2016 - Property Type: Semi detached Are you the property own...
Stirling - FK8
Enquiry from: Fraser I
Start Date: Immediate
Replaster dining room ceiling and part of kitchen ceiling following repair to leaking water pipe. Both ceilings are approx. 8' x 10'. Most of the ceilings are intact - holes cut into them to deal w...
How much do Plasterers cost? Costs for Plasterers in 2026 can be very different depending on the type of work that you require to have performed in your house.
A plaster is used to serve a number of purposes when applied on a solid surface. It seals rough brickwork or stonework, it provides a smooth surface for the application of paint, the smooth surface offers a clean and wipeable finish, it’s used to repair holes and cracks in existing plasterwork and lots more. With all these benefits, it’s little surprise more and more home and property owners are looking to have their properties plastered. If you’re also considering taking on this task, then you’d probably want to know exactly how much it’ll cost to get this project over the line. In this post, we’re going to give you a good insight into wall plastering costs to help you make the best informed decisions moving forward. Let’s take a look!
As you may have expected, the cost of charged by plasterers is dependent on a number of factors. These factors include the dimension of the room, accessibility of the surface, the condition of the existing plaster as well as the size or reputation of the company. Several plasterer professionals charge a daily rate or a average room size. They know the approximate area that they can cover in a day and charge accordingly. Typically, plastering walls from scratch for small rooms will cost within the range of £600 to £700 with a duration of 2 to 3 days, while mid-sized room should cost in between £650 to £1000 with a completion time from 2 to 4 days. Lastly, for a large room, you can expect to incur about of £1000 to £1500 and can be completed within 4 days.
The table shows the kinds of job that Plasterers usually do and the regular price series of these projects. Some jobs take longer to complete than others so prices do vary by task.
View our Plasterer advice| Plasterer job | Plasterer cost in 2026 |
|---|---|
| Plastering in Callander | £563-£863 |
| Artexing in Callander | £150-£230 |
| Plasterboard ceilings in Callander | £225-£600 |
| Suspended ceilings in Callander | £525-£805 |
| Artex Removal in Callander | £190-£400 |
It’s possible to paint your artex ceiling if you want to smarten it up or make it a different colour.
If it’s never been painted before, you’ll need to paint it with a PVA-based solution or water-thinned paint layer to start with. You may want to scrape or sand off any loose or peeling patches beforehand, but only do this if you’re sure that the artex doesn’t contain any asbestos.
Once you’ve done this, follow with two coats of your paint of choice – ideally an emulsion. If your artex ceiling has been painted before then you can paint directly without priming. However, if you’re painting over a particularly bold colour with a lighter one, you might want apply a layer of white paint first.
Also commonly referred to as drywall, plasterboard is an incredibly versatile product which features a sandwich of gypsum plaster between thick paper layers. It’s mainly used on both walls and ceilings due to the wide range of benefits it provides. Not only can plasterboard be made to be humidity resistant, fire resistant as well as noise resistant, but they’re also known to have a low environment impact, easy to repair and can be used to conceal stuff from plain sight. As a result of these benefits couple with the fact that they also happen to be quite affordable, plasterboard has grown to become a ubiquitous phenomenon in modern residential buildings.
When it comes to the installation of plasterboard on ceilings, one of the major sources of concern for several homeowners is the determination of the thickness required to ensure a durable and long-lasting project. If you’re planning to fit plasterboard on your ceiling and wondering the thickness that’ll be appropriate, then you’ve come to the right place. In this post, we’re going to give you a good insight on what plasterboard to use for ceilings. Let’s take a look!
First and foremost, the standard plasterboard sheet size is 120 cm in width and within the range of 180 cm to 360 cm in height. These sizes are designed to provide the much-needed support to the standard stud spacing which is 160 cm. Depending on the manufacturer, plasterboard can be in four different widths. Now talking about the thickness, there are two standard thicknesses of plasterboard - 9.5 mm and 12.5 mm. The sizes of plasterboard for ceilings are 9.5 mm or 10 mm. Most individuals tend to assume that the thicker the plasterboard the better, but this is absolutely false. A thicker plasterboard will only stick harder to the ceiling which will make it hard to seal joints if required.
How To Plaster A Wall
In order to plaster your wall successfully, you’ll firstly need to get the appropriate tools and materials for the job in place. The tools you’ll need to have includes a trowel and bucket trowel, plasterer’s float, corner trowel, hawk board, two buckets, mixing stick or a paddle, adequate plaster, PVA , dust sheets, clean water, sandpaper, stilts or step ladder as well as a dust mask.
✓ Prepare the wall. You’d have to make sure that you lay down a dust sheet so as to protect your floor and also gather any possible spillage or debris of plaster, before you start working on the walls. Get rid of all the dirt, dust and debris as this is very important for the success of your project if you’re going to be plastering on a worn out and old wall. Also, cover the holes and cracks in the walls with a screen tape
✓ Apply PVA to the wall. This will help ensure the layer you’re using will not dry out at the same time.
✓ Mix the paster. Mix the plaster according to the instructions given in the manufacturer’s manual.
✓ Apply the plaster onto the wall. Upon cleaning of the walls and successful mixture of the plaster, the next step is to apply the mixture to the wall using the hawk board, trowels and a floating tool.
✓ Skim and smooth. After the the first coat has dried after waiting for about 30 minutes, the next step will be to wipe out the bumps and lumps using a trowel to smooth over the surface. Once this is done you can then scrape the wall with a devilling float.
✓ Apply the second coat of plaster
✓ Apply the finishing touches. This includes polishing your work by adding some water to the surface with a spray gun and using the trowel to further smoothen out the surface.
✓ Painting and wallpapering.
Prior to removing artex on your ceiling, it’s always crucial to determine whether or not the surface coating material contains asbestos. Asides from this, you may also wish to know how much you’re going to have the asbestos artex ceiling removed. If yes, then you’ve come to the right place! In order to help you make the best informed decision possible, this post was written to help give you an idea of the price it’s going to cost to remove asbestos artex ceiling in the UK.
Unfortunately, as simple as it seems, there’s no single straightforward answer to this question as there are many factors that can affect the cost of hiring an asbestos artex removal professional. These factors include the project’s scale, the complexity of the area which needs to be removed as well as the need for extra materials. Generally, professional artex removal companies charge a standard rate for their labour. As a result, you can always predict that the tradesperson’s labour will be more costly based on the extent of the job. Therefore, the more costly the labour fees will be if the job takes longer time to complete.
On the average, a tradesperson will charge within the range of £250 to £400 on a daily basis to undertake the project for you. And of course, you can expect these rates to vary based on the company hired as well as the area you live in. For rxample, you can expect that a tradesperson’s charges would be higher in an area such as Central London, as opposed to other areas which are more rural.
Artex was originally made using white asbestos to make it stronger. However, this stopped in the mid-1980s, and the use of asbestos was banned in the UK in 1999, due to its extreme health risks. So, any artex you buy today won’t contain asbestos.
If you have an artex ceiling or wall that was created before 1999, it may have asbestos in it. This won’t be a health hazard if you leave it undisturbed, so it’s not necessary to remove it. However, if you want to get rid of or alter your artex ceiling or wall, you must get it tested to check if it has asbestos in or not first. If it does, you’ll need to hire a qualified professional to work on it.
Plastering will fix small cracks in walls. Very small cracks may be fixed by simply reskimming plaster. More serious cracks will usually mean that you need to use new plasterboard or backing plaster. Larger jobs or deep cracks may need an experienced plasterer to come in.
If your artex ceiling is looking tired or you just fancy a change, you can try plastering over your artex. You have two options when it comes to plastering over your artex: plasterboard or skimming.
Covering your ceiling with plasterboard is a good option if you suspect the artex may contain asbestos. If done carefully, it doesn’t involve disturbing the artex, reducing the risk of asbestos exposure.
You also have the option to skim over your ceiling. The first steps to this involve removing loose and flaking parts, cutting off stipples and sanding your ceiling down. So, if there’s a chance your artex ceiling may contain asbestos, this isn’t the right solution for you. However, if you’re sure there’s no asbestos in your ceiling, then sanding down and skimming over your ceiling can be a great way to create an attractive result.
It’s worth noting that both putting up plasterboard and skimming plaster can be difficult jobs. Although possible to DIY, you’re likely to get much better results if you hire a professional.
If you’re looking to plaster your ceiling, one of the most essential parts of the process is cutting the plasterboard. Once you’re able to master this skill, the rest of the plastering is quite easy. This is a task that can be done by any competent DIYer but with a little bit of patience and confidence. If you lack any of these attributes, we’d strongly recommend you call in a reliable professional who can guarantee the best results for help. In this guide, we’re going to take you through the plasterboard ceiling cutting process. Let’s take a look!
To cut plasterboard ceiling, you don’t need any expensive tool which is usually not the case when it comes to carpentry. If you won’t be cutting a lot of plasterboard, all you really need would be just an old handsaw or plasterboard one, a Stanley knife as well as a straight edge. However, if you’ll be cutting lots of plasterboards, you’ll require the following to make your task a lot easier:
✓ An old handsaw
✓ A Stanley knife and many spare blades
✓ A straight edge like a long spirit level
✓ A surform
✓ A battery drill and oh2 screwdriver bits, with specific plasterboard screws.
To cut plasterboard to length, you’ll have to first score a line on the face side of the board with a straight edge and Stanley knife. Once done, simply lift the sheet off the ground and snap it along the score line. Then, you can run your knife down the other side of the board , cutting the back of the plasterboard backing sheet. Upon completion, your plasterboard is now ready to be fitted on your ceiling.
Answer a few quick questions to help us match you with the right Plasterer
Receive no-obligation quotes from 4 Plasterers working in Callander.
Compare prices, customer reviews and services, and hire the right Plasterer.
View our open Plasterer jobs near you
Join today

