


05 Aug
Plastering
Walsall - WS9
Enquiry from: Collyn P
Start Date: Immediate
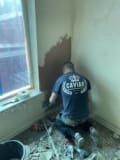
I need artex removed from hall stairs and landing walls and ceiling


Over 2 reviews & an average rating of 3.5/5 stars, you'll find the right pro
Use the shortlist button to select up to 4 tradespeople, enter your project details and press send
Get up to 4 quotes from local Plasterers near you


Walsall - WS9
Enquiry from: Collyn P
Start Date: Immediate
I need artex removed from hall stairs and landing walls and ceiling
Birmingham - B32
Enquiry from: Amar G
Start Date: Immediate
Leak into kitchen ceiling, require artex ceiling to be redone or fixed
Birmingham - B15
Enquiry from: Tom F
Start Date: Immediate
Kitchen ceiling needs artexing
Birmingham - B31
Enquiry from: Grace M
Start Date: Immediate
Hi, would be able to quote for skimming over or removing artex in a two bed mid 90's house in Rubery please Bw, Grace ***
Birmingham - B23
Enquiry from: Lee C
Start Date: Immediate
To board and plaster a kitchen
Tipton - DY4
Enquiry from: D R
Start Date: Immediate
Having brick built fireplace removed so will need wall replastered
Birmingham - B17
Enquiry from: Paul F
Start Date: Immediate

Plaster repair work on section of wall / corner
Birmingham - B47
Enquiry from: Jill J
Start Date: Immediate
Have had quite a lot of electrics done and there are holes where the trunking has gone in and where sockets have been moved to, hard to describe without actually seeing what I’m talking about Mainl
Birmingham - B17
Enquiry from: Paul F
Start Date: Immediate
Removal of hallway polystyrene ceiling & its replacement with fire retardant one
Tipton - DY4
Enquiry from: Sejal P
Start Date: Immediate
Outside of bay window first-floor plaster has fallen off
How much do Plasterers cost? Costs for Plasterers in 2026 can be very different depending on the type of work that you require to have performed in your house.
A plaster is used to serve a number of purposes when applied on a solid surface. It seals rough brickwork or stonework, it provides a smooth surface for the application of paint, the smooth surface offers a clean and wipeable finish, it’s used to repair holes and cracks in existing plasterwork and lots more. With all these benefits, it’s little surprise more and more home and property owners are looking to have their properties plastered. If you’re also considering taking on this task, then you’d probably want to know exactly how much it’ll cost to get this project over the line. In this post, we’re going to give you a good insight into wall plastering costs to help you make the best informed decisions moving forward. Let’s take a look!
As you may have expected, the cost of charged by plasterers is dependent on a number of factors. These factors include the dimension of the room, accessibility of the surface, the condition of the existing plaster as well as the size or reputation of the company. Several plasterer professionals charge a daily rate or a average room size. They know the approximate area that they can cover in a day and charge accordingly. Typically, plastering walls from scratch for small rooms will cost within the range of £600 to £700 with a duration of 2 to 3 days, while mid-sized room should cost in between £650 to £1000 with a completion time from 2 to 4 days. Lastly, for a large room, you can expect to incur about of £1000 to £1500 and can be completed within 4 days.
The table shows the kinds of job that Plasterers usually do and the regular price series of these projects. Some jobs take longer to complete than others so prices do vary by task.
View our Plasterer advice| Plasterer job | Plasterer cost in 2026 |
|---|---|
| Plastering in Walsall | £563-£863 |
| Artexing in Walsall | £150-£230 |
| Plasterboard ceilings in Walsall | £225-£600 |
| Suspended ceilings in Walsall | £525-£805 |
| Artex Removal in Walsall | £190-£400 |
Installing a plasterboard to a ceiling is not the easiest of tasks, and even though it can be done by one person, it’s usually a lot easier when done by two people. If you’re an experienced DIYer, this task becomes a lot easier to undertake, with both confidence and patience needed to ensure a successful outcome. If you lack these essential attributes, we’d strongly recommend you call in a reliable professional who can guarantee the best results for help. In this guide, we’re going to take you through the processes involved to plasterboard your ceiling. Let’s take a look!
✓ Take a measurement of your ceiling. Knowing the length and width of your room is crucial here. You have nothing to worry about if it’s not a perfect square as that’ll only mean more cutting.
✓ Make the necessary plasterboard cuts. Cut the plasterboard sheet with a utility knife in accordance to ceiling space measured.
✓ Remove existing plaster. Once done, examine the trusses and beams to ensure they’re still in a great condition before you proceed. Also, make sure there’s no loose plaster that can compromise your new installation.
✓ Apply construction adhesive. For a better fit, you’d have to apply adhesive along the beams while also avoiding the edges as this could affect your screw placement.
✓ Start in a level corner. You have to start the installation from the most level corner.
✓ Work along the outside edges. Secure it using a screw along the outside edge. This will make your plasterboard held to your ceiling perfectly. It won’t bend or break as your proceed with the installation.
✓ Complete the installation. Install the plasterboard on your entire ceiling and complete the installation by taping the seams and plastering for a smooth surface.
Although they’re pretty much outdated now, artex happens to be a very popular surface coating option just a few decades ago. Several homeowners with artex in recent times would either want to have them removed or cover them up with stuffs such as a wallpaper. So if you’re wondering whether or not it’s possible to wallpaper over artex, then there you have it. It’s possible to wallpaper over artex, however it’s not advisable as wallpaper may eventually crack over time. On the other hand, the artex can also create ridges beneath the wallpaper which allows unpleasant protrusions in the wallpaper. Instead of applying wallpaper over artex, a more permanent solution would be to cover it with drywall or wet plaster or perhaps just have it removed completely.
There are two types of wallpaper, there’s the thin wallpaper application which comes with adhesive on one side as well as a pattern or colour on the other side. With this, all you need do is simply to peel and stick. Then the other type is the sturdier wallpaper that’s more thick and requires a special wallpaper paste. However, it’s important to note that if you choose to wallpaper over your artex, you won’t be able to make use of the thin type of wallpaper, rather you’ll have to incorporate the sturdier option which makes use of wallpaper paste.
The wallpaper paste is the product you mix with water to produce a paste which you’ll have to apply to your walls before applying the applying the regular wallpaper - one without adhesive on one side. Appling wallpaper to an artex decoration may just give you the updated appearance you so much desire.
How To Plaster A Ceiling
Generally, plastering is a very tricky and time consuming job which usually require lots of efforts and practice to get right - with that in mind it gets even a lot trickier when it comes to ceiling plastering.
However, when you’re able to acquire the right know-how as well as tools, ceiling plastering can be completed by any confident DIYer enthusiast without the need to call in a professional. However, if you lack the needed confidence to pull off this task, then we’d recommend you get in touch with a trustworthy professional who can guarantee the best results for help. In this guide, we’ll take you through the ceiling plastering process.
You’ll need the following materials to get started: plaster, mixing bucket and paddle, plasterer’s float, plasterer’s towel, bucket trowel, protective gear, bucket of clean water and wide brush.
✓ Prepare the area. When it comes to plastering a ceiling it’s almost unavoidable to leave a mess around and no matter how you do it, your plaster will drop on the floor. Therefore you have put drop sheets on the floor, cover the furniture and put thing you don’t want to get dirty out of the way.
✓ Prepare the ceiling to be plastered. Sand down the uneven patches on the ceiling. Once done, wash the ceiling with a sponge and warm soapy water while also removing all cobwebs as well. Leave the surface to dry once completed.
✓ Mix the plaster or buy a premix plaster. To mix the plaster, simply use equal parts of plaster and water for mixing the plaster,
✓ Plaster the ceiling. Apply a little quantity of plaster to the edge of your trowel and try to spread it in rows to do the job without much hassle. Ensure that the thickness of the coat is thin and even throughout the application. The rough edge of the trowel should be used for the spreading as it’ll help you create scrapes or scratches in the plaster.
✓ Sand the surface
It’s possible to paint your artex ceiling if you want to smarten it up or make it a different colour.
If it’s never been painted before, you’ll need to paint it with a PVA-based solution or water-thinned paint layer to start with. You may want to scrape or sand off any loose or peeling patches beforehand, but only do this if you’re sure that the artex doesn’t contain any asbestos.
Once you’ve done this, follow with two coats of your paint of choice – ideally an emulsion. If your artex ceiling has been painted before then you can paint directly without priming. However, if you’re painting over a particularly bold colour with a lighter one, you might want apply a layer of white paint first.
Plastering will fix small cracks in walls. Very small cracks may be fixed by simply reskimming plaster. More serious cracks will usually mean that you need to use new plasterboard or backing plaster. Larger jobs or deep cracks may need an experienced plasterer to come in.
Can You Plaster Over Tiles?
Yes, it’s absolutely possible to plaster over tiles but just because is possible doesn’t mean you should. Plastering over tiles is an option but it’s not recommended by experts due to several reasons. A good example is the fact that a tiled environment is in no way a suitable environment that can serve as a good bonding surface for a plaster. For the success of a plastering project, there’s the need for the surface to be able to bond to the PVA base coat. Due to fact that most tiles are slippery in nature and also lack of the ability to be able to absorb moisture, the PVA base coat layer will not be able to bond to the tiled surface, which will ultimately make for a weak surface upon the application of the plaster. Consequently, the plaster will easily flake and fall from the wall.
The inability to drill into the tiled wall surface after plastering is one of the major disadvantages that also arises when you decide to plaster over tiled surfaces. Most tiled surfaces are found in kitchens and bathrooms which are going to need appliances such as sinks, lavatories, kitchen counters and lots more. These appliances are designed to be installed on solid surfaces which would not be an easy task to carry out on tiles knowing there would definitely be great cracks or damages.
The best tip you’ll get if you’re considering to plaster on a tiled surface, is that detaching tiles from a surface can easily be done with a hammer and chisel, and that would save you a host of problems later in the future. However, if you still wish to plaster on your tiled walls, then you best bet would be to get a Blue Grit bonding agent. It works better than PVA and only needs one coat.
The fact is several buildings contain artex as well as other textured coating on walls and ceilings which are all likely to contain asbestos. However, artex itself is not the main threat here but the potentially deadly harmful fibres that’s contained in it. In this post, we’re going to look at whether or not artex truly contains the deadly abestos.
The short and simply answer to this question is yes, artex can definitely contain asbestos, however not all artex will contain asbestos. The main reason asbestos was a popular construction material is because it was not only cheap and strong but also because it was very durable and long lasting. It was used in numerous construction materials ( which includes artex ) before it was finally banned in the year 1999. unfortunately during the time when artex was very popular in the 60’s, 70’s as well as 80’s, asbestos was still very much in use during the period. And as a result, a lot of the artex incorporated during that period will contain the deadly asbestos fibres. However, this does not only apply to artex, but also other textured coatings containing asbestos were incorporated in construction until 1999 when asbestos was formerly banned in the UK. These asbestos containing materials are often used on walls as well as ceilings of residential properties.
Unfortunately, it’s not possible to know an asbestos containing artex just by looking at it. In order to determine whether or not an artex contains the deadly asbestos fibres, it’ll have to be sampled and tested in a laboratory. What’s more? While several artex contains asbestos, asbestos free artex was available from the 1970s. However, since it’s impossible to determine using the naked eye, all artex installed before the ban will be assumed to contain asbestos.
Artex was originally made using white asbestos to make it stronger. However, this stopped in the mid-1980s, and the use of asbestos was banned in the UK in 1999, due to its extreme health risks. So, any artex you buy today won’t contain asbestos.
If you have an artex ceiling or wall that was created before 1999, it may have asbestos in it. This won’t be a health hazard if you leave it undisturbed, so it’s not necessary to remove it. However, if you want to get rid of or alter your artex ceiling or wall, you must get it tested to check if it has asbestos in or not first. If it does, you’ll need to hire a qualified professional to work on it.
Answer a few quick questions to help us match you with the right Plasterer
Receive no-obligation quotes from 4 Plasterers working in Walsall.
Compare prices, customer reviews and services, and hire the right Plasterer.
View our open Plasterer jobs near you
Join today
