
15 Oct
Flat Roof Replacement
Weymouth - DT3
Enquiry from: Alec F
Start Date: Immediate
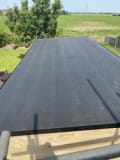
30 sq m flat garage roof fibreglass coming away would like it replaced with rubber please


Over 113 reviews & an average rating of 4.6/5 stars, you'll find the right pro
Use the shortlist button to select up to 4 tradespeople, enter your project details and press send
Get up to 4 quotes from local Roofers near you





Weymouth - DT3
Enquiry from: Alec F
Start Date: Immediate
30 sq m flat garage roof fibreglass coming away would like it replaced with rubber please
Weymouth - DT3
Enquiry from: Tom S
Start Date: Immediate
Submit your free quote for rated tradespeople
Weymouth - DT3
Enquiry from: John H
Start Date: Immediate
Advice and quote. Tiles sliding off roof under solar panels. Fitting roof guard as an interim measure
Weymouth - DT3
Enquiry from: Ray J
Start Date: Immediate
Repair to leaking velux. leaking on one side and to the top also
Weymouth - DT3
Enquiry from: John S
Start Date: Immediate
Poly-carbonate roof repairs
Weymouth - DT3
Enquiry from: Carolyn W
Start Date: Immediate
Repair to base of chimney where it joins roof
Weymouth - DT3
Enquiry from: Richard P
Start Date: Immediate


I have a broken roof tile on my 'hipped roof' which is on the second row above the guttering. A temporary repair has been carried out by my insurance this morning and was accessed via their scaffoldin
How much do Roofers cost? Costs for Roofers in 2026 can be very different depending on the kind of work that you want to have actually performed in your residence. It's the question we get asked a great deal "how much do Roofers charge?". It's often very good to have an idea of how much a Roofer are going to likely charge for their assistance. Prices will most likely fluctuate based on the materials and also the tradesman picked. The table shows the kinds of task that Roofers generally do as well as the standard cost series of these tasks. Some projects take longer to complete than others so costs do fluctuate by task.
View our Roofer cost guide View our Roofer advice| Roofer job | Roofer cost in 2026 |
|---|---|
| Velux windows in Abbotsbury | £675-£1,035 |
| Tile or slate roofing in Abbotsbury | £4,500-£6,900 |
| Flat roof in Abbotsbury | £1,875-£2,875 |
| Commercial roofing in Abbotsbury | £3,750-£5,750 |
| Flat roof repair in Abbotsbury | £1,500-£2,300 |
| Gutter cleaning in Abbotsbury | £75-£115 |
| Tile roof repairs in Abbotsbury | £338-£518 |
| Chimney sweeping in Abbotsbury | £75-£115 |
| Roof cleaning in Abbotsbury | £1,480-£2,220 |
| Sun Tunnel in Abbotsbury | £700-£1,000 |
The feasibility of this will depend on the roof’s strength, in particular its load bearing capabilities. This is simply because tiles are heavier than the metal sheeting. Normally a tiled roof will need to take a load capacity of 60kg per square metre. You will need a trusted roofing company to advise on this.
How To Replace Flat Roof Fascia
Whatever makes you decide to install your flat roof fascia by yourself and not a professional company, then you must have a clear idea of what to do and do it appropriately. If you lack proper training and experience, we’d recommend you employ a reliable professional to help with the task for the best results and save you some time and money. This step-by-step guide will give a clear insight on how to go about the replacement of your flat roof fascia.
The tools to be incorporated includes the fascia boards, table saw, plane, crimper, clamps, power nailer, compound saw and chalkline.
• Prepare and get all the necessary tools to complete the task before commencing as this would save you time from stopping and going back and forth looking for the next tool needed,
• Install the sheathing and board.
• Fix white fascias with at least 600mm centres ( a foiled fascia needs just 40mm centre) using a marine grade stainless steel plastic headed nails.
• Make a space of up to 10mm between the joints for possible building expansion, using super glue to secure the joints to just a side of the fascia.
• Place this directly on the fascia board’s top (if you’ll be installing ventilation) to create an air pathway.
• Take note that the type of roof to be installed will determine how you’ll have to install the fascia board. For instance, a hip roof permits you to attach the fascia board onto the roof in a quick fashion, whereas a gabled roof may need you to make markings on the board to achieve the right fit.
• Consider the depth of the fascia board as it also play a huge role in the installation of the fascia board. For instance, there’ll be additional weights on tiled roofs that will push up against the board. Therefore, if you do not get the appropriate amount of depth, it could eventually collapse.
Will My Roof Leak With Missing Ridge Tiles?
Your roof is the first line of defence against the elements. Therefore, if you want your home protected at all times, there’s a need to ensure a professional inspection of your home at least once a year. However, there are certain issues that you do not have to wait for a professional to be able to spot by yourself. And an example of this includes a missing ridge tile. This issue is noticeable from the ground level while some tiles may even fall off and notifying you in the process. If you’re currently facing this kind of challenge, you’d probably want to know if the missing ridge tiles can cause your roof to leak. In this article, we aim to answer this question and more. Let’s take a look!
Firstly, there are a number of causes of missing tiles or slates and the most obvious is the weather. When the wind or rain gets very high, it can pull your tiles out of place and even more more, if they weren’t properly installed in the first place. Secondly, there’s also a chance that the nails may wear away. These are the nails that holds your ridge tiles in place, they can rust and wear away, hence leading to missing ridge tiles.
Therefore, the short answer to the question is yes, missing ridge tiles can cause your roof to leak. Even if it doesn’t leave a visible gap in your roof’s covering, it’ll create a break in the roof which weather can easily penetrate. And allowing this to happen makes the other tiles more susceptible to damage which won’t be good for the entire house as well as your pocket. Hence, once you notice a missing ridge tile ensure to have it replaced as soon as possible.
The task of installing a tile roof can be quite a difficult one. Such a project takes a great deal of preparation, well before the actual tile installation is done. It does not matter if you are putting new ones or replacing your old tiles, understanding the proper technique and steps become crucial.
Remove old roofing (if applicable).
This is, on its own, a major job that can take days and require special tools. It takes some time, but be prepared to do it right.
Install battens (if applicable).
Battens may be needed to hold the tiles in place if the roof is having a steep slope. Usually made of metal or wood, battens are generally 1 inch thick and run horizontally along the roof.
You can find several varieties of tiles that has a hook or a lip allowing it to hang on the available battens. Apart from this, you can find several clips in the market which help to attach the tiles on to the batten.
Determining the spacing for battens can be done easily using two tiles. To prevent interlocking, a three inch overlap is required at the minimum, and a smaller amount of overhang should be left over the eaves. Keep this in mind when you determine the locations of the battens.
After you have determined the distance between the first two battens, measure the distance and set battens using that spacing up, making sure to double-check measurements as you go along.
• Install the tiles.
• You will need to begin with one side first, and then continue to move along the length of the roof.
• Cut tiles to fit tight spots.
• Tiles have to be cut precisely to overcome any obstacle like the chimney.
• Install the ridge tiles.
After completing the broad surfaces of the roof, special ridge tiles are required to cap the top.
One of the most popular choices for roofing materials are roof slates. There is a number of advantages that a roof slate has, hey can be aesthetically pleasing, they can also increase the potential selling value of the house and many more. Slate is a sturdy and resilient material that delivers waterproofing physical characteristics to a pitched roof. Unlike other roof materials which absorb water slates do not. Therefore, slate is the most resistant towards freezing and water damage.
Find out the pitch of your roof
Before beginning with the fitting procedure, you need to figure out the pitch of your roof. The roof pitch commands how much overlap is essential with each slate. This has been made a lot easier than the early days with the advancement of technology.
Find out the required overlap
Once you’ve found out the exact pitch of your roof accurately, take a look at the slate producer’s description. Each manufacturer will propose the obligatory overlap in order to form a firm and safe slate roof.
Roll out the roof membrane
Firstly, guarantee your joists or trusses are clean of any sheards or old nails that could harm the membrane. You will now have to roll the chosen roofing membrane along the roof trusses. It is always wise to start from one of the bottom corners and keep rolling it along to the other corner.
Secure the roof membrane
Once the membrane has been moved out, use thump nails to protect one edge. You will now have to pull the membrane taut and carefully fix it into position. Do this before adding any nails across the membrane at points of intersection with the trusses for extra stability.
Batten placement
This is done to find the proper assignment of the battens. For this, you will need two full-sized slates along with an under eaves slate. Carefully position the battens on the top of the roof on the top of the overlay. Make sure not to fix them down since it will be easier to move them around and make any adjustments.
Chimneys are certainly on top of the commonly overlooked features when it comes to cleaning a house. This is quite understandable given the fact that they’re not readily accessible and not in plain sight, hence, home and property owners tend to overlook the relevance of any chimney cleaning effort. But this can be a grave mistake! The importance of having your chimney swept on a regular basis cannot be over emphasized and even more so if it happens to be on a wood burner. Not only can a dirty chimney constitute fire hazard, but when left uncleaned it can also give rise to blockages which can lead to carbon monoxide poisoning. In fact, from 2014 to 2018, one of the top factors contributing to about 25% of home heating fires is due to lack of cleaning, mainly from solid-fueled heating equipment, mostly chimneys. Therefore, sweeping your chimney regularly is a safety precaution and when they happen to be on a wood burner, this exercise becomes a lot more important. With that in mind, the question that arises is just how often is sweeping of a chimney on a would burner needed?
Well, it’s strongly advisable to sweep chimney on a wood burner at least twice a year by a qualified professional depending on the usage. If you happen to own an oil burning fireplace, the same also applies. In other words, this means that regardless of the type of chimney you possess, the cleaning must be done regularly. However, most chimney would only need to be swept once in a year by a qualified professional.
As long as you can access them safely, it’s fairly easy to clean soffits and fascias. Using a sponge and warm water to scrub them is a good way to get off most types of dirt. You might want to add detergent or bleach to the water to make it more effective.
Once you’ve scrubbed your soffits and fascias, rinse them with clean water to make sure you’ve got all of the dirt and detergent off.
Yes, it’s a dirty job, but every homeowner out there has got to do it! Your gutter needs to be free of dead leaves, birds’ nest and other debris as well as being through clean in order to perform its functions effectively. It’s just a part of the responsibilities that comes with owning a home. Dry leaves, tree branches and other materials build up in your gutters overtime especially during the dry summer and you won’t notice until the point where your gutters start overflowing during the first main rain of the season.
In the event whereby your dirty and clogged gutter is left unattended to, this can lead to several issues like a leaky gutter and mold, leaky roof and basements,cracked foundation, driveway and yard damage and several more which will definitely make you incur more unnecessary expenses. So the question is, how often should the gutters be cleaned? The answer is, it depends. According to several experts, gutters should be cleaned at least twice a year - which is once in the late spring and once in the late summer or early fall. However, there are a couple of factors that may make you have a rethink.
If you happen to have a pine tree growing above your house, it’ll be wise to consider inspecting your gutters every 3 months. This is because pine trees shed needles year-round and they usually have a lot of these needles to shed. In the situation whereby you’re located at a higher elevation, ice is will most likely be your greatest source of concern. Making sure that your gutters remain clean throughout the winter can be quite a headache, but damage to your roof cause by ice can be an even greater pain. Prevention is always better than cure.
Answer a few quick questions to help us match you with the right Roofer
Receive no-obligation quotes from 4 Roofers working in Abbotsbury.
Compare prices, customer reviews and services, and hire the right Roofer.
View our open Roofer jobs near you
Join today

