16 Oct
Pitched Roof Repair
Fakenham - NR21
Enquiry from: Polly L
Start Date: Immediate


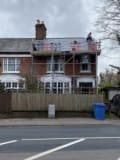
Repair as appropriate to chimney, including vented capping (fireplaces no longer in use)


Over 201 reviews & an average rating of 4.5/5 stars, you'll find the right pro
Use the shortlist button to select up to 4 tradespeople, enter your project details and press send
Get up to 4 quotes from local Roofers near you



Fakenham - NR21
Enquiry from: Polly L
Start Date: Immediate
Repair as appropriate to chimney, including vented capping (fireplaces no longer in use)
Fakenham - NR21
Enquiry from: Imogen K
Start Date: Immediate
3 bed semi gutter clearance
King's Lynn - PE31
Enquiry from: John B
Start Date: Immediate

Chimney repairs. a few bricks replacing and pot cowling fitting
King's Lynn - PE31
Enquiry from: James H
Start Date: Immediate
Semi slightly flat roof of chalet bungalow on the coast, Heacham. needs repair where its been constantly hit by north winds
Fakenham - NR21
Enquiry from: Shaun F
Start Date: Immediate
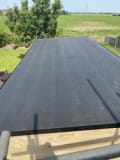
The roof has completely misshapen..so.will need either stripping back and wood replaced the fibreglass...or repair over existing roof ..size is approx 5m x 25
Sheringham - NR26
Enquiry from: Kim B
Start Date: Immediate
Sun/light tunnel installation over stairwell - detached house
Sheringham - NR26
Enquiry from: Jim A
Start Date: 1 to 3 months
22' x 10' garage pitched roof corrugated (not asbestos)
Hunstanton - PE36
Enquiry from: Barry W
Start Date: Immediate
Front guttering on semi detached two story house
King's Lynn - PE31
Enquiry from: Perry G
Start Date: Immediate
Gutter is overflowing at corner joint. not easily accessible due to conservatory
Fakenham - NR21
Enquiry from: Radford I
Start Date: Immediate
Reseal velux rooflight opening glass surround trims
Melton Constable - NR24
Enquiry from: Paul O
Start Date: Immediate
Looks like one roof tile spilt across , leaking , slightly tricky access
Melton Constable - NR24
Enquiry from: Lyn M
Start Date: Immediate
Rear extension has a conservatory roof installed - approximately 6 years old - today in heavy rain it started leaking in one place along the apex. Needs looking at and repairing as required
Fakenham - NR21
Enquiry from: Carole S
Start Date: Immediate
Submit your free quote for rated tradespeople
Fakenham - NR21
Enquiry from: Martin M
Start Date: Immediate
Repair or replace leaking cement fibre pitched garage roof
Fakenham - NR21
Enquiry from: Bev G
Start Date: Immediate
Chimney to be swept and cleaned before it can be used for a fire
Holt - NR25
Enquiry from: Steve B
Start Date: Immediate
Roof leaking onto upstairs landing Pantiled roof. Water entering near upper gulley. Help needed asap please
Sheringham - NR26
Enquiry from: Hilary C
Start Date: Immediate
Flat roof. single garage holds all electrics and boiler. water leaking through
King's Lynn - PE31
Enquiry from: Richard C
Start Date: Immediate
Cleaning of solar panels and moss removal
How much do Roofers cost? Costs for Roofers in 2026 can be very different depending on the kind of work that you want to have actually performed in your residence. It's the question we get asked a great deal "how much do Roofers charge?". It's often very good to have an idea of how much a Roofer are going to likely charge for their assistance. Prices will most likely fluctuate based on the materials and also the tradesman picked. The table shows the kinds of task that Roofers generally do as well as the standard cost series of these tasks. Some projects take longer to complete than others so costs do fluctuate by task.
View our Roofer cost guide View our Roofer advice| Roofer job | Roofer cost in 2026 |
|---|---|
| Velux windows in Wells-next-the-sea | £838-£1,268 |
| Tile or slate roofing in Wells-next-the-sea | £4,500-£6,900 |
| Flat roof in Wells-next-the-sea | £1,875-£2,875 |
| Commercial roofing in Wells-next-the-sea | £3,750-£5,750 |
| Flat roof repair in Wells-next-the-sea | £1,500-£2,300 |
| Gutter cleaning in Wells-next-the-sea | £75-£115 |
| Tile roof repairs in Wells-next-the-sea | £338-£518 |
| Chimney sweeping in Wells-next-the-sea | £75-£115 |
| Roof cleaning in Wells-next-the-sea | £1,480-£2,220 |
| Sun Tunnel in Wells-next-the-sea | £850-£1,250 |
Fitting a Velux window into a slate roof is very similar to the way you’d install it in other roof types. All roof windows, whether a Velux-branded one or not, will come with detailed instructions for you to follow if you want to have a go at fitting it yourself. But here are some brief instructions to give you an idea of what’s involved in installing a Velux window into a slate roof:
And that’s it! If you think that sounds a bit complicated, ask a roofer or window installer to fit your roof window into a slate roof for you. You’ll get a better finish and you can be sure that you won’t get any leaks from a botched installation.
Most Sun Tunnel Kits are available in sizes from 250mm Diameter to 550mm Diameter. This gives you a good range to choose from depending on the size of the room you are trying to brighten.
One of the most popular choices for roofing materials are roof slates. There is a number of advantages that a roof slate has, hey can be aesthetically pleasing, they can also increase the potential selling value of the house and many more. Slate is a sturdy and resilient material that delivers waterproofing physical characteristics to a pitched roof. Unlike other roof materials which absorb water slates do not. Therefore, slate is the most resistant towards freezing and water damage.
Find out the pitch of your roof
Before beginning with the fitting procedure, you need to figure out the pitch of your roof. The roof pitch commands how much overlap is essential with each slate. This has been made a lot easier than the early days with the advancement of technology.
Find out the required overlap
Once you’ve found out the exact pitch of your roof accurately, take a look at the slate producer’s description. Each manufacturer will propose the obligatory overlap in order to form a firm and safe slate roof.
Roll out the roof membrane
Firstly, guarantee your joists or trusses are clean of any sheards or old nails that could harm the membrane. You will now have to roll the chosen roofing membrane along the roof trusses. It is always wise to start from one of the bottom corners and keep rolling it along to the other corner.
Secure the roof membrane
Once the membrane has been moved out, use thump nails to protect one edge. You will now have to pull the membrane taut and carefully fix it into position. Do this before adding any nails across the membrane at points of intersection with the trusses for extra stability.
Batten placement
This is done to find the proper assignment of the battens. For this, you will need two full-sized slates along with an under eaves slate. Carefully position the battens on the top of the roof on the top of the overlay. Make sure not to fix them down since it will be easier to move them around and make any adjustments.
How To Clean Roof Lights
If you have existing roof lights or perhaps you’re about to have them installed, it’s important to know just how to have them cleaned, even if you wouldn’t be doing it yourself. Generally, glass roof lights fitted in flat roof applications are more likely to be a major victim of staining and discolouration by several elements like rainwater, bird droppings, vehicle exhaust pollutants as well as tree sap. Therefore, just like any other parts of your home, periodic inspection of the units as well as regular cleaning is highly advised to help maintain their top performance for a lengthy period of time.
Firstly, when installing the roof lights, it’ll be helpful if its fitted at the right pitch so as to help keep the exterior clean as it enables the elements such as rainwater to run off the surface naturally. Cleaning roof lights involves working at height which can be very dangerous. Therefore, if you lack the skill and confidence to pull this off, it’s advisable to hire the services of a professional who can guarantee the best results for help. In this article, we aim to give you a good insight into how the roof light cleaning process works. Let’s have a look!
Rooflight Interior Cleaning
✓ Spread plastic under the roof light to catch dirt and spills
✓ Dust to wipe clear all loose dirt and cobwebs.
✓ Use a squeegee with a warm soapy water or any other glass cleaning product to clean the glass ( steer clear of any harsh chemicals or abrasive cleaners)
✓ Dry the roof light with a soft and lint-free cloth.
Rooflight Exterior Cleaning
✓ Access the roof safely with a specialist ladder
✓ Put mild detergent into a bucket and carry up to the roof before filling with warm water from a hosepipe
✓ Use the soapy water and a non-abrasive cloth or squeegee to clean the roof light, its surroundings as well as fixings.
While it sounds like it could be difficult to plasterboard around a Velux window, it needn’t be. As long as you have the right tools and materials, you should be able to plasterboard around your roof window easily and make good ready to be skimmed. When you or a tradesperson has fitted your Velux window into your roof, you’ll probably need to plasterboard over it to create a good ceiling. To do this, you’ll need:
When you’re ready to plasterboard around your roof window, make sure you’ve cleared enough space to work in. Then you can begin by cutting your plasterboard to size using your straight edge and pen knife to score, then your saw to get a clean cut. A common way of plasterboarding around your Velux window is to use the groove on the window frame to hold one edge of the board, then screw the other edge to the battens on the ceiling. People often use drywall screws these days as they have a better grip of the plasterboard as they drive through. You’ll need to use a drill to screw these in. However, you could use plasterboard nails, which are galvanised to stop rusting. When you’ve done this, you can then skim the walls or ask a plasterer to do it for you. Plastering, while it looks easy, is a tricky skill so it’s always best to ask a professional to do it.
Ponding is where you see pools of water appearing on your flat roof. Unless your roof is leaking or showing other signs of damage, you don’t need to replace it. When you do have your flat roof replaced, tell the contractor so they can find out the cause of the ponding.
How To Clean Concrete Roof Tiles
Dirt, moss and algae usually sees concrete roof tiles as the perfect place to reside. They can damage the structural bonds of your roof, they can lead to overheating of the attic and roof space as well as blocked gutters. In order to protect the structural integrity of your roof and ensure your home and properties are well protected against the elements, it’s therefore crucial to clean your roof regularly. There are plethora of ways to go about this but which method will best suit your concrete roof tile?
When it comes to working at heights, skill and confidence is paramount even if the actually cleaning and maintenance happens to be an easy task. As a result, if you lack the two attributes mentioned, we’d strongly recommend that you call in a professional roof cleaning contractor who can guarantee the best results for help. In this article, we aim to give you a good insight into the concrete roof tiles cleaning process. Let’s have a look!
✓ Use a trowel or stiff brush
This is a manual method which involves scraping off the algae, moss and dirt by hand using an effective tool like a trowel. However, before you do this make sure its a very dry day. Also, you can make use of a stiff brush to scrape off the dirt. Both cleaning tools are very easy and effective means to clean concrete roof tiles.
✓ Use chemicals
You can apply fungicide, moss killers and anti moss treatments with the help of a spray to kill any plant life on your concrete roof tiles. However, you should only do this after you’ve successfully scraped the surface with a trowel or a stiff brush.
The task of installing a tile roof can be quite a difficult one. Such a project takes a great deal of preparation, well before the actual tile installation is done. It does not matter if you are putting new ones or replacing your old tiles, understanding the proper technique and steps become crucial.
Remove old roofing (if applicable).
This is, on its own, a major job that can take days and require special tools. It takes some time, but be prepared to do it right.
Install battens (if applicable).
Battens may be needed to hold the tiles in place if the roof is having a steep slope. Usually made of metal or wood, battens are generally 1 inch thick and run horizontally along the roof.
You can find several varieties of tiles that has a hook or a lip allowing it to hang on the available battens. Apart from this, you can find several clips in the market which help to attach the tiles on to the batten.
Determining the spacing for battens can be done easily using two tiles. To prevent interlocking, a three inch overlap is required at the minimum, and a smaller amount of overhang should be left over the eaves. Keep this in mind when you determine the locations of the battens.
After you have determined the distance between the first two battens, measure the distance and set battens using that spacing up, making sure to double-check measurements as you go along.
• Install the tiles.
• You will need to begin with one side first, and then continue to move along the length of the roof.
• Cut tiles to fit tight spots.
• Tiles have to be cut precisely to overcome any obstacle like the chimney.
• Install the ridge tiles.
After completing the broad surfaces of the roof, special ridge tiles are required to cap the top.
Answer a few quick questions to help us match you with the right Roofer
Receive no-obligation quotes from 4 Roofers working in Wells-next-the-sea.
Compare prices, customer reviews and services, and hire the right Roofer.
View our open Roofer jobs near you
Join today

