19 Jun
Building work | Wall Rendering
Banff - AB45
Enquiry from: Mike H
Start Date: Immediate
Customer visited the myplasteringprices.co.uk site and submitted an enquiry. Property type: Semi detached, Work description: Skimmed small bathroom
Are you seeking Wall rendering in Banff? Our network of installers can aid with your project. Every one of our Builder in Banff are inspected so you can see local write-ups, when the business was created, reviews, approval and also day rate, enabling you to make the right decision on who to work with. Let us take the trouble out of discovering as much as 4 pros for your Wall rendering job.
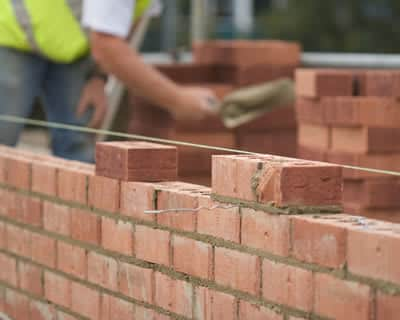
Wall surface Rendering look attractive and make a residential property look its best.
To make sure the ongoing protection of these wall surfaces, making is frequently needed as well as it's terrific at protecting against weather condition damage to the brickwork. Without providing, wall surfaces might just last in between 5 and also 10 years before they begin to compromise.
With wall rendering, not only do you make certain a structure's toughness, however the wall surfaces will be extra eye-catching also and also simpler to repaint. Certainly, you'll have further protection versus natural elements as well.
As well as in today's globe you do not have to wait until the summer season to have wall making carried out. New technologies imply that the drying procedure is now much quicker.
Rendering your walls has never ever been more affordable and specialist interest will not break the bank. With enhanced life span, the more affordable prices make rendering much more budget-friendly.
Getting Wall Rendering Quotes
We will offer up to 4 Wall rendering pros locally, who will certainly provide quotations for the job you want done. You'll obtain a home visit from experts in Banff that'll help you to pick the ideal Wall rendering for your residence prior to carrying out the setup. Enter your postcode to start looking now.
The regular cost of Wall rendering is £5000. Costs vary based on the materials and the company chosen. The upper price range can be as high as £5750. The material costs are normally about £1250
| Avg. price low | Avg. price low |
|---|---|
| Avg. price | Avg. price |
| Avg. price high | Avg. price high |
£6300
£4725
£3150
£1575
£0
| Labour cost | £3,500 | |
| Material cost | £1,250 | |
| Waste removal | £250 |
Requests for quotations in Banff in June 2026
Requests for Wall rendering quotations in Banff in June 2026. 0% change from May 2026.
Requests for Wall rendering quotations in Banffshire in June 2026. 0% change from May 2026.
Banff is a town in the Banff and Buchan area of Aberdeenshire, Scotland. Banff is situated on Banff Bay and faces the town of Macduff across the estuary of the River Banff is a previous royal burgh, as well as is the county town of the historic area of Banffshire. Banff's initial castle was built to push back Viking invaders and also a charter of 1163 AD shows that Malcolm IV was living there back then. Throughout this period the community was an active trading centre in the "totally free hanse" of Northern Scottish burghs, despite not having its very own harbour till 1775. The very first recorded Sheriff of Banff was Richard de Strathewan in 1264, as well as in 1372 Royal Burgh status was provided by King Robert II. By the 15th century Banff was just one of 3 major towns exporting salmon to the continent of Europe, together with Aberdeen and also Montrose. There was a lot of lawlessness in seventeenth-century Scotland, as well as a few of the most awful culprits were members of the nobility. According to documents maintained by historian William Cramond, the tolbooth (courthouse as well as jail) of Banff was, in 1628, the site of an altercation between Lord Banff and also James Ogilvie, his family member. Supposedly, he struck James Ogilvie upon the head with a baton during a court hearing. Twenty of his friends and fans then attacked Ogilvie with swords prior to chasing him right into the street and finishing him off with a pistol shot. Banff and also Macduff are divided by the valley of the River Deveron. This unpredictable river was ultimately subjugated by the 7 arched bridge finished in 1779 by John Smeaton. An earlier bridge had been integrated in 1765, yet was swept away in 1768. The old ferry was restored into use, up until it was shed in a flooding in 1773. A public conference was kept in 1800 and passed a resolution for the structure of a turnpike roadway in between Turiff and Banff as the existing roadway remained in a depressing state of repair service. Later 19th century transport improvements included the building of 2 railway lines, from Macduff to Turiff in 1860 as well as the Banff, Portsoy and Strathisla Train in 1859 which linked to the primary Aberdeen to Inverness line. During the 19th Century the Banff Fishery Area (consisting of the ports from Crovie to Sandend) was important to the herring profession, with production peaking in 1853 at greater than sixty-thousand barrels, of which almost thirty-four thousand were exported, nevertheless by 1912 production had actually declined to just over eight thousand barrels. Currently, the languages spoken in the town and also in its area have a tendency to be the Doric language of Scots, as well as English.
Banff - AB45
Enquiry from: Mike H
Start Date: Immediate
Customer visited the myplasteringprices.co.uk site and submitted an enquiry. Property type: Semi detached, Work description: Skimmed small bathroom
Macduff - AB44
Enquiry from: Ronald G
Start Date: Immediate
i need front and back and garage and some dykes harled are you the property owner: owner of the property property type: terrace how many bedrooms do you have: 1-2 bedrooms how many walls are you look...
Turriff - AB53
Enquiry from: D
Start Date: Immediate
Sun Lounge walls rendered
Answer a few quick questions, so we can match you with local builders who can help.
Get free, no-obligation local wall rendering quotes from 4 verified builders working in Banff.
Compare customer reviews, services and prices, and choose the right tradesperson for you.
Would highly recommend, they found me a firm which I was happy with a quote they give me and went ahead and had my job done within 2 days of enquiring.
Good easy way to find a selection of trades you need all in one place.
Love Local Quotes it's a big part of my Business I would recommend to anyone
Rendering is an external wall’s plastered finish which provides a smooth finish while also protecting the brickwork from the elements like rain, snow and the likes. The traditional rendering is normally applied in two or three coats which enables it to be more resistant to surface cracks. In modern times, the finishes are largely different from the grey pebble dash of post war housing. Today, we now have a plethora of specialist products to pick from such as through-coloured silicone renders as well as one coat renders. The types of renders include the following:
✓ Cement renders. These are the common option that are usually mixed on site and used in a number of applications, then painted when dried. There’s a need to paint this type of render regularly to keep them looking great.
✓ Polymer renders. These are pre mixed and mostly pre coloured (usually with through colouring).
✓ Through-coloured products. These rendered do not need to be painted as the pigment is already added in the manufacturing process to colour the whole render.
✓ Lime renders. These are superior to cement as they’re less likely to trap moisture in the brickwork and also more good looking. However, they’re generally more costly and more difficult to apply.
Overall, rendering on a house provides several benefits. Not only is it able to protect your brickwork against the elements like the rain and wind, but it can also make the building more efficient. Being fully aware that about 30 percent of the energy used in heating a home is lost via the external walls, making use of a product such as acrylic insulated render is a smart approach to improve your home’s energy efficiency without affecting your interior living space.
Wall rendering is basically a process which involves the application of sand, cement or polymer covering to a home’s exterior in such a way that enhances its look while also offering an improved stability. The process is a perfect solution for several exterior concerns mainly due to the support its able to provide. It’s highly beneficial for older homes whose walls may suffer from poor quality because of wear over time, while it’s also greatly advantageous for newer homes as it increases their stability while also enhancing their visual appeal.
Knowing how to apply render is a great skill to have with your home’s upkeep in mind. The project can be done quite easily by any competent and confident DIYer. However if you lack any of those attributes, then we’d recommend you get in touch with a reliable professional for help. In this article, we’ll take you through the wall rendering process.
✓ Prepare the walls. This involves examining the wall, repairing any structural defects as well as stabilizing any movements to prevent the render finish from failing.
✓ External details. This includes the removal of bargeboards, rainwater, soil pipes, alarm boxes and all other external details.
✓ Insulation. In the event whereby external wall insulation is to be fitted, this is the stage to do so.
✓ Developing a foundation for the render to fix to. Apply a render mesh over the insulation, bedded into the first base coat layer of render.
✓ Building up the render.
✓ Render finishes. There are a wide range of colour options as well as various finishes available from very smooth to textured. However, you should note that thin coat render systems are usually designed to be self coloured.
✓ Final finishes. This involves the re-application of the external rainwater, soil pipes and the other external details.
If you’re considering rendering your house or property, then you’d most likely want to know whether or not applying for a planning permission will be needed. In several cases, planning permission will not be required for the maintenance, repair as well as replacement of the existing render on your building. These activities are covered by what’s called “Permitted Development Rights, which allows you to carry out some activities without having to apply for a planning permission but always subject to following some strict guidelines. For rendering, as long as the material (render) possesses an identical appearance to those existing on the house as well as same colour, then you will not require a planning permission. However, there are a number of projects that have been highlighted in which a planning permission would be required. These includes the following:
✓ Re-rendering in a colour that different from the original one used on the house or building.
✓ Rendering over brickwork which was not originally covered.
✓ Rendering over pebbledash
✓ Removing pebbledash and replacing it with render.
Another exception to the Permitted Development rights are for houses in conservation areas, national parks or areas of outstanding national beauty.
Although, you wouldn’t normally require to submit a planning application for approval before you apply render, but in truth it’s actually a bit of a grey area which isn’t totally clear and doesn’t allow for much freedom or creativity. And due to this fact, homeowners who wants an absolute peace of mind may opt to apply for planning permission just in case. It’s also worth noting that whether or not a planning permission is required, a huge rendering work will need to comply with building regulations which includes the need to insulate walls on the inside or outside as part of the work on several older properties .
Rendering a house’s external walls is one of the cheapest and most effective ways by which a building can be made waterproof and also good looking. If you’re thinking about rendering your house, figuring out the cost of completion is usually one of the most important things you’ll have to consider before you proceed and if you don’t know where to start, finding an experienced tradesperson who possesses several years of experience as well as the ability to overcome the different issues that he may be faced with while on the project is paramount. If you’re able to get one, however, you should know that they rarely come cheap.
When trying to determine the accurate house rendering cost estimate , a tradesperson will put into consideration a great number of factors. Even at that, a rough estimate still requires both skills and expertise to be able to take into account all the necessary factors. In general, a typical 3 bedroom home in the UK will cost within the range of £4000 to about £5500 for a complete render job on the outside and covering from top to bottom.
Usually, the most important factor which play the biggest role when determining rendering costs is the area that’s going to be covered by the render mix. Professional contractors will provide a quote based on the rendering costs per square metre. Below are some rough estimates of rendering costs of properties depending on their size (without VAT).
✓ For a small mid terrace house of about 40 to 50 square metre, the total rendering cost estimate is £3000 to £4000.
✓ For a large mid terrace house of about 70 to 180 square metre, the total rendering cost estimate is £3000 to £5000.
✓ For a three bedroom detached house of about 100 to 160 square metre, the total rendering cost estimate is £4000 to £5500.
We can help you get more wall rendering work with our qualified job leads and boost your business.
Join today