Bamm HUB LTD
Based: in Ramsbottom, BL0 9BJLatest review
Graham G., DY12
Building work | Wall Rendering in Bewdley
Decided not to go this route, to expensive.
Are you seeking Wall rendering in Grange-over-sands? Our network of installers can help with your project. Every one of our Builder in Grange-over-sands are inspected so you can see local write-ups, when the business was created, rankings, satisfaction and also day rate, allowing you to make the ideal decision on who to employ. Allow us take the headache out of finding as much as 4 experts for your Wall rendering project.
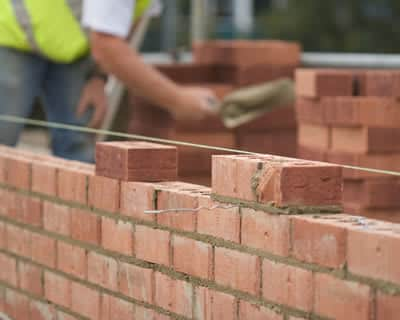
Wall surface Rendering look appealing and also make a building look its ideal.
To guarantee the continued security of these wall surfaces, rendering is frequently needed and it's great at stopping weather damage to the brickwork. Without making, walls may only last in between five and also 10 years prior to they begin to deteriorate.
With wall rendering, not just do you make certain a structure's strength, yet the walls will be a lot more appealing too as well as less complicated to repaint. Naturally, you'll have additional security versus natural environments also.
And in today's globe you don't have to wait till the summer to have actually wall surface rendering carried out. New innovations mean that the drying process is now much quicker.
Making your walls has actually never ever been more affordable and also specialist interest won't cost a fortune. With enhanced life span, the less expensive costs make providing much more budget-friendly.
Getting Wall Rendering Quotes
We will provide approximately four Wall rendering pros in your area, who will certainly supply quotes for the work you desire done. You'll obtain a property visit from specialists in Grange-over-sands that'll assist you to pick the best Wall rendering for your home before carrying out the installation. Enter your postcode to start searching currently.
The regular cost of Wall rendering is £5000. Costs vary based on the materials and the company chosen. The upper price range can be as high as £5750. The material costs are normally about £1250
| Avg. price low | Avg. price low |
|---|---|
| Avg. price | Avg. price |
| Avg. price high | Avg. price high |
£6300
£4725
£3150
£1575
£0
| Labour cost | £3,500 | |
| Material cost | £1,250 | |
| Waste removal | £250 |
Requests for quotations in Grange-over-sands in June 2026
Requests for Wall rendering quotations in Grange-over-sands in June 2026. 0% change from May 2026.
Requests for Wall rendering quotations in Cumbria in June 2026. 0% change from May 2026.
Grange-over-Sands is a community and civil parish situated on the north side of Morecambe Bay in Cumbria, England. Travelling by road, Grange Over Sands is 13.1 miles (21.1 kilometres) to the south of Kendal, 14.9 miles (24.0 km) to the east of Ulverston, 25 miles (40 kilometres) to the east of Barrow-in-Furness and also 28.1 miles (45.2 kilometres) to the west of Lancaster. Historically part of Lancashire, the town was developed as a metropolitan area in 1894. Because 1974, adhering to local government re-organisation, the town has been administered as part of the South Lakeland district of Cumbria, though it remains part of the Duchy of Lancaster. It had a population of 4,114 at the 2011 Census.
Decided not to go this route, to expensive.
Answer a few quick questions, so we can match you with local builders who can help.
Get free, no-obligation local wall rendering quotes from 4 verified builders working in Grange-over-sands.
Compare customer reviews, services and prices, and choose the right tradesperson for you.
Would highly recommend, they found me a firm which I was happy with a quote they give me and went ahead and had my job done within 2 days of enquiring.
Good easy way to find a selection of trades you need all in one place.
Love Local Quotes it's a big part of my Business I would recommend to anyone
Rendering a house comes with a plethora of benefits. Not only is it able to brighten up houses that looks tired especially those with damaged brickwork or having discoloured render, but its also the final step of external wall insulation.
If you own a 3 bed house, you’ll probably want to know just how much it’ll cost to have it rendered. If yes, then you’ve come to the right place! In this article, we aim to look at the cost of rendering a house using the standard 3 bed house as an example. Firstly, it should be stated that there are numerous factors that affects the price of a rendering a house which includes the rendering type, the size of the house, the ease of access, the prep work required, whether or not scaffolding will be needed as well as your location and the quality of the contractor your hire. Out of all these factors, the most significant variables are probably the type of rendering you go for and the size of the house.
There are three types of render and the one you opt for will play a key role in the price of your 3 bed house. In this article, we’re basing our cost estimate for a 3 bed house (3 bed detached) on the size ranging from 110 per square metre to 160 per square metre. Now let’s look at the cost per square metre of each rendering type.
✓ The silicone or acrylic thin coat render is usually the most expensive option of the lot due to the fact that they’re the newest and also the best type of render. This rendering type usually costs within the range of £45 to about £75 per square metre.
✓ The monocouche modern through coloured rendering type are able to offer a decorative and waterproof finish for walls. They usually costs within the range of £35 to about £70 per square metre.
✓ Sand and cement render type is the traditional type which has been applied for several years. This rendering type usually costs within the range of £20 to about £45 per square metre.
Did you try rendering a wall but it doesn’t turn out the way you would have hoped for? Or perhaps you’ve been watching your wall render gradually deteriorate over time. Regard of your purpose, learning how to repair render cracks on wall is usually a great skill to have with your home maintenance in mind. However, whenever these crack are too large or difficult, we’d recommend you call in a reliable professional who can guarantee the best results for help. In this guide, we’re going to take you through the wall render repairing process. Let’s have a look!
No matter how solid a building material is, over time it’ll yield to the elements. When it comes to wall rendering it may be a case of too much sunshine or a costly mistake in the application process, but in truth, it cracks just because it cracks.
In order to repair render cracks, you’d have to start with a removal of damaged or cracked render. You’ll have to remove all the render or just a small section depending on the area you’re working on. If you’re able to clean all of the existing render as well as the paint over it all (both old and new), then removing a small section would work better as it makes it look neat and redone. Upon the removal of the existing render, the next important step would be to remove all loose material as well. Once done, you can then leave for up to 2 days to allow any trapped moisture to come out. Unfortunately, if the rains you’d have to wait till that dries too before you proceed.
Once dried, you can buy a pre-prepared render mix which already contains cement, lime and sand. Mix a 20kg bag with 4 litres of water (or check the product instructions and follow strictly), the mix to a fine consistency. Render is quick to dry, so you’d want to apply within 30 minutes of mixing. Make use of a trowel to apply the render on the affected spots and blend with the surrounding area.
Rendering a house’s external walls is one of the cheapest and most effective ways by which a building can be made waterproof and also good looking. If you’re thinking about rendering your house, figuring out the cost of completion is usually one of the most important things you’ll have to consider before you proceed and if you don’t know where to start, finding an experienced tradesperson who possesses several years of experience as well as the ability to overcome the different issues that he may be faced with while on the project is paramount. If you’re able to get one, however, you should know that they rarely come cheap.
When trying to determine the accurate house rendering cost estimate , a tradesperson will put into consideration a great number of factors. Even at that, a rough estimate still requires both skills and expertise to be able to take into account all the necessary factors. In general, a typical 3 bedroom home in the UK will cost within the range of £4000 to about £5500 for a complete render job on the outside and covering from top to bottom.
Usually, the most important factor which play the biggest role when determining rendering costs is the area that’s going to be covered by the render mix. Professional contractors will provide a quote based on the rendering costs per square metre. Below are some rough estimates of rendering costs of properties depending on their size (without VAT).
✓ For a small mid terrace house of about 40 to 50 square metre, the total rendering cost estimate is £3000 to £4000.
✓ For a large mid terrace house of about 70 to 180 square metre, the total rendering cost estimate is £3000 to £5000.
✓ For a three bedroom detached house of about 100 to 160 square metre, the total rendering cost estimate is £4000 to £5500.
If you’re considering rendering your house or property, then you’d most likely want to know whether or not applying for a planning permission will be needed. In several cases, planning permission will not be required for the maintenance, repair as well as replacement of the existing render on your building. These activities are covered by what’s called “Permitted Development Rights, which allows you to carry out some activities without having to apply for a planning permission but always subject to following some strict guidelines. For rendering, as long as the material (render) possesses an identical appearance to those existing on the house as well as same colour, then you will not require a planning permission. However, there are a number of projects that have been highlighted in which a planning permission would be required. These includes the following:
✓ Re-rendering in a colour that different from the original one used on the house or building.
✓ Rendering over brickwork which was not originally covered.
✓ Rendering over pebbledash
✓ Removing pebbledash and replacing it with render.
Another exception to the Permitted Development rights are for houses in conservation areas, national parks or areas of outstanding national beauty.
Although, you wouldn’t normally require to submit a planning application for approval before you apply render, but in truth it’s actually a bit of a grey area which isn’t totally clear and doesn’t allow for much freedom or creativity. And due to this fact, homeowners who wants an absolute peace of mind may opt to apply for planning permission just in case. It’s also worth noting that whether or not a planning permission is required, a huge rendering work will need to comply with building regulations which includes the need to insulate walls on the inside or outside as part of the work on several older properties .
We can help you get more wall rendering work with our qualified job leads and boost your business.
Join today