Cape Decorators
Based: in Glasgow, G71 8NULatest review
Elizabeth S., PA1
Painter | Interior in Paisley
Work starts on the 13th Feb 2018, However with the speed of contact and personal visit, I feel very confident I have cho...
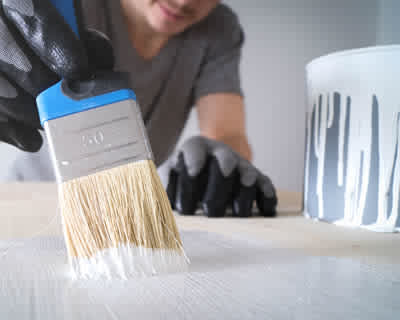
Interior painting can be a really cost-effective technique to brighten up the interior of your home. Painting is often accomplished as a DIY job, but experienced painters and decorators can assure the best appearance and ensure that your decoration is going to look its best for as long as possible.
You will typically devote more time to preparing to paint than actually painting. It is crucial to clean and prepare all walls and ceilings prior to painting, along with to mask off any regions that should not be painted over like skirting, architrave, plug sockets and light switches. Cover furnishings and carpets or flooring in the area with dust sheets to protect from any spills. If you are painting inside, employ a primer coat as a base then multiple layers of paint, leaving each layer time to dry in between.
Interior painters and decorators can give you lots of recommendations about paint and help you select the most suitable colour palette for your internal rooms.
The average cost of a Painting and decorating is £800. Costs vary based upon the materials and the contractor chosen. The upper price range can be as high as £920. The material costs are mainly around £200
| Avg. price low | Avg. price low |
|---|---|
| Avg. price | Avg. price |
| Avg. price high | Avg. price high |
£1100
£825
£550
£275
£0
| Labour cost | £560 | |
| Material cost | £200 | |
| Waste removal | £40 |
Requests for quotations in Isle Of Colonsay in June 2026
Requests for Painting and decorating quotations in Isle Of Colonsay in June 2026. 0% change from May 2026.
Requests for Painting and decorating quotations in Inner Hebrides in June 2026. -100% change from May 2026.
Requests for quotations in Greenock in June 2026
Requests for quotations in Paisley in June 2026
Requests for quotations in Gourock in June 2026
Requests for quotations in Port Glasgow in June 2026
Requests for quotations in Erskine in June 2026
Colonsay is an island in the Inner Hebrides of Scotland, located north of Islay and also south of Mull. The genealogical house of Clan Macfie and the Colonsay branch of Clan MacNeil, it remains in the council area of Argyll as well as Bute as well as has an area of 4,074 hectares (15.7 sq mi). Lined up on a south-west to north-east axis, it gauges 8 miles (13 kilometres) in length and reaches 3 miles (4.8 km) at its largest point. The island's population was 124 as recorded by the 2011 census an increase of almost 15% considering that 2001 when there were 108 normal homeowners.
Work starts on the 13th Feb 2018, However with the speed of contact and personal visit, I feel very confident I have cho...
Answer a few quick questions, so we can match you with local decorators who can help.
Get free, no-obligation local painting and decorating quotes from 4 verified decorators working in Isle Of Colonsay.
Compare customer reviews, services and prices, and choose the right tradesperson for you.
Would highly recommend, they found me a firm which I was happy with a quote they give me and went ahead and had my job done within 2 days of enquiring.
Good easy way to find a selection of trades you need all in one place.
Love Local Quotes it's a big part of my Business I would recommend to anyone
Yes, painters and decorators can repair stained, damp or mouldy walls. Usually, this process will involve stripping away the damaged paint and treating the area with specialist paint. After this is done, the damaged sections can be repainted to match the room.
You should always wait until plaster is dry before painting. The time this will take varies depending on the room and property, but in general, it will take about a week. Your plasterer will tell you how long it is best to leave it before covering or painting their work.
How To Paint A Room
Painting is a joyful task and it’s quite obvious why it’s one of the most popular DIY projects. Whether you’re painting as an experienced DIYer or as a newbie, this step by step guide will put you in the right direction. However, if you lack the confidence to carry out this task, then we’d recommend you get in touch with a seasoned professional who can guarantee the best results for help. This way, you get to save some time and additional money that would have resulted from possible costly errors.
So just before you head right into the task, there’s the need to determine the type of pain finish you would love to use which is to choose a colour. Now let’s get started!
• Prepare the room
✓ Remove all objects as much as you can from the room and cover the remaining furniture or objects with a sheet.
✓ Fill all holes on the surface to make for an even finish.
✓ Wash the wall with the help of a damp sponge. A sugar soap or diluted washing up liquid will work just fine.
✓ Tape the edges of objects you do not wish to paint like light switches, plug sockets and the likes.
• This step can be skipped if painting on an existing paint, but it’ll advisable to dilute small quantity of your selected paint to patch prime the holes that you’ve filled. If you have a large number of holes that was filled, then priming them would be smart.
• Mix or stir the paint thoroughly in a paint kettle to ensure an even and perfect mix.
• Now you’re ready to start painting! Start from the edges to form like a frame to work within with your roller. Once done, leave for about 4 to 6 hours to dry.
• For the second coat, simply repeat the above step to complete your painting project.
Can You Paint Over A Wallpaper?
According to some painting and decoration experts, painting over a wallpaper can never produce a result that’ll be as good as painting on a blank or naked wall. However in the event whereby there’s a pressing need to quickly beautify a room, it’ll be totally understandable if you don’t want to go through the hassle of the time consuming old wallpaper removal process.
Therefore, the short and simple answer to this question is yes, it’s absolutely possible to paint over a wallpaper and get a good outcome so far you don’t rush the process. To ensure your success if you want to paint over a wallpaper, there’s also the need to use the right tools and techniques. And just like any other DIY project, proper preparation before commencement is key.
If you’re going to paint over a wallpaper, many of the tools you’ll need to acquire are the standard painting and decorating products. This means that they can be easily procured at many DIY stores. To paint over a wallpaper, you’ll need a paint roller, top quality paint brushes, joint compound ( you’ll only need this in situations whereby your wallpaper is damaged or peeling), oil based primer, tape, sandpaper, paint ( can be water, solvent or oil based paints) as well as drop clothes ( for the protection of your furnitures).
As a rule of thumb, if you can easily remove the existing wallpaper, then you probably should before you start to paint the walls. However, if removing the wallpaper seems to be a pain or can significantly damage your wall, then it’ll be smart to simply paint over it. But before you proceed, you must also note that painting over the wallpaper will make it even harder to remove later in the future.
We can help you get more painting and decorating work with our qualified job leads and boost your business.
Join today