


Interior work | Plastering
Perth - PH2
Enquiry from: Alan D
Start Date: Immediate
Installing new kitchen and have removed old tiles. Need two walls plastered or screed.
The regular cost of Plastering is £750. Costs fluctuate based on the materials and the firm hired. The upper price range can be as high as £862.5. The material costs are typically about £187.5
| Avg. price low | Avg. price low |
|---|---|
| Avg. price | Avg. price |
| Avg. price high | Avg. price high |
£1000
£750
£500
£250
£0
| Labour cost | £525 | |
| Material cost | £188 | |
| Waste removal | £38 |
Requests for quotations in Aberargie in June 2026
Requests for Plastering quotations in Aberargie in June 2026. 0% change from May 2026.
Requests for Plastering quotations in Kinross-shire in June 2026. 0% change from May 2026.
Requests for quotations in Perth in June 2026
Requests for quotations in Fort William in June 2026
Requests for quotations in Corrour in June 2026
Requests for quotations in Kinlochleven in June 2026
Requests for quotations in Ballachulish in June 2026
Aberargie is a village in the south east of Perth and Kinross, Scotland. It lies on the western edge of the old Abernethy Parish along the River Farg, which is where it derives its name from. Aberargie is about 1.6 miles west of Abernethy and 2.2 miles south-east of Bridge of Earn.
Aberargie can be dated back to at least 460AD, as this was when the Pictish Chronicle listed it as part of Nechtan's land grant. It's highly likely that it has been in existence for a lot longer. Formerly, the community thrived by using the River Farg to operate water mills for sawing timber and milling flax and meal. The mills stopped operation by the early 20th century and the most complete mill was destroyed in the 1950s.
Archaeologists have found neolithic flints in the village as well as Scottish Medieval pottery. They have also found flintlock rifle and pistol flints, indicating that there has been a settlement at Aberargie for an extensive amount of time.
If your home in Aberargie needs a replacement boiler, ensure that you get quotations from at least three respected installers.
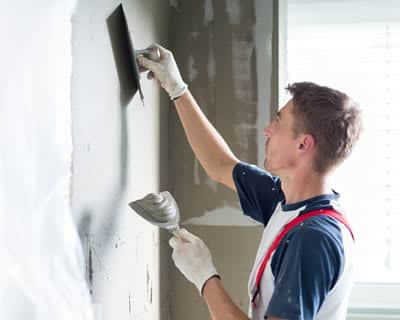
Perth - PH2
Enquiry from: Alan D
Start Date: Immediate
Installing new kitchen and have removed old tiles. Need two walls plastered or screed.
Perth - PH2
Enquiry from: Irene M
Start Date: Less than one month
Internal plastering around recently installed doors and windows. Requires to be done to a high standard. Are you the property owner: Owner of the property Property Type: Semi detached How many rooms a...
Perth - PH2
Enquiry from: Amanda K
Start Date: Immediate
Plastering ceiling in en suite Are you the property owner: Owner of the property Property Type: Detached Time scale: Less than one month How many rooms are you looking to have plastered: 1 Please...
Cupar - KY15
Enquiry from: Jason B
Start Date: Immediate
3 ceilings retaped and painted 1 room potentially 2 for coving 1 stairwell and landing painted
Kinross - KY13
Enquiry from: Naomi W
Start Date: Immediate
mrs requested quotes for plastering from a plasterer around kinross. they are considering a couple of projects at the moment.call anytime to arrange appointment to discuss. the information below is wh...
Cupar - KY15
Enquiry from: Grant R
Start Date: 3+ months
are you the property owner: owner of the property property type: detached other forms: home improvements agreed to receive quotes for selected products: yes please call to appoint time scale: 3-6 mon...
Perth - PH1
Enquiry from: Pauline W
Start Date: 1 to 3 months
plastering of lounge ceiling, with minor touch ups on walls
Perth - PH1
Enquiry from: Ben C
Start Date: Immediate
Textured plaster walls in our living room, hallway, stairs & landing to be skimmed to a clean finish ready for redecoration
Kinross - KY13
Enquiry from: Ann R
Start Date: Immediate
re roughcast single garage
Cupar - KY15
Enquiry from: Elspeth B
Start Date: Immediate
plastering on lath and plaster wall in cottage (living room)
Kinross - KY13
Enquiry from: Mrs W
Start Date: Immediate
Sorting cracks along edge of bedroom ceiling
Perth - PH1
Enquiry from: Tam S
Start Date: Immediate
Replace bathroom ceiling (2x3m) and repair damaged plaster ceiling section 1m Are you the property owner: Owner of the property Property Type: Semi detached How many rooms are you looking to have plas...
Perth - PH1
Enquiry from: Robert M
Start Date: Immediate
Living room walls and ceiling two bedrooms walls and ceilings hallway walls and ceiling Are you the property owner: Owner of the property Property Type: Other How many rooms are you looking to have pl...
Auchterarder - PH3
Enquiry from: Stephen H
Start Date: Immediate
Homeowner Plaster where tiles have been taken off Call to appoint
Answer a few quick questions, so we can match you with local plasterers who can help.
Get free, no-obligation local plastering quotes from 4 verified plasterers working in Aberargie.
Compare customer reviews, services and prices, and choose the right tradesperson for you.
Would highly recommend, they found me a firm which I was happy with a quote they give me and went ahead and had my job done within 2 days of enquiring.
Good easy way to find a selection of trades you need all in one place.
Love Local Quotes it's a big part of my Business I would recommend to anyone
Can You Plaster Over Tiles?
Yes, it’s absolutely possible to plaster over tiles but just because is possible doesn’t mean you should. Plastering over tiles is an option but it’s not recommended by experts due to several reasons. A good example is the fact that a tiled environment is in no way a suitable environment that can serve as a good bonding surface for a plaster. For the success of a plastering project, there’s the need for the surface to be able to bond to the PVA base coat. Due to fact that most tiles are slippery in nature and also lack of the ability to be able to absorb moisture, the PVA base coat layer will not be able to bond to the tiled surface, which will ultimately make for a weak surface upon the application of the plaster. Consequently, the plaster will easily flake and fall from the wall.
The inability to drill into the tiled wall surface after plastering is one of the major disadvantages that also arises when you decide to plaster over tiled surfaces. Most tiled surfaces are found in kitchens and bathrooms which are going to need appliances such as sinks, lavatories, kitchen counters and lots more. These appliances are designed to be installed on solid surfaces which would not be an easy task to carry out on tiles knowing there would definitely be great cracks or damages.
The best tip you’ll get if you’re considering to plaster on a tiled surface, is that detaching tiles from a surface can easily be done with a hammer and chisel, and that would save you a host of problems later in the future. However, if you still wish to plaster on your tiled walls, then you best bet would be to get a Blue Grit bonding agent. It works better than PVA and only needs one coat.
There are several different kinds of plastering. ‘Dot and dab’ refers to a base layer of plasterboard which is attached to a wall using ‘dabs’ of adhesive. ‘Floating’ is a technique where a backing or undercoat plaster is applied to walls. ‘Skimming’ or ‘reskimming’ refers to the very thin final decorative layer of plaster.
Can You Plaster Over Artex?
The short and simple answer to this question is yes, you can plaster over Artex. However, you must also note that plastering over Artex may not be the best choice as Artex is porous and as such, you’d have to detach the stripping so as to get a smooth and even coating. In the event whereby your ceilings or walls have Artex on them, you’ll have to smooth the Artex in order to obtain a plaster of solid coat.
✓ Preparing Artex for plastering. First and foremost, you’ll have to detach any bumps before you can plaster over the Artex. Do note that you don’t have to completely remove the Artex, all that’s needed is just enough to get a coat of plaster. Make use of a scraper to get rid of the bumps on various Artex designs like swirl and bark. Once you’re through getting rid of as much bumps as possible, there’s the need to seal the Artex due to the fact that it can absorb the moisture out of the plaster which will cut the time to get a good finish to little or nothing. You can use a PVA and water mix to do the job!
✓ The PVA mix. This is done to seal off the porous Artex in order to stop it from absorbing moisture from your plaster which can make it start to crack and crumble. To do this, simply mix half PVA and half water, then use a brush to paint the mixture over the plastering area. Once done, you can give the plastering surface about two to three coats and wait for the solution to dry off within a hour or two.
Plastering over Artex is not as hard as it seems, but if you lack the confidence to complete the task, simply contact a professional for help.
How To Plaster A Wall
In order to plaster your wall successfully, you’ll firstly need to get the appropriate tools and materials for the job in place. The tools you’ll need to have includes a trowel and bucket trowel, plasterer’s float, corner trowel, hawk board, two buckets, mixing stick or a paddle, adequate plaster, PVA , dust sheets, clean water, sandpaper, stilts or step ladder as well as a dust mask.
✓ Prepare the wall. You’d have to make sure that you lay down a dust sheet so as to protect your floor and also gather any possible spillage or debris of plaster, before you start working on the walls. Get rid of all the dirt, dust and debris as this is very important for the success of your project if you’re going to be plastering on a worn out and old wall. Also, cover the holes and cracks in the walls with a screen tape
✓ Apply PVA to the wall. This will help ensure the layer you’re using will not dry out at the same time.
✓ Mix the paster. Mix the plaster according to the instructions given in the manufacturer’s manual.
✓ Apply the plaster onto the wall. Upon cleaning of the walls and successful mixture of the plaster, the next step is to apply the mixture to the wall using the hawk board, trowels and a floating tool.
✓ Skim and smooth. After the the first coat has dried after waiting for about 30 minutes, the next step will be to wipe out the bumps and lumps using a trowel to smooth over the surface. Once this is done you can then scrape the wall with a devilling float.
✓ Apply the second coat of plaster
✓ Apply the finishing touches. This includes polishing your work by adding some water to the surface with a spray gun and using the trowel to further smoothen out the surface.
✓ Painting and wallpapering.
We can help you get more plastering work with our qualified job leads and boost your business.
Join today