
15 Jun
Conservatory Cleaning
York - YO62
Enquiry from: Pamela H
Start Date: Immediate
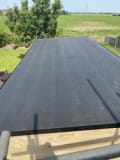
Conservatory roof cleaning


Over 610 reviews & an average rating of 4.4/5 stars, you'll find the right pro
Use the shortlist button to select up to 4 tradespeople, enter your project details and press send
Get up to 4 quotes from local Handymans near you






York - YO62
Enquiry from: Pamela H
Start Date: Immediate
Conservatory roof cleaning
Scarborough - YO13
Enquiry from: Ian C
Start Date: Immediate
Roof panels keep slipping and are difficult to locate so leaks. Ideally looking for full replacement polycarbonate roof
Scarborough - YO12
Enquiry from: Philip S
Start Date: 1 to 3 months
We have a lean to type conservatory 4 metres x 2.5 metres. 5 of the 6 roof panels have “ blown “ and need replacing
Scarborough - YO12
Enquiry from: Michael G
Start Date: Less than one month
Conservatory roof leaks in multiple places during heavy rain
Scarborough - YO12
Enquiry from: Brian A
Start Date: Immediate
Full gutter clearance please
Scarborough - YO12
Enquiry from: Don G
Start Date: Immediate
Leak in conservatory roof
York - YO62
Enquiry from: Clarissa P
Start Date: Immediate
Gutter cleaning required in our house
Scarborough - YO12
Enquiry from: Simon H
Start Date: Immediate
Wanting kitchen cupboard doors replacing or painting
Scarborough - YO12
Enquiry from: Helen B
Start Date: Immediate
Conservatory roof leaking
Pickering - YO18
Enquiry from: Jennifer S
Start Date: Immediate
Outbuilding cleared- garden table, chairs, barbeque, 2 lawn mowers, wood and various other rubbish
Scarborough - YO12
Enquiry from: Roman D
Start Date: Immediate
Quotes for conservatory roof panels holes in them
Scarborough - YO12
Enquiry from: Mohammad A
Start Date: Immediate
It is a flat roof conservatory. Water dew accumulating under the flat roof. Side wall glasses also jazzy. Possibly some leaking from roof at door
How much do Handymans in Pickering charge?
Prices for Handymans around Pickering can fluctuate depending on the type of service that you want to have actually done in your residence. It's the inquiry we are asked a lot "how much do Handymans in Pickering charge?". It's definitely better to have an idea of how much a Handyman will likely cost for their work. Rates will probably fluctuate based on the products and also the tradesperson selected. The table shows the kinds of task that Handymans normally do and the standard price range of these projects. Some tasks take longer to complete than others so costs do vary by task.
Tasks that Handymans in Pickering can do:
| Handyman job | Handyman cost in 2026 |
|---|---|
| Painting and decorating in Pickering | £600-£920 |
| Replacement Kitchen doors in Pickering | £563-£3,000 |
| Bedroom fitting in Pickering | £1,500-£2,300 |
| Conservatory repairs in Pickering | £1,125-£1,725 |
| Driveway cleaning in Pickering | £263-£648 |
| Gutter cleaning in Pickering | £48-£118 |
| Conservatory cleaning in Pickering | £225-£345 |
| Demolition in Pickering | £1,720-£4,330 |
| Garden shed in Pickering | £450-£690 |
| Rubbish clearing & removal in Pickering | £188-£288 |
| Aluminium repair in Pickering | £240-£360 |
| Window repair in Pickering | £268-£402 |
| Wooden window repair in Pickering | £320-£480 |
| Graffiti removal in Pickering | £208-£312 |
| Roof cleaning in Pickering | £560-£2,340 |
| Driveway repair in Pickering | £1,520-£2,280 |
There are a bunch of things a handyman can do around the house, so if you’re looking for a reason to hire one, you’d definitely find plenty. First and foremost, a handyman is basically a well versed, skilled and experienced professional who possesses the ability to carry out a plethora of tasks as well as repairs. While not all local authorities require handymen to have a license or carry an insurance policy, some handymen do have insurance. Generally, their rates vary based on their experience as well as specialities.
Handymen are able to handle a multitude of potential jobs in and around the house. These ranges from small tasks, installations, assembly, indoor or outdoor building or repair jobs. They are available to help out with a wide array of odd jobs around the home at a very reasonable price. So, what are some of the jobs a handyman can do in a home? Let’s take a look!
A sudden appearance of graffiti on your property carried out by some vandals can be a real concern. Since you know it’s your responsibility to have it cleaned, the question becomes would you rather call in a professional or have it cleaned yourself. While calling in a professional may be costly, removing graffiti by yourself won’t be easy either especially if it’s done on brick. Bricks are known to be porous which enables paint to sink with ease inside all of the surface’s grooves. Unlike wood, they can’t be scraped and if it happens to be an internal wall, it can’t be sand- or water-blasted. So, what is the best way to remove graffiti?
Well, your best bet would be to incorporate chemical and gel masonry stripper. And while stripping of the surface is not a complex task, it does involve a number of applications of stripper and multiple scrubbing which makes it very time consuming.
Basically, a fresh and wet paint should be soaked up with am absorbent material without wiping the paint in order to spread the stain. Once done, you can then proceed to apply a suitable solvent like white spirit. After this, wash the area using a degreasing agent taking care in the disposal of the run-off material.
With dried paint, simply scrape off the paint as far as possible and apply a paint removal using the following steps:
Generally, a paved driveway is always subjected to regular usage and yours isn’t likely to be an exception, otherwise you won’t be here. Regular usage automatically necessitates regular maintenance of the driveway in order to extend its lifespan, make your property safer and add more value to it. This maintenance will involve a frequent inspection of the paved driveway so as to identify and repair divots, cracks as well as rutting. Paved driveways usually have a lifespan ranging between 15 to 20 years, but this can only be guaranteed when backed by regular maintenance activities. Failure to provide your paved driveway with a regular maintenance will lead to a rapid deterioration within just a couple of years after installation.
The issues commonly faced by paved driveways is usually different based on several factors such as the weather, your location, your property’s sub base as well as some other elements. The ability to identify the problems and solve or repair them on time is key to success while it’s also save you some time and money. In this article we’re going to look at how to go about do-it-yourself tasks that involves minor cracks. More intense damages are advised to be handled only by professionals.
✓ Prepare the area. Clear the debris, weed the plants or vegetation (if any).
✓ Use a strong spray from a garden hose to wash clean the cracks
✓ In the event whereby the crack is deep, simply fill it until it reach about a quarter inch of the surface with sand.
✓ Tamp down the sand to make it more compact.
✓ Apply a patching compound to the surface of the cracked paved driveway.
✓ Leave it for some time to cure.
✓ Once cured, you can then apply your sealant.
Keeping water away from your house is of great importance and hence, the installation of a roof guttering system to serve this purpose. However, in order to perform this task effectively and seamlessly, there’s a need to clear out the clogging dirt and debris from the gutter and ensure it’s free from water-blocking obstacles at all times. Although there are a number of ways to achieve this, but the major cause of concern for several home and property owners is having to work at heights or on top of a ladder to get the job done. This is a very dangerous endeavour especially if you do not have the confidence required to pull it off. As a result, we’d strongly recommend you hire the services of a reliable professional who possess the skills when it comes to working at heights and delivering a highly effective clean. Fortunately, there are a couple of ways you can get to clean your gutters without having to climb any ladders. Let’s take a look!
First and foremost, there exists a common argument which revolves around graffiti. While some particular set of people believe that graffiti is vandalism and a punishable offence, other believe it’s actually a form of art which should be encouraged for more to be done. There exists some graffiti with great value, however it must be stated that not all (if not most) graffitis are pleasing to the eye. If you happen to live in an environment that’s rife or perhaps your very own property is vandalized, the detracting aspects of graffiti can be highly frustrating. Therefore, if graffiti is carried out on a property without the consent or permission of the property owner, then this is considered to an illegal act. If you have one done on your property, you’d probably want to know who will be responsible for the graffiti removal. So, who is responsible to removing graffiti which suddenly shows up? Although there are varying rules in various councils, the general rule of thumb is the person responsible for graffiti removal is owner of such property. In other words, if it happens to be on your personal or business property then it’s your responsibility to have it cleaned. However, if it appears on a public or council property, then it’ll be the responsibility of the council to have it removed.
You can report any form of graffiti on your property, but different councils have their unique ways for making such reports. For instance, the City of London offers an app dedicated to help home or property owners report both vandalism and fly tipping. Other states may provide phone numbers and email addresses where you report graffiti to the authorities.
How Much Does It Cost To Have Roof Cleaned?
If your roof is dirty, it’s highly recommended that you have it cleaned by a reliable and professional roof cleaning contractor who specializes in cleaning of all types of roofs rather than making it a DIY project or hiring an odd job man who is a jack of all trades. This is due to fact that major mistakes like incorporating inappropriate cleaning agents, pressure as well as wrong cleaning techniques can have a serious negative impact on your home while also putting in mind the several dangers that comes with working at height. However, when hiring a professional roof cleaning person or company, do make sure that the cleaner is fully insured, possesses the relevant training working at height and has the ability to operate access machinery. In other words, when it comes to roof cleaning where safety is the first priority, it shouldn’t always be about the price of the job but the quality of the service you’re going to receive.
There are several variables that determines the cost of cleaning a roof and these includes both the type of the roof in question as well as the size of the house. Let’s take a look!
✓ For a small semi detached or terraced house with a standard front and rear elevation with no side hips, the average cost of cleaning the roof usually starts from £390 and above.
✓ For a semi detached or detached house which is a free standing residential building, the average cost of cleaning the roof usually starts from £490 and above.
✓ For a averaged sized detached house which is a stand alone property, the average cost of cleaning the roof usually starts from £590 and above.
✓ For a large detached house featuring several additional roofs including a porch, double garage and even an extension, the average cost of cleaning the roof usually starts from £790 and above.
Answer a few quick questions to help us match you with the right Handyman
Receive no-obligation quotes from 4 Handymans working in Pickering.
Compare prices, customer reviews and services, and hire the right Handyman.
View our open Handyman jobs near you
Join today

