13 Oct
Flat Roof Repair
Great Yarmouth - NR30
Enquiry from: Grant F
Start Date: Immediate
Corner of roof by downpipe has rotten joist on flat roof


Over 201 reviews & an average rating of 4.5/5 stars, you'll find the right pro
Use the shortlist button to select up to 4 tradespeople, enter your project details and press send
Get up to 4 quotes from local Roofers near you



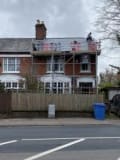

Great Yarmouth - NR30
Enquiry from: Grant F
Start Date: Immediate
Corner of roof by downpipe has rotten joist on flat roof
Harleston - IP20
Enquiry from: Richard P
Start Date: Immediate
Velux in bedroom, built-in blind has broken. require repair or replace blind if possible
Lowestoft - NR33
Enquiry from: Marie H
Start Date: Immediate
We need new gutters for the roof and possibly new or repairs for lower gutters. we would like a quote for yearly and 6 monthly gutter cleaning also please
Saxmundham - IP17
Enquiry from: Stephen F
Start Date: Immediate
Double Garage roof repair or replacement. Flat. Approx 5.5 x 5.5m. Currently grp
Lowestoft - NR32
Enquiry from: Barry S
Start Date: 1 to 3 months
Our tiled bungalow & garage needs moss removal & treatment
Great Yarmouth - NR31
Enquiry from: Costas A
Start Date: Immediate
Plastic roof replaced with felt
Lowestoft - NR33
Enquiry from: Hong T
Start Date: Immediate
I am looking for replacement flat roof or repair roof for shop ta ***
Lowestoft - NR33
Enquiry from: Stephen C
Start Date: Immediate
Flat roof on a garage and made good
Great Yarmouth - NR30
Enquiry from: Anthony D
Start Date: Immediate
Chimney repairs
Bungay - NR35
Enquiry from: Margaret S
Start Date: Immediate
Sun/light tunnel installed in small kitchen in bungalow
Bungay - NR35
Enquiry from: Margaret S
Start Date: Immediate
Light tunnel in a small kitchen with no window situated next to a living area, at present we have to put light on in kitchen whenever we are working in it
Beccles - NR34
Enquiry from: Teddy F
Start Date: Immediate
Pointing and making good round the bottom of the chimney only
Beccles - NR34
Enquiry from: Pauline A
Start Date: 1 to 3 months
Overall check up and replace a few tiles
Lowestoft - NR32
Enquiry from: Donna B
Start Date: Immediate
Re-pointing of chimney and repair
Great Yarmouth - NR30
Enquiry from: Stuart M
Start Date: Immediate
Large flat shop roof replaced
Great Yarmouth - NR31
Enquiry from: Jennifer R
Start Date: Immediate
I have a slate roof and need two cracked roof slates replaced
Beccles - NR34
Enquiry from: Paula W
Start Date: Immediate
One tile replaced at the back, easy access via garden front gutters to be cleared
Beccles - NR34
Enquiry from: Philip F
Start Date: Immediate
Poly-carbonate roof for conservatory has started to leak in heavy rain and high winds; probably caused by perished seal
Beccles - NR34
Enquiry from: Beryl B
Start Date: Immediate
Gutter cleaned out on front of house and rear checked
How much do Roofers cost? Costs for Roofers in 2026 can be very different depending on the kind of work that you want to have actually performed in your residence. It's the question we get asked a great deal "how much do Roofers charge?". It's often very good to have an idea of how much a Roofer are going to likely charge for their assistance. Prices will most likely fluctuate based on the materials and also the tradesman picked. The table shows the kinds of task that Roofers generally do as well as the standard cost series of these tasks. Some projects take longer to complete than others so costs do fluctuate by task.
View our Roofer cost guide View our Roofer advice| Roofer job | Roofer cost in 2026 |
|---|---|
| Velux windows in Beccles | £838-£1,268 |
| Tile or slate roofing in Beccles | £4,500-£6,900 |
| Flat roof in Beccles | £1,875-£2,875 |
| Commercial roofing in Beccles | £3,750-£5,750 |
| Flat roof repair in Beccles | £1,500-£2,300 |
| Gutter cleaning in Beccles | £75-£115 |
| Tile roof repairs in Beccles | £338-£518 |
| Chimney sweeping in Beccles | £75-£115 |
| Roof cleaning in Beccles | £1,480-£2,220 |
| Sun Tunnel in Beccles | £850-£1,250 |
How To Replace A Flat Roof
Is it high time you replaced your flat roof with a new one? If it’s time, then you probably shouldn’t waste another minute! Flat roofs come with multiple upsides and happens to be a lot more affordable than many other options (especially for starters). Not only do they add to your home’s curb appeal and requires a relatively low labour costs as there are minimal risks involved, but they’re also more accessible for maintenance purposes and aren’t as exposed to damage as a pitched roof. However, we’re not here to discuss the various benefits of installing a flat roof, but rather tell you how to install one. If you lack proper training and experience, we’d recommend you hire a trustworthy professional that can guarantee the best results.
• Wipe the entire roof system clean.
• Detach and replace rotted roof sheathings.
• Detach and replace rotted fascia
• Hire a qualified air conditioning professional to disconnect the existing AC units.
• Introduce new aluminium air conditioning stands and secure against the deck.
• Let you qualified air conditioning professional reconnect the existing AC units.
• Put in place the new air conditioning quick disconnects.
• Attach EPS fanfold insulation in such a way to cover the surface of the entire roof and secure it firmly in place.
• Attach the tie-in roof materials where necessary.
• Attach roofing membrane to cover the entire area of the roofing.
• Attach membrane to the entire roof’s perimeter.
• Attach new perimeter flashings (fascia bar, fascia cap and drip edge), secured on the centre at 6. Make use of a good sealant to secure the fascia bar or fascia cap’s top flange.
• Attach boots on plumbing seal and stacks.
• Identify the existing vent stacks and seal, and put curbs
• Put safety walk pad network from the access point of the roof to the air conditioning units.
• Attach rooftop signs for roof traffic personnel
• Tidy up and clear out the debris
How To Clean Roof Lights
If you have existing roof lights or perhaps you’re about to have them installed, it’s important to know just how to have them cleaned, even if you wouldn’t be doing it yourself. Generally, glass roof lights fitted in flat roof applications are more likely to be a major victim of staining and discolouration by several elements like rainwater, bird droppings, vehicle exhaust pollutants as well as tree sap. Therefore, just like any other parts of your home, periodic inspection of the units as well as regular cleaning is highly advised to help maintain their top performance for a lengthy period of time.
Firstly, when installing the roof lights, it’ll be helpful if its fitted at the right pitch so as to help keep the exterior clean as it enables the elements such as rainwater to run off the surface naturally. Cleaning roof lights involves working at height which can be very dangerous. Therefore, if you lack the skill and confidence to pull this off, it’s advisable to hire the services of a professional who can guarantee the best results for help. In this article, we aim to give you a good insight into how the roof light cleaning process works. Let’s have a look!
Rooflight Interior Cleaning
✓ Spread plastic under the roof light to catch dirt and spills
✓ Dust to wipe clear all loose dirt and cobwebs.
✓ Use a squeegee with a warm soapy water or any other glass cleaning product to clean the glass ( steer clear of any harsh chemicals or abrasive cleaners)
✓ Dry the roof light with a soft and lint-free cloth.
Rooflight Exterior Cleaning
✓ Access the roof safely with a specialist ladder
✓ Put mild detergent into a bucket and carry up to the roof before filling with warm water from a hosepipe
✓ Use the soapy water and a non-abrasive cloth or squeegee to clean the roof light, its surroundings as well as fixings.
Chimneys are certainly on top of the commonly overlooked features when it comes to cleaning a house. This is quite understandable given the fact that they’re not readily accessible and not in plain sight, hence, home and property owners tend to overlook the relevance of any chimney cleaning effort. But this can be a grave mistake! The importance of having your chimney swept on a regular basis cannot be over emphasized and even more so if it happens to be on a wood burner. Not only can a dirty chimney constitute fire hazard, but when left uncleaned it can also give rise to blockages which can lead to carbon monoxide poisoning. In fact, from 2014 to 2018, one of the top factors contributing to about 25% of home heating fires is due to lack of cleaning, mainly from solid-fueled heating equipment, mostly chimneys. Therefore, sweeping your chimney regularly is a safety precaution and when they happen to be on a wood burner, this exercise becomes a lot more important. With that in mind, the question that arises is just how often is sweeping of a chimney on a would burner needed?
Well, it’s strongly advisable to sweep chimney on a wood burner at least twice a year by a qualified professional depending on the usage. If you happen to own an oil burning fireplace, the same also applies. In other words, this means that regardless of the type of chimney you possess, the cleaning must be done regularly. However, most chimney would only need to be swept once in a year by a qualified professional.
In the UK, fireplaces are a very common addition to homes and property and reasonably so. Not only do they represent a great source of heat, but they’re also quite timeless in their beauty, thereby adding more value to your property. Now every fireplace possesses some sort of chimney, asides from the ones that are ventless. And while you might not be aware, every chimney poses a number of dangers which includes being a fire hazard and can also lead to carbon monoxide poisoning as a result of improper or lack maintenance.
Since your chimney will be clogged up over time with all sorts of soot and often cleaned from the top of the roof, cleaning of a chimney comes with a huge amount of risk. As a result, you run the risk of falling off if you decide to clean one by yourself. And even if you’re the type that’s comfortable being on high level places, you should know cleaning a chimney is not the most pleasant of jobs. It can be quite messy as accumulated creosote and soot can drop into your home causing a cloud which covers both the floor, furniture and any other thing you have in the room. Furthermore, chimney cleaning requires specialized skills and knowledge which professionals have acquired after several practices. For instance, missing out on a spot can result in an unchecked chimney fire or a masonry crack.
The simple answer to this question is, therefore, a big NO - you should leave the cleaning to the professionals. Professionals are not just limited to chimney cleaning; they’re trained to identify any structural issues while also being able to carry out a close analysis of the chimney. They’ll fix minor issues on site and give you a peace mind for any future wood burning activities.
How To Clean A Fibreglass Roof?
If you have a dirty fibreglass roof or perhaps you’re just planning to have one installed on a newly constructed house, then you’d probably want to know the best way to have your fibreglass roof cleaned.
Generally, fibreglass roofs are of great quality and happens to be a lot more resistant to moisture, heat, water and even fire when compared to the other alternative flat roofing materials. As a result, they require just a little maintenance but this doesn’t mean they should be totally ignored. Truth be told, cleaning of a fibreglass roof is as easy as it get, however, when it comes to working at height, skill and confidence is paramount to guarantee your safety. If you lack any of these two qualities, then it’s highly recommended that you sought the services of a reliable roof cleaning contractor who can do the work safely and perfectly. If you’re able to clean and maintain your fibreglass roof as you should, you wouldn’t have to think about replacement for about 20 to 30 years.
Cleaning is simple and doesn’t take much time. Now let’s take a look at the process.
✓ Preparation. Hose down the vegetation around the area with water to protect them. Once done, mix a gallon of warm water with one quarter cup trisodium phosphate and 1 quart of bleach. Put this mixture into a garden sprayer and sweep any dirt or debris off the roof with a broom.
✓ Application. Spray the mixture over the fibreglass roof, ensuring that it gets to all the necessary corners where dirt may be hidden. Allow this applied solution to sit for up to 15 minutes to loosen the stubborn stains and dirts on the roof.
✓ Finishing. Spray cold water to wash down all the solutions. If there’s still some dirts, you can repeat the process till the fibreglass roof is entirely clean.
Yes, it’s a dirty job, but every homeowner out there has got to do it! Your gutter needs to be free of dead leaves, birds’ nest and other debris as well as being through clean in order to perform its functions effectively. It’s just a part of the responsibilities that comes with owning a home. Dry leaves, tree branches and other materials build up in your gutters overtime especially during the dry summer and you won’t notice until the point where your gutters start overflowing during the first main rain of the season.
In the event whereby your dirty and clogged gutter is left unattended to, this can lead to several issues like a leaky gutter and mold, leaky roof and basements,cracked foundation, driveway and yard damage and several more which will definitely make you incur more unnecessary expenses. So the question is, how often should the gutters be cleaned? The answer is, it depends. According to several experts, gutters should be cleaned at least twice a year - which is once in the late spring and once in the late summer or early fall. However, there are a couple of factors that may make you have a rethink.
If you happen to have a pine tree growing above your house, it’ll be wise to consider inspecting your gutters every 3 months. This is because pine trees shed needles year-round and they usually have a lot of these needles to shed. In the situation whereby you’re located at a higher elevation, ice is will most likely be your greatest source of concern. Making sure that your gutters remain clean throughout the winter can be quite a headache, but damage to your roof cause by ice can be an even greater pain. Prevention is always better than cure.
One of the most popular choices for roofing materials are roof slates. There is a number of advantages that a roof slate has, hey can be aesthetically pleasing, they can also increase the potential selling value of the house and many more. Slate is a sturdy and resilient material that delivers waterproofing physical characteristics to a pitched roof. Unlike other roof materials which absorb water slates do not. Therefore, slate is the most resistant towards freezing and water damage.
Find out the pitch of your roof
Before beginning with the fitting procedure, you need to figure out the pitch of your roof. The roof pitch commands how much overlap is essential with each slate. This has been made a lot easier than the early days with the advancement of technology.
Find out the required overlap
Once you’ve found out the exact pitch of your roof accurately, take a look at the slate producer’s description. Each manufacturer will propose the obligatory overlap in order to form a firm and safe slate roof.
Roll out the roof membrane
Firstly, guarantee your joists or trusses are clean of any sheards or old nails that could harm the membrane. You will now have to roll the chosen roofing membrane along the roof trusses. It is always wise to start from one of the bottom corners and keep rolling it along to the other corner.
Secure the roof membrane
Once the membrane has been moved out, use thump nails to protect one edge. You will now have to pull the membrane taut and carefully fix it into position. Do this before adding any nails across the membrane at points of intersection with the trusses for extra stability.
Batten placement
This is done to find the proper assignment of the battens. For this, you will need two full-sized slates along with an under eaves slate. Carefully position the battens on the top of the roof on the top of the overlay. Make sure not to fix them down since it will be easier to move them around and make any adjustments.
The feasibility of this will depend on the roof’s strength, in particular its load bearing capabilities. This is simply because tiles are heavier than the metal sheeting. Normally a tiled roof will need to take a load capacity of 60kg per square metre. You will need a trusted roofing company to advise on this.
Answer a few quick questions to help us match you with the right Roofer
Receive no-obligation quotes from 4 Roofers working in Beccles.
Compare prices, customer reviews and services, and hire the right Roofer.
View our open Roofer jobs near you
Join today

