
31 Oct
Pitched Roof Repair
Keighley - BD21
Enquiry from: Mostak A
Start Date: Immediate
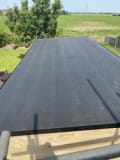
Leaking roof have solar panels on not sure where its leaking from


Over 456 reviews & an average rating of 4.4/5 stars, you'll find the right pro
Use the shortlist button to select up to 4 tradespeople, enter your project details and press send
Get up to 4 quotes from local Roofers near you





Keighley - BD21
Enquiry from: Mostak A
Start Date: Immediate
Leaking roof have solar panels on not sure where its leaking from
Keighley - BD21
Enquiry from: Mostak A
Start Date: Immediate
Submit your free quote for rated tradespeople
Bradford - BD5
Enquiry from: Sharon W
Start Date: Immediate
Need a slate fixing under my solar panels
Harrogate - HG1
Enquiry from: Robert D
Start Date: Immediate
Flat roof to replace
Wetherby - LS22
Enquiry from: Asif A
Start Date: Immediate
Submit your free quote for rated tradespeople
Liversedge - WF15
Enquiry from: Masood B
Start Date: Immediate
26ft x 16ft rubber roof on flat roof
Leeds - LS18
Enquiry from: Pummie M
Start Date: Immediate
Garage side trim board / soffit broken with strong gales, to replace
Bradford - BD9
Enquiry from: Christine L
Start Date: Immediate
Need 2 ridge tiles putting back and repointing
Pudsey - LS28
Enquiry from: Raf T
Start Date: Immediate
Roof cleaning
Bradford - BD10
Enquiry from: JENNIFER W
Start Date: 1 to 3 months


A quote for repointing the chimney stack and repairing the flaunching and capping, as identified in a level 2 survey. please advise whether any additional works are required
Batley - WF17
Enquiry from: Rafik T
Start Date: Immediate
Find where the leak is?
Keighley - BD22
Enquiry from: Kirsty P
Start Date: Immediate
Shared terrace chimney needs repointing and tidying up. Leaks into bedroom. Also there's a small, unused satellite dish attached to it that could do with removing
Bingley - BD16
Enquiry from: Ninan O
Start Date: Immediate
Submit your free quote for rated tradespeople
Batley - WF17
Enquiry from: Liz P
Start Date: Immediate
Chimney stack area and another roof leak to do
Bradford - BD8
Enquiry from: I
Start Date: Immediate
Had a velux window fitted 6 months ago and it’s leaking
Leeds - LS16
Enquiry from: Jp D
Start Date: Immediate
Gutters cleared of moss balls, leaves and weeds. particular concern for a valley between the two gables, with drain hole >1m back from edge, currently blocked with moss balls and overflowing
Leeds - LS10
Enquiry from: Martin D
Start Date: Immediate
Got blocked and got a new fixing
Pudsey - LS28
Enquiry from: Reuben S
Start Date: Immediate
A quote to see what i need to use my chimney
Otley - LS21
Enquiry from: Michael C
Start Date: Immediate
Quote for a Sun tunnel on landing
How much do Roofers cost? Costs for Roofers in 2026 can be very different depending on the kind of work that you want to have actually performed in your residence. It's the question we get asked a great deal "how much do Roofers charge?". It's often very good to have an idea of how much a Roofer are going to likely charge for their assistance. Prices will most likely fluctuate based on the materials and also the tradesman picked. The table shows the kinds of task that Roofers generally do as well as the standard cost series of these tasks. Some projects take longer to complete than others so costs do fluctuate by task.
View our Roofer cost guide View our Roofer advice| Roofer job | Roofer cost in 2026 |
|---|---|
| Velux windows in Otley | £1,059-£3,012 |
| Tile or slate roofing in Otley | £3,138-£11,113 |
| Flat roof in Otley | £1,341-£4,522 |
| Commercial roofing in Otley | £1,138-£6,438 |
| Flat roof repair in Otley | £512-£2,400 |
| Gutter cleaning in Otley | £48-£118 |
| Tile roof repairs in Otley | £178-£1,287 |
| Chimney sweeping in Otley | £75-£1,105 |
| Roof cleaning in Otley | £540-£2,005 |
| Sun Tunnel in Otley | £1,067-£3,000 |
Gutters are a crucial component of any roofing system. They’re designed in such a way to protect your home or property from serious water damage, but keeping them clean and in good condition is something that’s almost always forgotten or ignored. Do not be deceived even when rain water is still running from them or they don’t appear to be clogged. Failure to clean maintain your gutters can lead to a wide range of outcomes and they aren’t so pretty. According to experts, gutter cleaning should be done twice a year - once in the spring and once in the fall. In order to help you realize the importance of cleaning your gutters, we’ll look at some of the possible outcomes of a neglected gutter.
How To Replace Flat Roof Fascia
Whatever makes you decide to install your flat roof fascia by yourself and not a professional company, then you must have a clear idea of what to do and do it appropriately. If you lack proper training and experience, we’d recommend you employ a reliable professional to help with the task for the best results and save you some time and money. This step-by-step guide will give a clear insight on how to go about the replacement of your flat roof fascia.
The tools to be incorporated includes the fascia boards, table saw, plane, crimper, clamps, power nailer, compound saw and chalkline.
• Prepare and get all the necessary tools to complete the task before commencing as this would save you time from stopping and going back and forth looking for the next tool needed,
• Install the sheathing and board.
• Fix white fascias with at least 600mm centres ( a foiled fascia needs just 40mm centre) using a marine grade stainless steel plastic headed nails.
• Make a space of up to 10mm between the joints for possible building expansion, using super glue to secure the joints to just a side of the fascia.
• Place this directly on the fascia board’s top (if you’ll be installing ventilation) to create an air pathway.
• Take note that the type of roof to be installed will determine how you’ll have to install the fascia board. For instance, a hip roof permits you to attach the fascia board onto the roof in a quick fashion, whereas a gabled roof may need you to make markings on the board to achieve the right fit.
• Consider the depth of the fascia board as it also play a huge role in the installation of the fascia board. For instance, there’ll be additional weights on tiled roofs that will push up against the board. Therefore, if you do not get the appropriate amount of depth, it could eventually collapse.
How to repair a flat roof depends on the type of flat roof you have. We’ll talk about how to repair felt, asphalt, fibreglass and EDPM flat roofs yourself. But ultimately if you want the best finish, it’s best to ask a professional to repair your flat roof for you. Repairing a flat roof Whether you’ve got an old pour-and-roll type felt roof or a newer torch-on felt flat roof, you can get cracks, lifting around joints, leaks or dips. As a temporary measure, you can buy a special paint that you paint over cracks. For a more permanent repair, you can add a patch of torched-on felt or add a layer on top. Asphalt flat roof repair As your asphalt flat roof gets older, you may notice blisters, cracks or shrinkage and sagging around flashings. Again, you can use a paint on fix from a tin as a temporary repair, or add heat-applied flashing tape around flashing. For a more permanent fix you can use a liquid system, but many are only available to the trade market. You can also add a patch of torched-on roofing felt over a crack. How to repair a fibreglass (GRP) flat roof Fibreglass flat roofs are usually excellent, but problems can involve leaking flashing and cracks near upstands, trims or board joints. You can add acrylic sealant to cracks or holes for a good DIY repair, but a flashing problem is more difficult to fix. You’ll need to clean and sand the affected area of flashing, then laminate a 600g chopped strand mat into place, cure it and add a topcoat colour to match the roof. That sounds like a job better left to a specialist. EDPM rubber flat roof repair Rubber roofs often suffer from shrinkage when mechanical fixings haven’t been used near upstands, flashing leaks or holes or cuts. If you’ve got a small tear that you want to repair, you can add some lap sealant to the area – but use it sparingly. For a more permanent repair to flashing, buy some self-adhesive flashing that will mould into shape easily. Clean the area you want to repair, add EDPM primer, then stick the patch of flashing on from the centre outwards with a hard roller. You can add lap sealant around the edges if you want more protection from water.
The task of installing a tile roof can be quite a difficult one. Such a project takes a great deal of preparation, well before the actual tile installation is done. It does not matter if you are putting new ones or replacing your old tiles, understanding the proper technique and steps become crucial.
Remove old roofing (if applicable).
This is, on its own, a major job that can take days and require special tools. It takes some time, but be prepared to do it right.
Install battens (if applicable).
Battens may be needed to hold the tiles in place if the roof is having a steep slope. Usually made of metal or wood, battens are generally 1 inch thick and run horizontally along the roof.
You can find several varieties of tiles that has a hook or a lip allowing it to hang on the available battens. Apart from this, you can find several clips in the market which help to attach the tiles on to the batten.
Determining the spacing for battens can be done easily using two tiles. To prevent interlocking, a three inch overlap is required at the minimum, and a smaller amount of overhang should be left over the eaves. Keep this in mind when you determine the locations of the battens.
After you have determined the distance between the first two battens, measure the distance and set battens using that spacing up, making sure to double-check measurements as you go along.
• Install the tiles.
• You will need to begin with one side first, and then continue to move along the length of the roof.
• Cut tiles to fit tight spots.
• Tiles have to be cut precisely to overcome any obstacle like the chimney.
• Install the ridge tiles.
After completing the broad surfaces of the roof, special ridge tiles are required to cap the top.
Velux windows, or roof windows, are very easy to clean. Regular cleaning helps to keep them looking bright and shiny for years to come. So how should you clean Velux windows?
If you want to clean the air filter, you can remove it and wash it with your normal household cleaners. Velux windows have a cleaning position, so rotate and secure it into this position then remove the filter. You should be able to buy new filters from the manufacturer of your roof window.
To clean the outer pane, there’s no need to lean out of the window and risk falling out. Simply rotate the sash (the opening part) 180 degrees and secure it into position. Then you can clean the pane with a soft, lint-free cloth, sponge or squeegee and clean water. If you live in a hard water area, add some detergent to the water and wipe the window dry when you’re finished. You can also use normal non-abrasive household cleaners.
It’s recommended that you clean the flashing around your roof window at least once a year. You can use a brush to do this. This will allow rainwater to flow freely and stop any leaves from collecting.
If you’re in any doubt about using certain cleaners on your Velux windows, get in touch with the manufacturer who should be able to help. You can also do a patch test on an inconspicuous area if you’re unsure.
Replacement of roof tiles that have fractured, cracked or is missing is vital to avoid roof leaks and ceiling damage once rain and wind appear. Countering the problem swiftly by yourself is probable as long as it's only a few tiles. Charges for tile replacement can be expensive and fluctuate conditional on the company you hire.
The steps to replacing a tile are:
Ensure you have the right replacement tile as there are numerous different roof tiles on the market.
The most common types of roof tiles are concrete and terracotta. You must confirm that the tile is identical to your earlier tile or it may not work and can result in impairment even though you've tried to repair it. If you don't know what the tile is, ask the suggestion of a roofing supplier and they should be able to match it for you.
Get onto the roof.
It is only advisable to do this if the safety is guaranteed, using a steady ladder and maybe even using climbing ropes to protect you in case of a fall. If you don't possess a head for altitudes or you're sceptical about how safe it is for you to get on the roof, call in a professional.
Once you have securely gotten to the cracked tile, you'll want to somewhat lift the tiles that overlay the one to be detached. Do this by means of two pieces of timber to hold them up. Lift the broken tile over the baton with a brick trowel and gently slide it down.
Place your new tile on top of the brick trowel and inverse the steps to remove the tile.
Be certain to place the overlying tiles back into place.
Conduct a fast check across the roof to review any other possible damage. It is always advised to keep update on how the roof is holding out to keep an eye out for other tiles that might need replacing.
A roof serves as something which is so much more than just a top of a building. A roof delivers guard from the elements and precipitation, it also helps drain water from a structure, and helps to provide insulation to the structure allowing it to keep the interior of a building cool or warm, according to season.
There are several steps to building a roof
Mount the trusses.
This step requires the building’s wall frames to be completely level, square and plumb. If you are building the roof onto a building that is still a frame you must use ladders or scaffolding. Hoist the trusses onto the roof.
Install temporary braces.
You will need to install temporary braces that the trusses can rest on until the sheathing and permanent bracing are installed, this has to be done before you install the trusses. At the centre of the back wall, nail the bottom half of one two-by-six board that's 16 feet long to the top of the outside wall, making sure you fasten it to a stud.
Install the end trusses.
Install the two end trusses at the front and back of the building, making sure you affix them to the temporary bracing. The batten you take will have to be a bit longer than the distance will separate the trusses.
Install the standard trusses.
According to the instructions provided by the manufacturer, you will first need to install the first standard truss. You will also need to nail it to the batten from the first truss.
Sheath the roof.
Once your trusses permanently braced, you can begin with the sheathing of the roof. Starting from the bottom corner and moving across the bottom, the sheathing is installed lengthwise.
Install the roof cover.
Like the sheathing and underlayment procedures, the roof cover is installed lengthwise from the bottom up. The shingles should be staggered, and they should also overlap at the same time. You will need to work up to the ridge and use a ridge cap shingles to finish the ridge.
You should inspect your roof twice a year, ideally after rain or snow, to see if it’s draining properly. Also in the Spring to check for damage that may of been caused over the winter months that will need to be put right before the next winter. Have an inspection carried out if you are unsure.
Answer a few quick questions to help us match you with the right Roofer
Receive no-obligation quotes from 4 Roofers working in Otley.
Compare prices, customer reviews and services, and hire the right Roofer.
View our open Roofer jobs near you
Join today

