02 Nov
Tile or slate roofing
Cardiff - CF14
Enquiry from: Paula W
Start Date: Immediate
Tile or slate roofing enquiry



In Wales, a typical job costs about £7,000, with prices from around £3,750 for small jobs to £10,000 for bigger ones. Too few tradespeople covering Cilfynydd have set their prices yet, so these figures are for Wales.
| Avg. price low | Avg. price low |
|---|---|
| Avg. price | Avg. price |
| Avg. price high | Avg. price high |
£10500
£7875
£5250
£2625
£0
Searches that showed one of our pages for Cilfynydd, all services
Searches that showed our page for Pontypridd
Searches that showed our page for Pentre
Cilfynydd is a village within the county borough of Rhondda Cynon Taf, Wales a mile from the South Wales Valleys town of Pontypridd, and 13 miles north from the capital city Cardiff.

Cardiff - CF14
Enquiry from: Paula W
Start Date: Immediate
Tile or slate roofing enquiry
Maesteg - CF34
Enquiry from: Simon T
Start Date: Immediate
Tile or slate roofing enquiry
Newport - NP20
Enquiry from: Donna E
Start Date: Immediate
Tile or slate roofing enquiry
Pontypool - NP4
Enquiry from: Goronwy H
Start Date: Immediate
Roof will need replacement in around 5 years time
Cardiff - CF14
Enquiry from: Jon C
Start Date: Immediate
It a 7degree pitched roof with 3 velux windows. I want them removed, i has slates on there at the moment from the previous owner.... so im open to suggestions what should be done with a free quote !!!
Bridgend - CF31
Enquiry from: Neil T
Start Date: Immediate
Small Pre fab garage roof replacement required
Cardiff - CF5
Enquiry from: Chris K
Start Date: Immediate
I am buying a property where the current roof is nearing the end of its life requiring replacement. I need a quote for a full felt and tile replacement if possible
Bridgend - CF31
Enquiry from: Roger H
Start Date: Immediate
Tile or slate roofing enquiry
Ebbw Vale - NP23
Enquiry from: Joseph S
Start Date: Immediate
Tile or slate roofing enquiry
Cardiff - CF3
Enquiry from: David E
Start Date: Immediate
Tile or slate roofing enquiry
Treharris - CF46
Enquiry from: Lauren N
Start Date: 1 to 3 months
Miss lives in the treharris area and would like a call to discuss options
Roof: pitched · Property: semi detached · Built: 1930-1970 · Height: 2nd floor
Cardiff - CF24
Enquiry from: Maybur R
Start Date: Immediate
Tile or slate roofing enquiry
Caerphilly - CF83
Enquiry from: Chris M
Start Date: Immediate
Property: semi detached
Aberdare - CF44
Enquiry from: Lisa C
Start Date: Immediate
Material: slates · Height: 1st floor
Maesteg - CF34
Enquiry from: Justin J
Start Date: Immediate
New roof and dormers re-cladded
Pontypridd - CF37
Enquiry from: Jayne D
Start Date: Immediate
Tile or slate roofing enquiry
Pontypridd - CF37
Enquiry from: Josh E
Start Date: Immediate
Slate roof strip off, felt re batton and tiled
Material: slates · Property: terrace · Height: 2nd floor · Bedrooms: 3-4 rooms
Answer a few quick questions, so we can match you with local roofers who can help.
Get free, no-obligation local tile or slate roofing quotes from 4 verified roofers working in Cilfynydd.
Compare customer reviews, services and prices, and choose the right tradesperson for you.


A good straight company. A good straight company. Used them twice now and both times the price has been good and the work has been carried out on time, to a high standard and no mess left behind. Any ...
Easy to use Easy to use, got us a great roofer that we needed urgently.
Very good Very good, as previously stated I received next day responces
The task of installing a tile roof can be quite a difficult one. Such a project takes a great deal of preparation, well before the actual tile installation is done. It does not matter if you are putting new ones or replacing your old tiles, understanding the proper technique and steps become crucial.
Remove old roofing (if applicable).
This is, on its own, a major job that can take days and require special tools. It takes some time, but be prepared to do it right.
Install battens (if applicable).
Battens may be needed to hold the tiles in place if the roof is having a steep slope. Usually made of metal or wood, battens are generally 1 inch thick and run horizontally along the roof.
You can find several varieties of tiles that has a hook or a lip allowing it to hang on the available battens. Apart from this, you can find several clips in the market which help to attach the tiles on to the batten.
Determining the spacing for battens can be done easily using two tiles. To prevent interlocking, a three inch overlap is required at the minimum, and a smaller amount of overhang should be left over the eaves. Keep this in mind when you determine the locations of the battens.
After you have determined the distance between the first two battens, measure the distance and set battens using that spacing up, making sure to double-check measurements as you go along.
• Install the tiles.
• You will need to begin with one side first, and then continue to move along the length of the roof.
• Cut tiles to fit tight spots.
• Tiles have to be cut precisely to overcome any obstacle like the chimney.
• Install the ridge tiles.
After completing the broad surfaces of the roof, special ridge tiles are required to cap the top.
One of the most popular choices for roofing materials are roof slates. There is a number of advantages that a roof slate has, hey can be aesthetically pleasing, they can also increase the potential selling value of the house and many more. Slate is a sturdy and resilient material that delivers waterproofing physical characteristics to a pitched roof. Unlike other roof materials which absorb water slates do not. Therefore, slate is the most resistant towards freezing and water damage.
Find out the pitch of your roof
Before beginning with the fitting procedure, you need to figure out the pitch of your roof. The roof pitch commands how much overlap is essential with each slate. This has been made a lot easier than the early days with the advancement of technology.
Find out the required overlap
Once you’ve found out the exact pitch of your roof accurately, take a look at the slate producer’s description. Each manufacturer will propose the obligatory overlap in order to form a firm and safe slate roof.
Roll out the roof membrane
Firstly, guarantee your joists or trusses are clean of any sheards or old nails that could harm the membrane. You will now have to roll the chosen roofing membrane along the roof trusses. It is always wise to start from one of the bottom corners and keep rolling it along to the other corner.
Secure the roof membrane
Once the membrane has been moved out, use thump nails to protect one edge. You will now have to pull the membrane taut and carefully fix it into position. Do this before adding any nails across the membrane at points of intersection with the trusses for extra stability.
Batten placement
This is done to find the proper assignment of the battens. For this, you will need two full-sized slates along with an under eaves slate. Carefully position the battens on the top of the roof on the top of the overlay. Make sure not to fix them down since it will be easier to move them around and make any adjustments.
A roof serves as something which is so much more than just a top of a building. A roof delivers guard from the elements and precipitation, it also helps drain water from a structure, and helps to provide insulation to the structure allowing it to keep the interior of a building cool or warm, according to season.
There are several steps to building a roof
Mount the trusses.
This step requires the building’s wall frames to be completely level, square and plumb. If you are building the roof onto a building that is still a frame you must use ladders or scaffolding. Hoist the trusses onto the roof.
Install temporary braces.
You will need to install temporary braces that the trusses can rest on until the sheathing and permanent bracing are installed, this has to be done before you install the trusses. At the centre of the back wall, nail the bottom half of one two-by-six board that's 16 feet long to the top of the outside wall, making sure you fasten it to a stud.
Install the end trusses.
Install the two end trusses at the front and back of the building, making sure you affix them to the temporary bracing. The batten you take will have to be a bit longer than the distance will separate the trusses.
Install the standard trusses.
According to the instructions provided by the manufacturer, you will first need to install the first standard truss. You will also need to nail it to the batten from the first truss.
Sheath the roof.
Once your trusses permanently braced, you can begin with the sheathing of the roof. Starting from the bottom corner and moving across the bottom, the sheathing is installed lengthwise.
Install the roof cover.
Like the sheathing and underlayment procedures, the roof cover is installed lengthwise from the bottom up. The shingles should be staggered, and they should also overlap at the same time. You will need to work up to the ridge and use a ridge cap shingles to finish the ridge.
A pitched roof is a type of roof that is defined to have a sloping surface that has an angle that is greater than 20 degrees. Pitched roofs offer a more classical appearance. They remain the most communal and effective answer in wet and cold weathers to guarantee all-out protection.
Eaves
In the roof, the lower part of the inclined roof which is prominent outside the external face of the wall. The chief purpose of eaves is to pour the rainwater from the roof straight on the exterior wall. It also provides protection from sunlight. Eaves are sometimes decorated to an architectural beauty.
Gable
The Three-sided higher part of the wall at the end of a ridge roof.
Flashing
A band of impermeable material, typically metal, used to eliminate water from the intersection between a roof covering and another part of the structure. Flashings are provided to stop moisture from inflowing the wall and roof through joints in copings, parapet wall, and other infiltrations through the roof plane.
Hip
The Hip is defined as the exterior angle, which is generally greater than 180 degrees, which is formed at the inclined ridge of the roof slopes.
Ridge
The ridge is defined as the horizontal intersection made by the rising roof surfaces that are inclined in opposite directions.
Purlins
Purlins are the horizontal members which are laid on the principal rafters which help to support the common rafter of a roof. This is usually done when the span is large. Purlins are made from wood or steel. The top surfaces of the purlins intend to be unvarying and plane.
Fascia
This is the wooden board that is fixed to the feet of the common rafter at eaves. The Fascia helps the lowest ends of the roof covering material to rest on it.
Rafter
One of the major structural components of a pitched roof is a rafter. The rafter generally begins for the support of the roof to the ridge or hip. The purlin is supported by equally spaced rafters used side by side.
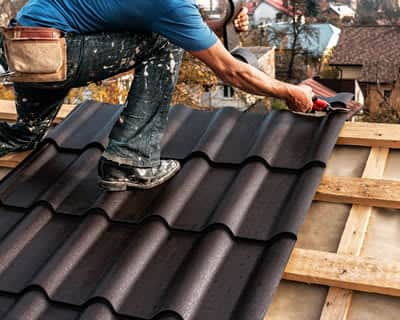
We can help you get more tile or slate roofing work with our qualified job leads and boost your business.
Join today